Tutorial 2017
This
tutorial is written by
Denise D. on 5th June 2017
from
my own ideas.
Any
resemblance to other tutorials is
co-incidental and unintentional.
You
may share my tutorials with other
groups.
All I ask is that you advise me
and
credit for the tutorial is given to me and linked to
http://escapingtopsp2.altervista.org/Home/homeb.html
Please
do not upload any of my completed Tutorial images onto sites
such as Fotki, Pinterest, Photobucket or similar
TOYS
AND THINGS
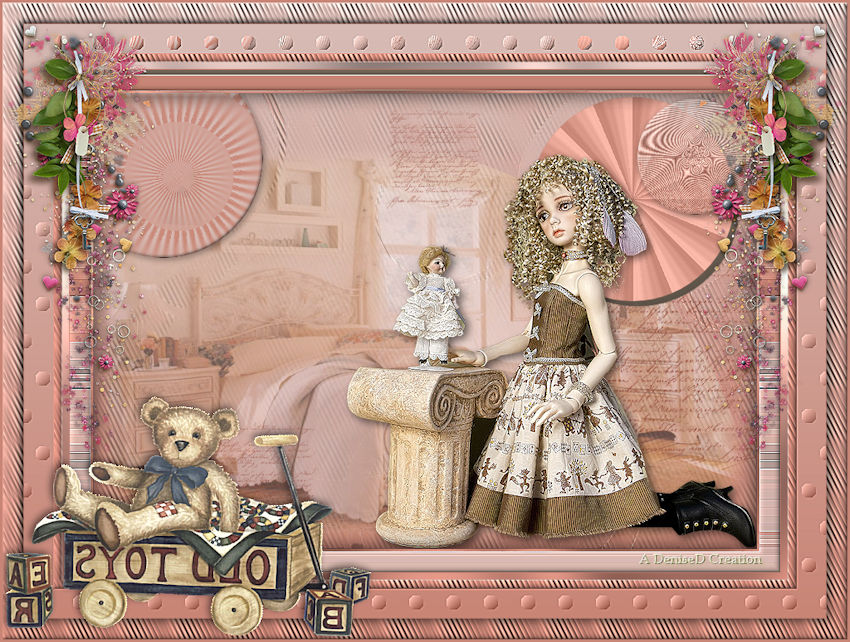
http://escapingtopsp2.altervista.org/ToysAndThings/ToysAndThings.html

Thank you Inge-Lore for
this German Translation

Click on the Box to download Supplies
To print click on Printer

Supplies
Images:
interieur_maison3_franiemargot.psp
You can join this Group at:
http://franiemargot.com/index.htm
Mina@.bambola3-16.4.15.pspimage
You can join this Group at:
http://laminagraficatubes.blogspot.com.au/search/label/tubes
old toys.png
kristen_otf_borders2_border07.pspimage
Denise D Signature.png
This image was obtained from the Internet
If you are the owner of this
image, please contact me
so that credit can be given to
you
Textures:
winni.texture.011
Brush:
Text letters.pspbrush
Copy of Brush image (if you are unable to Export Brush, please
copy/paste this image onto layer)
Alpha Channel
Mask:
Narah_mask_0850.pspimage
You can join this Group at:
https://ar.groups.yahoo.com/neo/groups/TUBESpack/info
Presets:
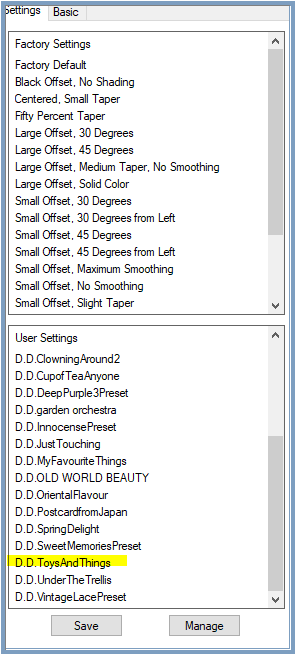
D.D.ToysAndThings
Double Click on the  icon in the Supplies File to install
this Preset in your Plugin. icon in the Supplies File to install
this Preset in your Plugin.
If for some reason this doesn’t work,
I have provided the settings in the Tutorial.
Plugins:
Eye Candy 3 OR Eye Candy 4000
Filter Factory Gallery E
Filter Factory Gallery D
&<Sandflower Specials"v">
(Import into Filters Unlimited 2.0)
Alien Skin Eye Candy 5
VM Natural
Found here:
http://www.saturnelladesign.fr/pages/filtres.htm
http://janaly.com/Filtres/Filtre.html
http://www.maidiregrafica.eu/paginafiltri/filtri.html
Notes:
This Tutorial was created in PSP
X9.... other
versions may need adjustment
Some of the graphics may be from Free
to Use sites or Share
Groups.
If you are the creator of one of these
please let me know
so that appropriate credit can be given.
No infringement of
copyright is intended or intentional.
Some
helpful information:
You can change the blend mode, opacity and drop shadow, as
well as colourise
the materials,
according to the tubes/colours you are using.
When applying the Resize with the All Layers option checked, this will
be
informed in the tutorial,
otherwise, apply the resize with this option unchecked.
Remember always to save your work.
Whenever you reduce an image, apply Adjust/Sharpness/Sharpen, to
maintain the
sharpness of the image.
Some tools or features have other names in earlier versions of the PSP.

Before opening PSP, download plugins
and install
Place Mask in PSP Mask Folder
Place Texture in PSP Texture Folder
File/Export/Custom Brush
Install Preset
Open graphics in PSP, duplicate (Shift
D) and close the original.
Please
Note: Offset
settings provided in this tutorial may vary according to size of your
image.
Please
adjust to suit.
The
settings remain the same throughout this Tutorial unless otherwise
stated.
Set your Foreground colour to #d7bbb5
Set your Background colour to #c98675
Step One:
Open Alpha Channel
Duplicate
and close Original
Change Foreground Colour to
Foreground/Background/Linear Gradient as follows:
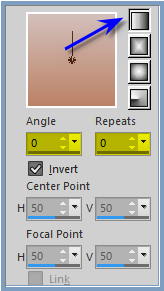
Flood Fill with Gradient
Step Two:
Layers/New Raster Layer
Flood Fill with Background Colour
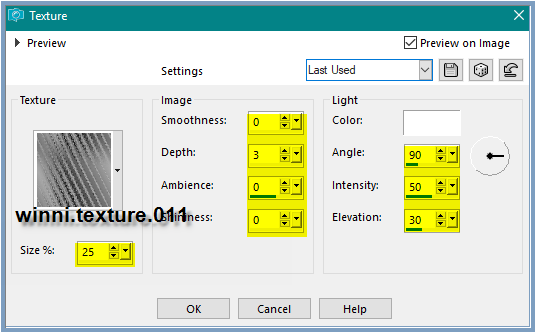
Effects/Texture
Effects/Texture/winni.texture.011 as follows:
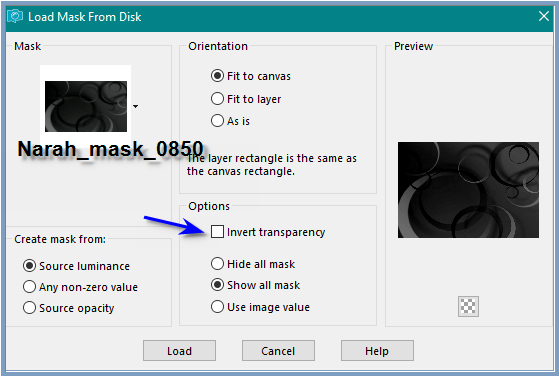
Layers/Load/Save Mask from Disk/Load Mask
Narah_mask_0850 as follows:
Effects/Edge Effects/Enhance More
Layers/Merge/Merge Group
Adjust/Sharpness/Sharpen More
Step Three:
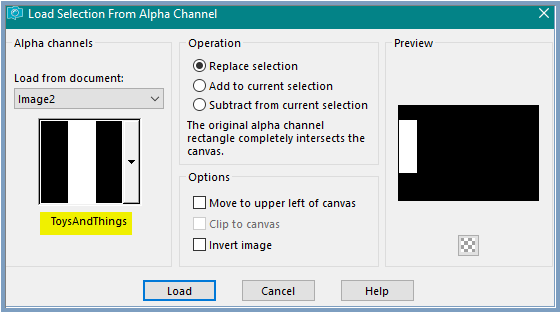
Selections/Load/Save Selection/Load Selection/ToysAndThings from Alpha
Channel as follows:
Layers/New Raster Layer
Maximise interieur_maison3_franiemargot.psp
Edit/Copy
Edit/Paste into Selection
Selections/Select None
Change Opacity to 55%
Selections/Load/Save
Selection/Load Selection/ToysAndThings2 from Alpha Channel
Layers/New Raster Layer
Flood Fill with Background Colour
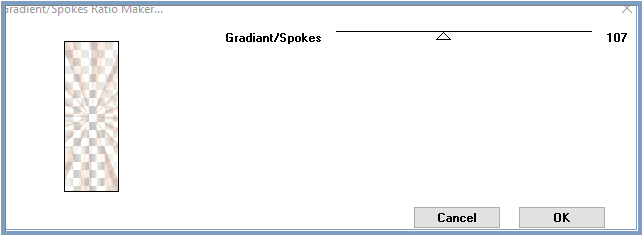
Effects/Plugins/Filter Factory Gallery E/Gradient/Spokes Ratio
Maker as follows:
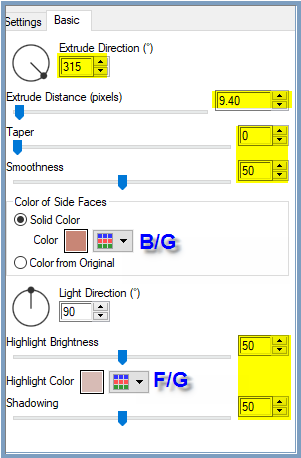
Effects/Plugins/Alien
Skin Eye Candy 5/Impact/Extrude/D.D.ToysAndThings as follows:
Selections/Select None
Step Four:
Selections/Load/Save
Selection/Load Selection ToysAndThings3 from Alpha Channel
Layers/New Raster Layer
Flood Fill with Gradient
Effects/Plugins/Filter
Factory Gallery D/Moving Screen as follows:
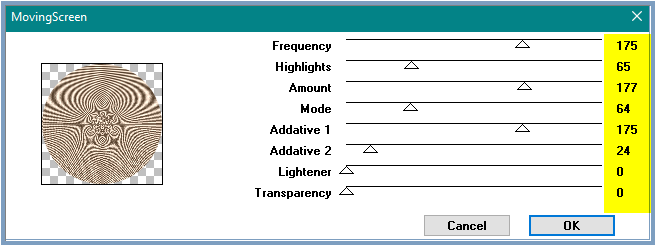
Change Opacity to 65%
Effects/3D Effects/Inner Bevel as follows:
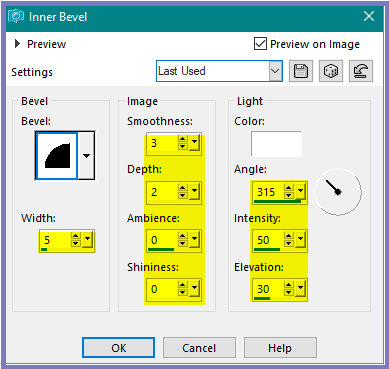
Effects/Plugins/Eye
Candy 3.0/Drop Shadow as follows:
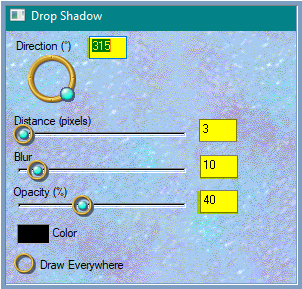
OR
Effects/Plugins/Eye Candy 4000/Shadowlab as follows:
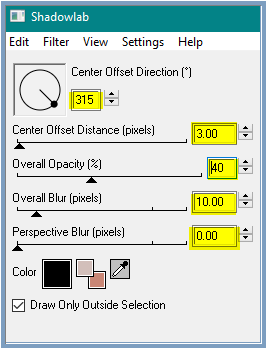
Selections/Select None
Step Five:
Selections/Load/Save
Selection/Load Selection ToysAndThings4 from Alpha Channel
Layers/New Raster Layer
Flood Fill with Gradient
Effects/Plugins/Filter
Factory Gallery D/Ring Tile as follows:
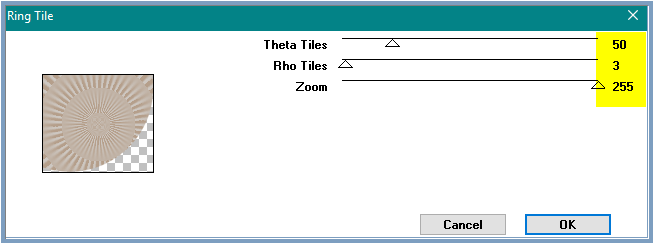
Change Opacity to 90%
Effects/3D Effects/Inner Bevel
Effects/Plugins/Eye Candy 3.0/Drop Shadow
OR
Effects/Plugins/Eye Candy 4000/Shadowlab
Selections/Select None
Step Six:
Layers/New Raster Layer
Maximise Mina@.bambola3-16.4.15.pspimage
Edit/Copy
Edit/Paste as New Layer
Image/Resize/65% as follows:
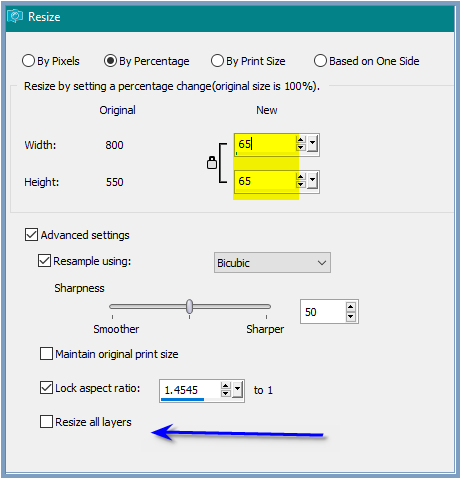
Adjust/Sharpness/Sharpen
Effects/Image Effects/Offset as follows:
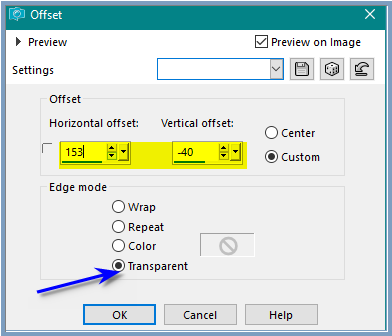
Effects/Plugins/Eye Candy 3.0/Drop Shadow
BUT change settings to Distance 5/Blur 12/Opacity 55
OR
Effects/Plugins/Eye Candy 4000/Shadowlab/Distance 5/Blur 12/Opacity 55
Step Seven:
Select Raster 1
Layers/New Raster Layer
Change Background Colour to #984f3e (or colour of your choice)
Brush Tool with the following settings:

On the right hand side (see my image for placement) use the Brush Tool
once
On the left hand side (see my image for placement) use the Brush Tool
once BUT change the size to 150
On the top use the Brush Tool once BUT change size to 125
Deselect the Brush Tool
Change Background back to Background Colour
Step Eight:
Image/Add Borders/3 pixels/Background Colour #c98675
Magic Wand with the following settings:

Effects/Plugins/Filters
Unlimited 2.0/&<Sandflower
Specials"v">/Poolshadow as follows:
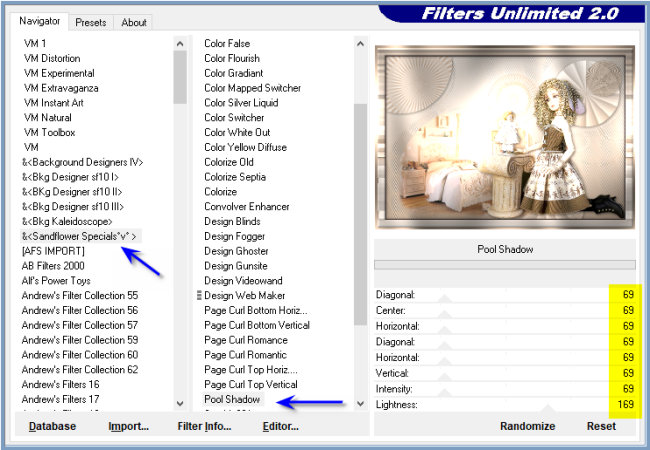
Selections/Select None
Image/Add Borders/25/White
Select Border with Magic Wand
Flood Fill with Gradient
Effects/Plugins/Filter
Factory Gallery D/Inspirator as follows:
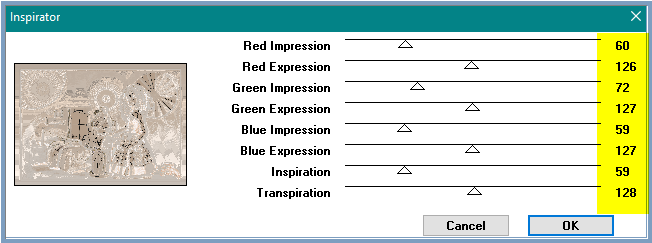
Effects/Edge
Effects/Enhance More
Effect/3D Effects/Inner Bevel as follows:
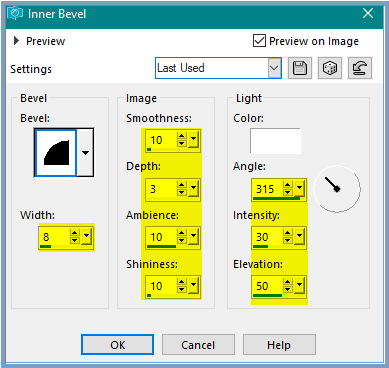
Selection/Select All
Selections/Modify/Contract 28 pixels
Effects/3D Effects/Cut Out as follows:
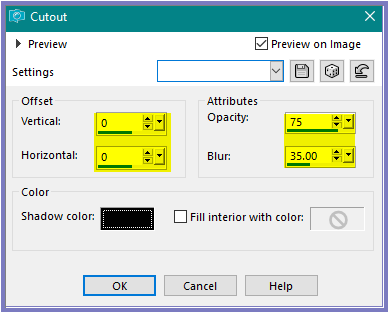
Selections/Select None
Step Nine:
Image/Add Borders/1 pixels/Background Colour
Image/Add Borders/8 pixels/White
Select with Magic Wand
Flood Fill with
Gradient
Effects/Plugins/Filters Unlimited
2.0/&<Sandflower Specials"v">/Poolshadow
Selections/Select None
Image/Add Borders/1 pixels Foreground Colour
Image/Add Borders/10 pixels/Background Colour
Select with Magic Wand
Effects/Texture Effects/Texture/winni.texture.011
Effects/3D Effects/Inner Bevel
Selections/Select None
Image/Add Borders/35
pixels/White
Select with Magic Wand
Flood Fill with Gradient
Effects/Plugins/VM
Natural/Legoland as follows:
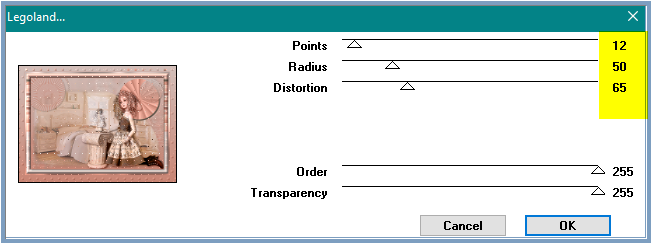
Adjust/Sharpness/Sharpen More
Selections/Select None
Image/Add Borders/1 pixels/Background Colour
StepTen:
Image/Add Borders/25 pixels/White
Select with Magic Wand
Flood Fill with Gradient
Effects/Texture Effects/Texture
Effects/3D Effects/Inner Bevel
Selections/Invert
Effects/Plugins/Eye Candy 3.0/Drop Shadow
OR
Effects/Plugins/Eye Candy 4000/Shadowlab
Repeat Drop Shadow/Shadowlab/Direction 135
Selections/Select None
Maximise old toys.png
Edit/Copy
Edit/Paste as New Layer
Adjust/Sharpness/Sharpen
Effects/Image Effects/Offset as follows:

Effects/Plugins/Eye
Candy 3.0/Drop Shadow
OR
Effects/Plugins/Eye Candy 4000/Shadowlab
Step Eleven:
Maximise kristen_otf_borders2_border07.pspimage
Edit/Copy
Edit/Paste as New Layer
Image/Resize 75%
Adjust/Sharpness/Sharpen
Effects/Image Effects/Offset as follows:
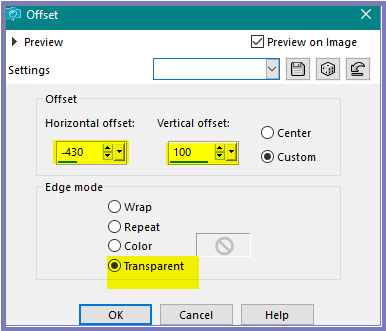
Effects/Plugins/Eye Candy 3.0/Drop Shadow as follows:

OR
Effects/Plugins/Eye Candy 4000/Shadowlab as follows:

Layers/Duplicate
Image/Mirror/Horizontal OR Image/Mirror
Step Twelve:
Image/Add Borders/2 pixels/Background Colour
Maximise Denise D Signature.png
Edit/copy Edit/Paste as New Layer
Place at bottom of Layer
Layers/New
Raster Layer
Add
your Watermark
Layers/Merge
All Flatten
Image/Resize/850
pixels wide - height will adjust itself
File/Export/JPEG
Optimiser/Compression Value 20
I hope you have
enjoyed
this tutorial
A
big thank you to the ladies who test my Tutorials
TESTERS'
RESULTS
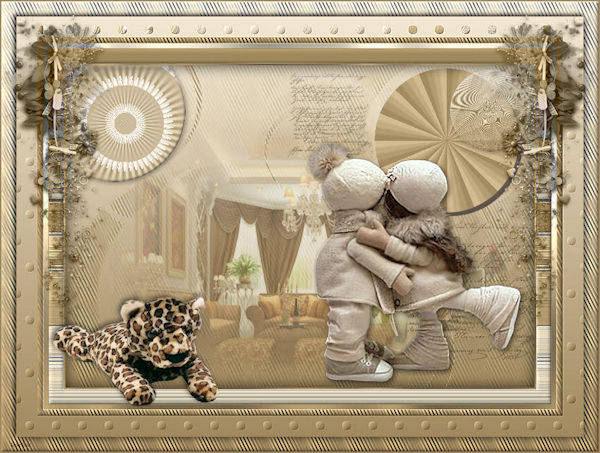
SHIRLEY NZ
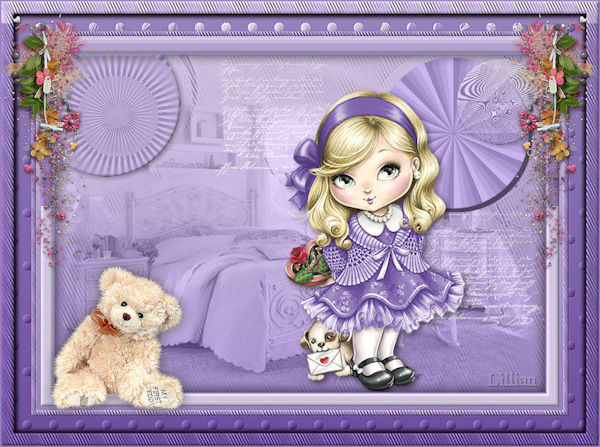
TOYS AND THINGS
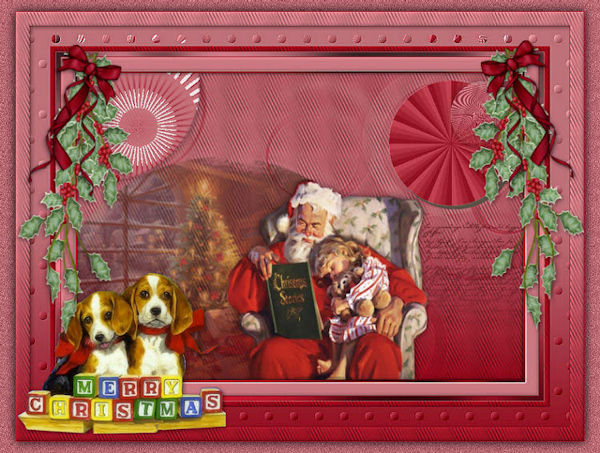
BETTY
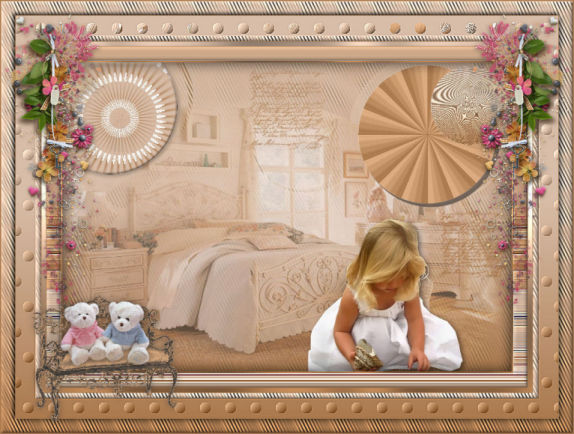
ELIZABETH
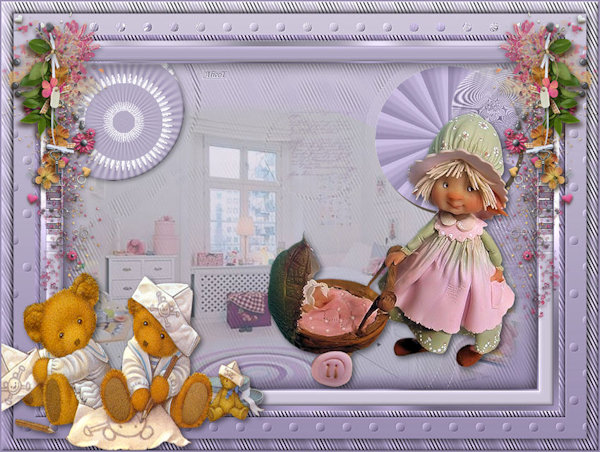
ALICE T.
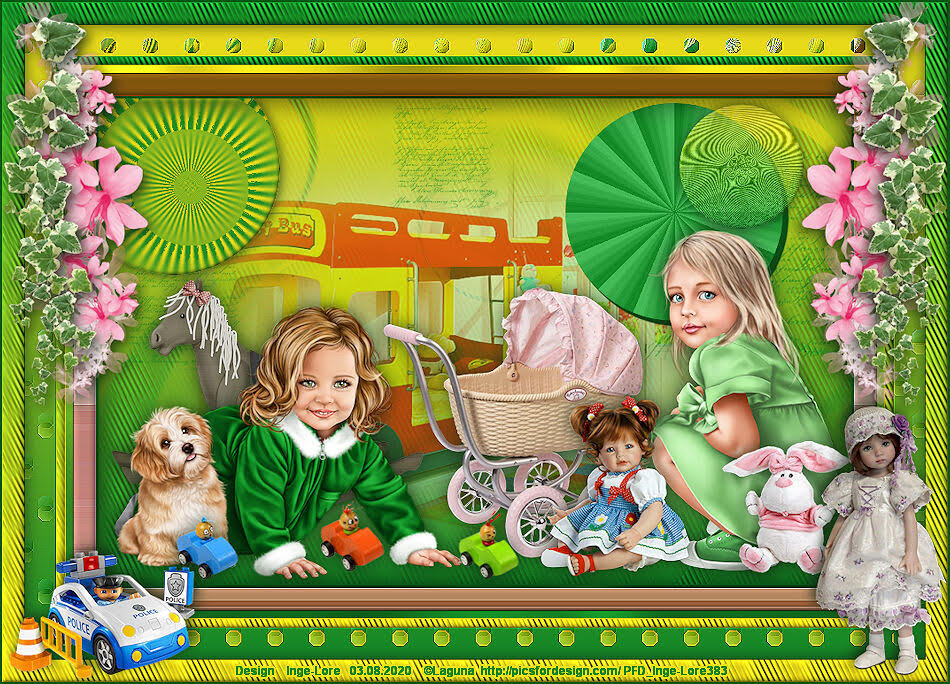
INGE-LORE
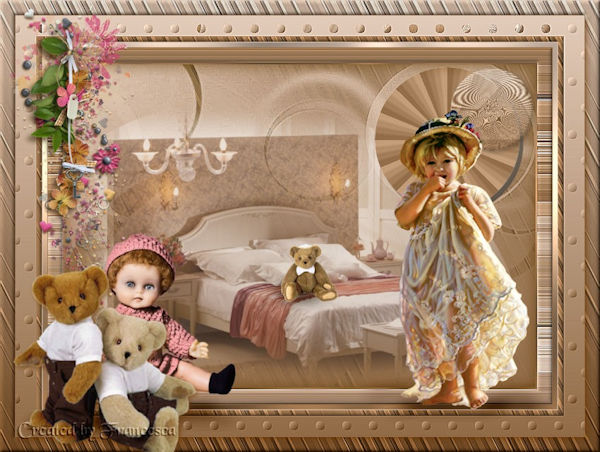
FRAN

| | | |