Tutorial 2017
This
tutorial is written by
Denise D. on 18th January, 2019
from
my own ideas.
Any
resemblance to other tutorials is
co-incidental and unintentional.
You
may share my tutorials with other
groups.
All I ask is that you advise me
and
credit for the tutorial is given to me and linked to
http://escapingtopsp2.altervista.org/Home/homeb.html
Please
do not upload any of my completed Tutorial images onto sites
such as Fotki, Pinterest, Photobucket or similar
STRAWBERRIES
AND CREAM
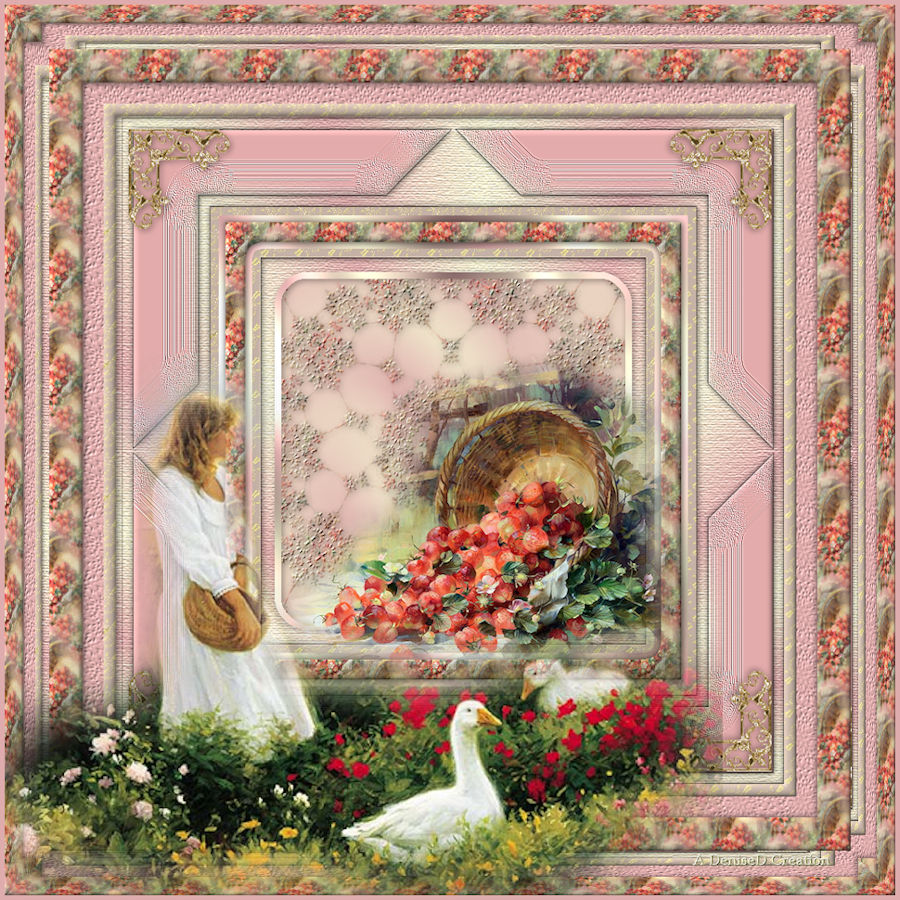
http://escapingtopsp2.altervista.org/StrawberriesAndCream/StrawberriesAndCream.html

Click on the Box to download Supplies
For French Translation by Franie
Margot click here:

Thank you Inge-Lore for this German Translation

Supplies
Images:
lizztish_some-strawberries-in-a-basket.pspimage
with-some-geese1_lizztish.pspimage
You can join this Group at:
https://groups.google.com/forum/?fromgroups#!forum/emotivemists
corner_gold13
Signature.png
This image was obtained from the Internet
If you are the owner of this
image, please contact me
so that credit can be given to
you
Texture:
JC_022
Preset Shapes
Preset Shapes (144).jsl
Patterns:
ABgold5
Strawberries&CreamPattern.jpg
Mask:
1250181204_masques4
Plugins:
Alien Skin Eye Candy 3.0
OR
Alien Skin Eye Candy 4000
&<Sandflower
Specials"v"> (Import into
Filters Unlimited 2.0)
Texture
Alf's Border FX
Simple
MuRa's Seamless
Found here:
 AND AND 
Notes:
This Tutorial was created in PSP
X9.... other
versions may need adjustment
Some of the graphics may be from Free
to Use sites or Share
Groups.
If you are the creator of one of these
please let me know
so that appropriate credit can be given.
No infringement of
copyright is intended or intentional.
Before opening PSP, download plugins
and install
Some
helpful information:
You can change the blend mode, opacity and drop shadow, as
well as colourise
the materials,
according to the tubes/colours you are using.
When applying the Resize with the All Layers option checked, this will
be
informed in the tutorial,
otherwise, apply the resize with this option unchecked.
Remember always to save your work.
Whenever you reduce an image, apply Adjust/Sharpness/Sharpen, to
maintain the
sharpness of the image.
Some tools or features have other names in earlier versions of the PSP.

Please
Note: Offset
settings provided in this tutorial may vary according to size of your
image.
Please
adjust to suit.
The
settings remain the same throughout this Tutorial unless otherwise
stated.
Set your Foreground colour to #f4f0d0
Set your Background colour to #deacac
Step One:
Place Preset Shape in
PSP Preset Shapes Folder
Place Pattern in PSP Pattern Folder
Place Texture in PSP Texture Folder
Place Mask in PSP Mask Folder
Open graphics in PSP, duplicate (Shift
D) and close the original.
File/New/New Image 800 pixels x 800
pixels as follows:
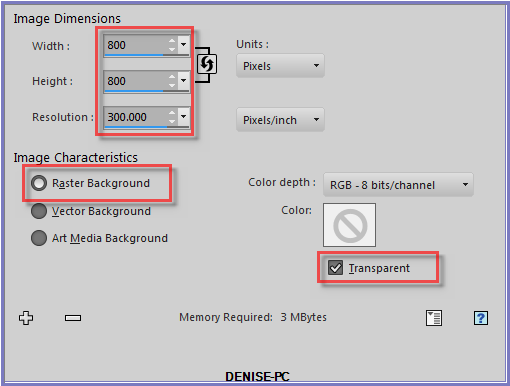
Change
Foreground Colour to
Foreground/Background/Sunburst Gradient as follows:
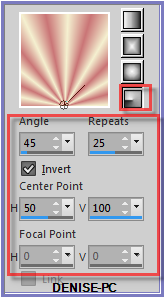
Flood Fill with Gradient
Effects/Plugins/Texture/Texturizer/Canvas as follows:
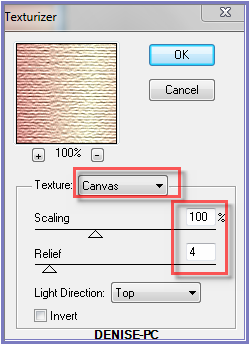
Step Two:
Preset Shape Tool/Preset Shapes (144).jsl/ (shows up as M in my drop
down menu) with the following settings:

Starting in the top left hand corner, draw out the shape to cover the
whole Layer
Result:
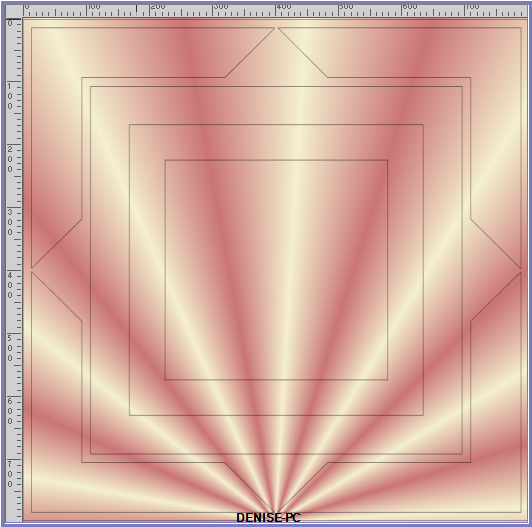
Convert to Raster Layer
Step Three:
Magic Wand with the following settings:

Select the following areas:
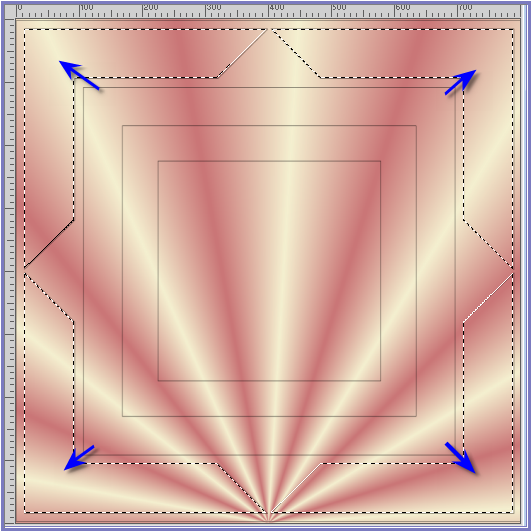
Layers/New Raster Layer
Flood Fill with Background Colour
Effects/Texture Effects/Soft Plastic as follows:
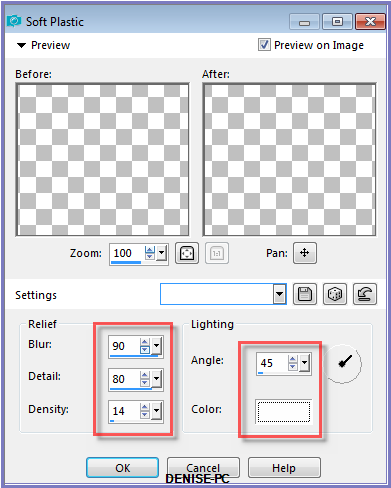
Effects/Edge Effects/Enhance More
Effects/3D Effects/Inner Bevel as follows:
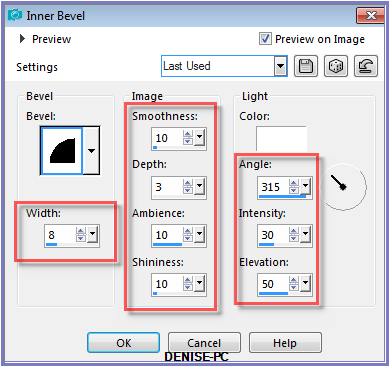
Effects/Plugins/Eye Candy 3.0/Drop Shadow as follows:
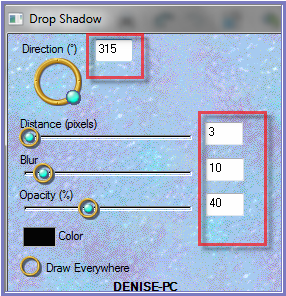
OR
Effects/Plugins/Eye Candy 4000/Shadowlab as follows:
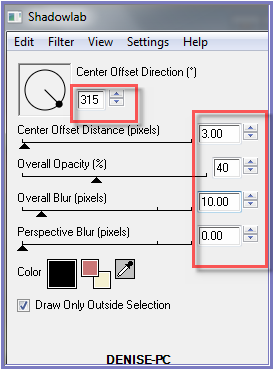
Repeat Drop Shadow/Shadowlab/Direction 135
Selections/Select None
Step Four:
Select Raster2
Select the following area with the Magic Wand:
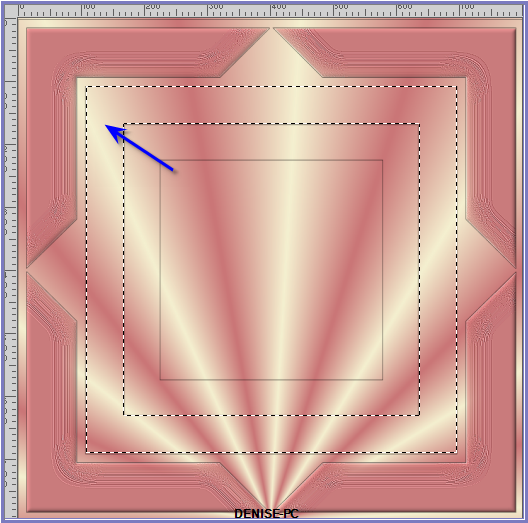
Layers/New Raster Layer
Change Background Colour to Pattern ABgold5 as follows:
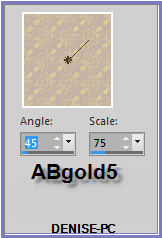
Flood Fill with Background Pattern
Adjust/Sharpness/Sharpen More
Selections/Modify/Contract 10 pixels
Step Five:
Change Foreground Colour to Foreground/Background/Linear Gradient as
follows:
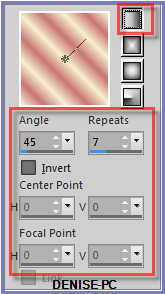
Layers/New Raster Layer
Flood Fill with Gradient
Effects/Plugins/Filters Unlimited 2.0/&<Sandflower
Specials"v">/Poolshadow as follows:
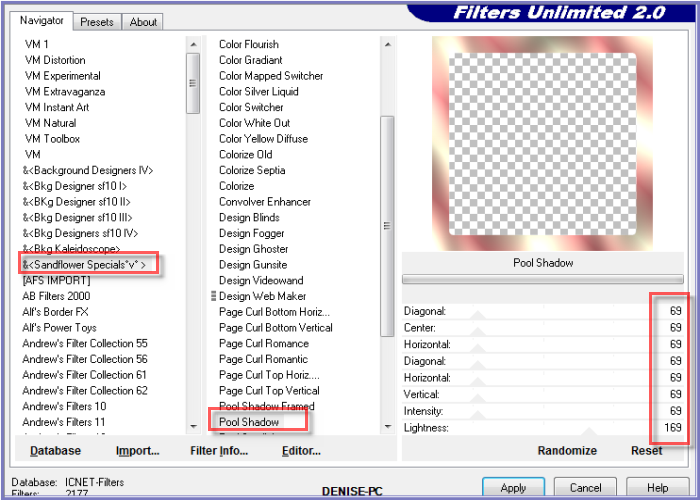 Step Six:
Selections/Modify/Contract 8 pixels
Layers/New Raster Layer
Change Background Colour to Pattern
Strawberries&CreamPattern.jpg as follows:
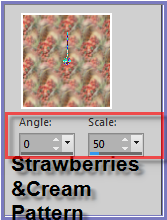
Flood fill with Pattern
Adjust/Sharpness/Sharpen
Effects/3D Effects/Inner Bevel
Effects/Plugins/Eye Candy 3.0/Drop Shadow
OR
Effects/Plugins/Eye Candy 4000/Shadowlab
Repeat Drop Shadow/Shadowlab/Direction 315
Selections/Select None
Step Seven:
Select Raster 2
Select centre of Image with Magic Wand
Selections/Modify/Expand 40 pixels
Layers/New Raster Layer
Flood Fill with Foreground Gradient
Adjust/Blur/Radial Blur as follows:
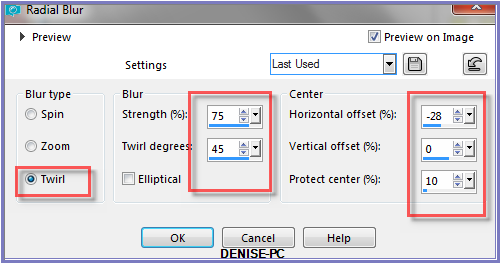
Layers/New Raster Layer
Flood Fill with
Background Pattern
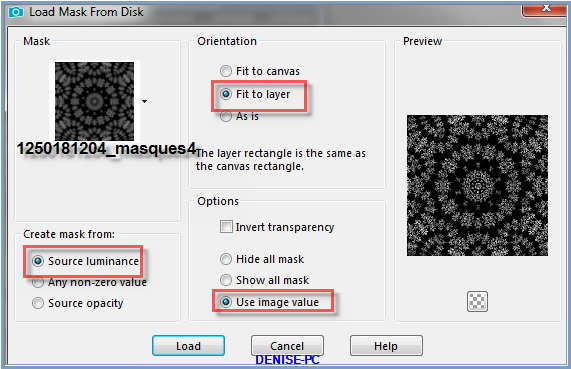
Layers/Load/Save Mask/Load Mask 1250181204_masques4 from Disk as
follows:
Effects/Edge Effects/Enhance
Layers/Merge/Merge Group
Effects/Plugins/MuRa's Seamless/Emboss at Alpha/Default Settings
Keep Selected
Step Eight:
Layers/New Raster Layer
Flood Fill with Gradient
Effects/Plugins/Filters Unlimited
2.0/&<Sandflower Specials"v">/Poolshadow
Selections/Modify/Contract 8 pixels
Edit/Clear
Selections/Select None
Layers/Merge/Merge Down
Effects/Plugins/Eye Candy 3.0/Drop Shadow
OR
Effects/Plugins/Eye Candy 4000/Shadowlab
Maximise corner_gold13.pspimage
Edit/Copy Edit/Paste as New Layer
Layers/Arrange/Bring to Top
Image/Resize/90% as follows:
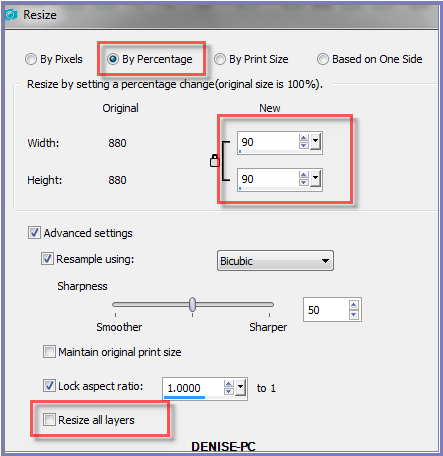
Adjust/Sharpness/Sharpen
Effects/Image Effects/Offset as follows:
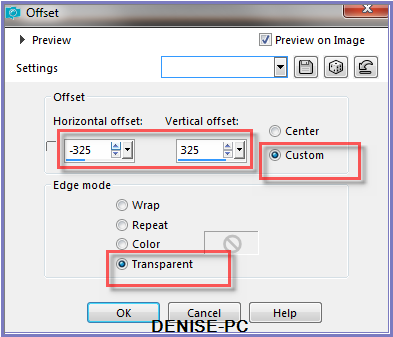
Effects/Plugins/Eye Candy 3.0/Drop Shadow
Or
Effects/Plugins/Eye Candy 4000/Shadowlab
Effects/Plugins/Simple/Top Left Mirror
Step Nine:
Maximise lizztish_some-strawberries-in-a-basket.pspimage
Edit/Copy Edit/Paste as New Layer
Adjust/Sharpness/Sharpen
Effects/Image Effects/Offset as follows:
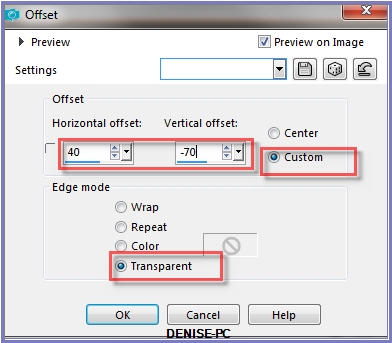
Select Raster 4 Layer
Effects/Plugins/Eye Candy 3.0/Drop Shadow
OR
Effects/Plugins/Eye Candy 4000/Shadowlab
Repeat Drop Shadow/Shadowlab/Direction 135
Step Ten:
Image/Add Borders/15 pixels/White
Select with Magic Wand
Change Background Pattern back to ABgold5
Flood Fill with Background Pattern
Effects/3D Effects/Inner Bevel
Effects/Plugins/Eye Candy 3.0/Drop Shadow
OR
Effects/Plugins/Eye Candy 4000/Shadowlab
Repeat Drop Shadow/Shadowlab/Direction 315
Selections/Select None
Image/Add
Borders/25 pixels/Background Colour
Select with Magic Wand
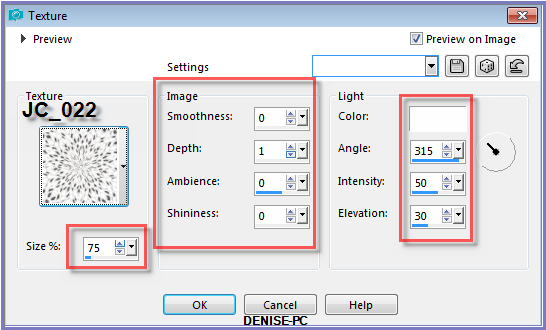
Effects/Texture Effects/Texture as follows:
Selections/Select None
Step Eleven:
Image/Add Borders/40 pixels/White
Select with Magic Wand
Change Background Colour back to Pattern StrawberriesAndCreamPattern
Flood Fill with Pattern
Effects/3D Effects/Inner Bevel
Effects/Plugins/Eye Candy 3.0/Drop Shadow
OR
Effects/Plugins/Eye Candy 4000/Shadowlab
Repeat Drop Shadow/Shadowlab/Direction 135
Selections/Select None
Layers/Duplicate
Image/Resize/90%
Select Background Layer
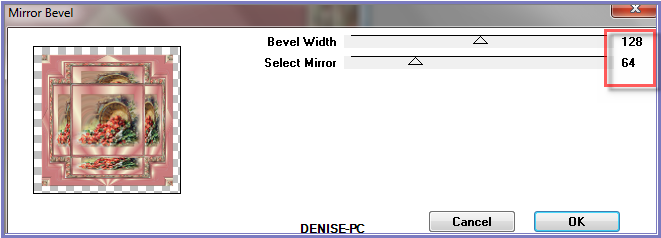
Effects/Plugins/Alf's Border FX/Mirror Bevel as follows:
Step Twelve:
Maximise with-some-geese1_lizztish.pspimage
Edit/Copy Edit/Paste as New Layer
Layers/Arrange/Bring to Top
Image/Resize/150%
Adjust/Sharpness/Sharpen
Layers/Duplicate
Repeat Duplicate once
Layers/Merge/Merge Down
Repeat Merge Down once
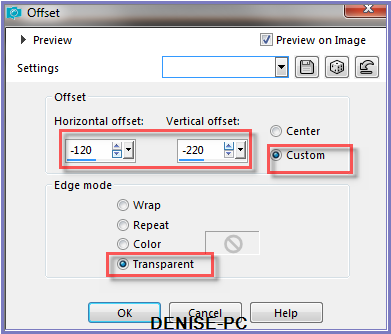
Effects/Image Effects/Offset as follows:
Image/Add Borders/5 pixels/Background Colour
Layers/New Raster Layer
Add
your Watermark
Layers/Merge
All Flatten
Image/Resize/900
pixels wide - height will adjust itself
File/Export/JPEG
Optimiser/Compression Value 20
I
hope you have enjoyed
this tutorial
A
big thank you to the ladies who test my Tutorials
TESTERS'
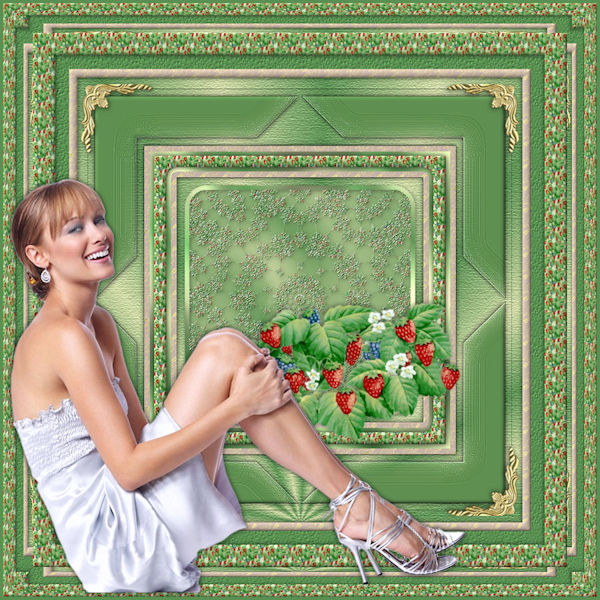
RESULTS
SHIRLEY NZ
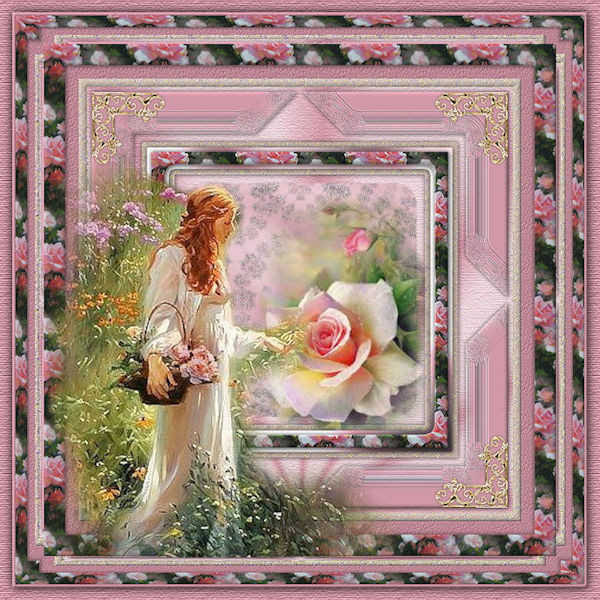
BETTY
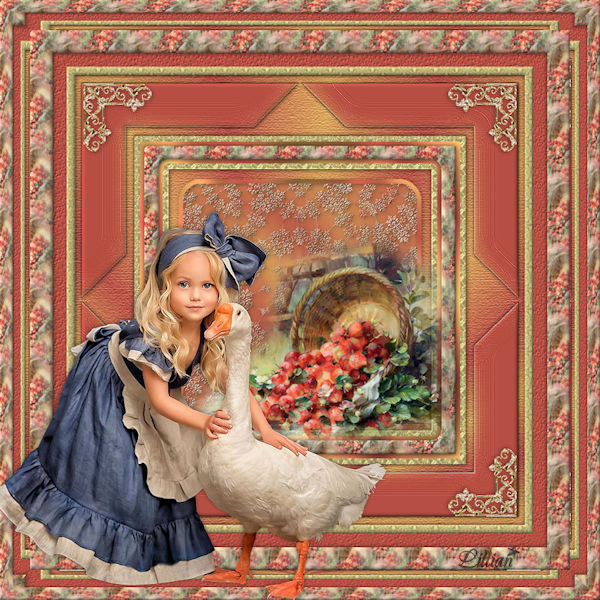
LILLIAN
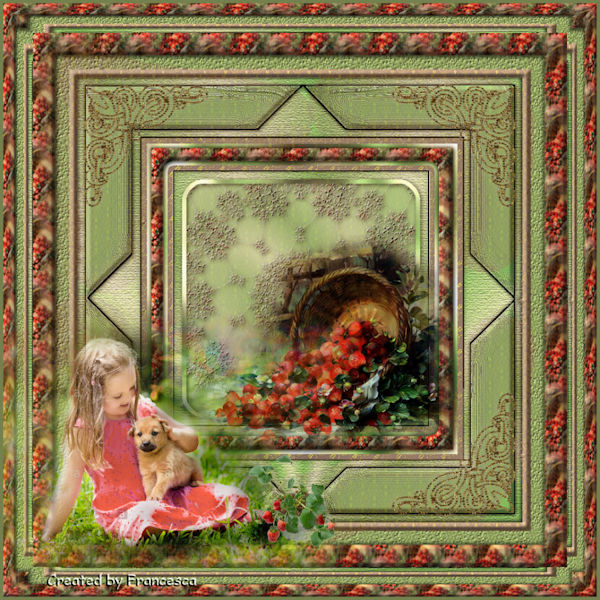
FRAN
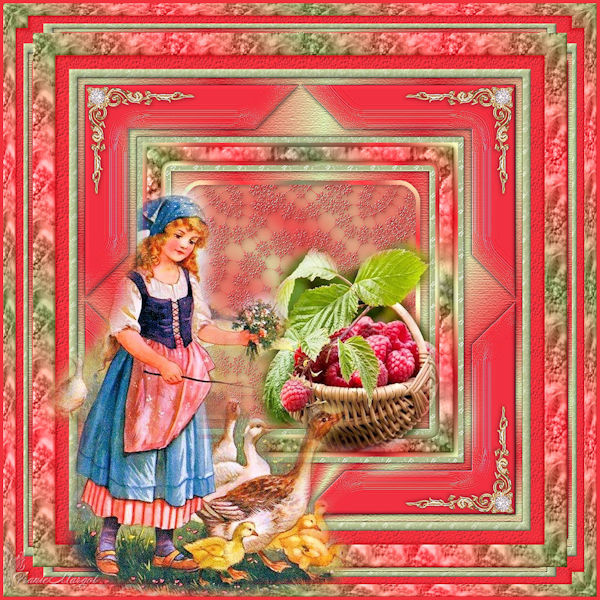
FRANIE MARGOT
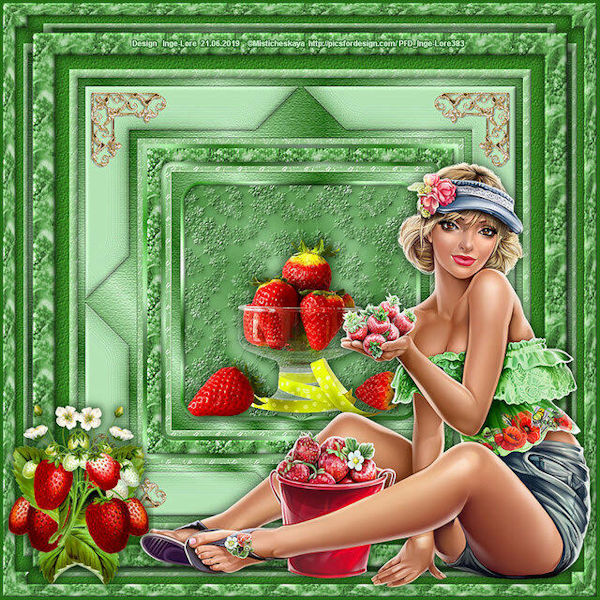
INGE-LORE
FOR
OTHER VERSIONS OF THE TUTORIAL
PLEASE
GO TO:
Escapingtopsp2.altervista.org/StrawberriesAndCream/StrawberriesAndCreamVersions.html
| | | |