Tutorial 2017
This
tutorial is written by
Denise D. on 12th June, 2018
from
my own ideas.
Any
resemblance to other tutorials is
co-incidental and unintentional.
You
may share my tutorials with other
groups.
All I ask is that you advise me
and
credit for the tutorial is given to me and linked to
http://escapingtopsp2.altervista.org/Home/homeb.html
Please
do not upload any of my completed Tutorial images onto sites
such as Fotki, Pinterest, Photobucket or similar
sailing
home
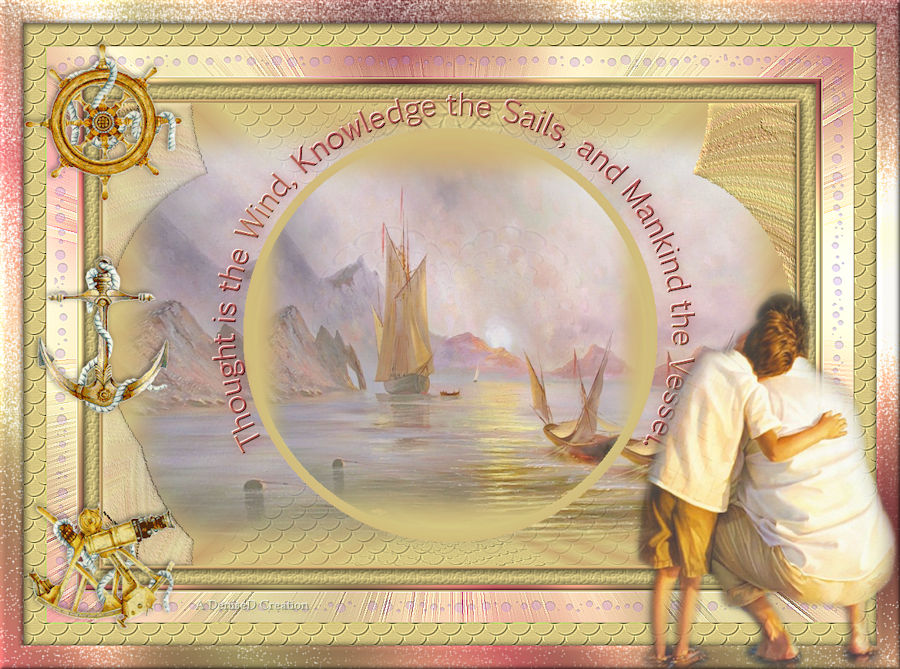
http://escapingtopsp2.altervista.org/SailingHome/SailingHome.html


Click on the Box to download Supplies
To print click on Printer

Supplies
Images:
lizztish_sailing-ships1.pspimage
You can join this Group at:
https://groups.google.com/forum/?fromgroups#!forum/emotivemists
FatherSonatTheBeachMisted~PS50.pspimage
nautical2sheet.pspimage
Signature.png
This image was obtained from
the Internet
If you are the owner of this
image, please contact me
so that credit can be given to
you
Textures:
JC_027
JC_023
Font:
Euphemia
Selections:
D.D.SaillingHome
D.D.SaillingHome2
D.D.SaillingHome3
Presets:
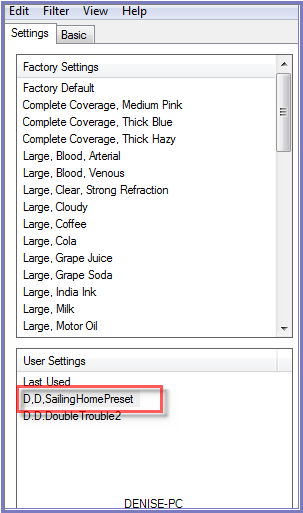
D,D,SailingHomePreset
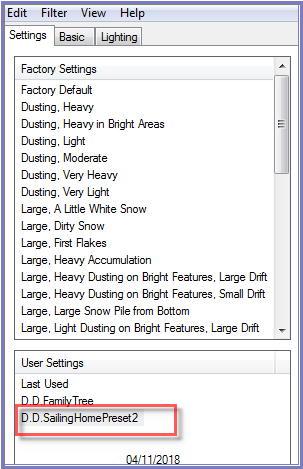
D.D.SailingHomePreset2
Double Click on the  icon in your supplies folder to install this Preset in your Plugin.
Plugins:
Alien Skin Eye Candy 3.0
OR
Alien Skin Eye Candy 4000
Simple
MuRa's Seamless
VM Natural (Import into
Filters Unlimited 2.0)
&<Sandflower
Specials"v"> (Import into
Filters Unlimited 2.0)
Photo Aging Kit (Import into
Filters Unlimited 2.0)
Found here:
 and
and 
Notes:
This Tutorial was created in PSP
X9.... other
versions may need adjustment
Some of the graphics may be from Free
to Use sites or Share
Groups.
If you are the creator of one of these
please let me know
so that appropriate credit can be given.
No infringement of
copyright is intended or intentional.
Before opening PSP, download plugins
and install
Some
helpful information:
You can change the blend mode, opacity and drop shadow, as
well as colourise
the materials,
according to the tubes/colours you are using.
When applying the Resize with the All Layers option checked, this will
be
informed in the tutorial,
otherwise, apply the resize with this option unchecked.
Remember always to save your work.
Whenever you reduce an image, apply Adjust/Sharpness/Sharpen, to
maintain the
sharpness of the image.
Some tools or features have other names in earlier versions of the PSP.

Please
Note: Offset
settings provided in this tutorial may vary according to size of your
image.
Please
adjust to suit.
The
settings remain the same throughout this Tutorial unless otherwise
stated.
Set your Foreground colour to
#c8a36e
Set your Background colour to #d4c482
Step One:
Place Textures in PSP Texture Folder
Place Selections in PSP
Selection Folder
Place Mask in PSP Mask
Folder
Install Font
Install Presets
Open graphics in PSP, duplicate (Shift
D) and close the original.
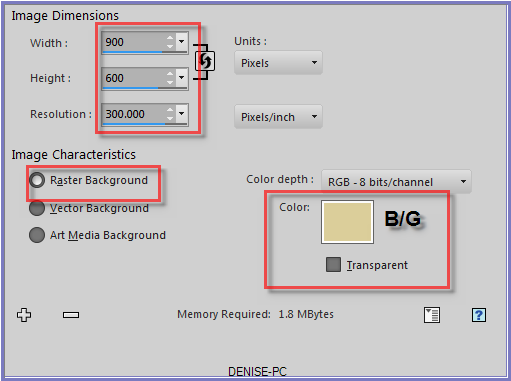
File/New/New Image 900 pixels x 600
pixels as follows:
Step Two:
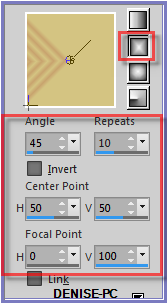
Change Foreground Colour to
Foreground/Background/Rectangular Gradient as follows:
Layers/New
Raster Layer
Flood fill with Gradient
Effects/Plugins/Simple/Top Left Mirror
Effects/Edge
Effects/Enhance More
Step Three:
Selections/Load/Save
Selection/Load Selection/D.D.SailingHome from Disk as follows:

Effects/Texture Effects/Texture JC-023 as follows:
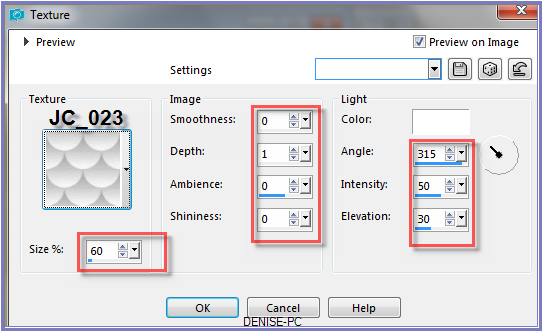
Effects/Edge Effects/Enhance More
Selections/Select None
Step Four:
Layers/Duplicate
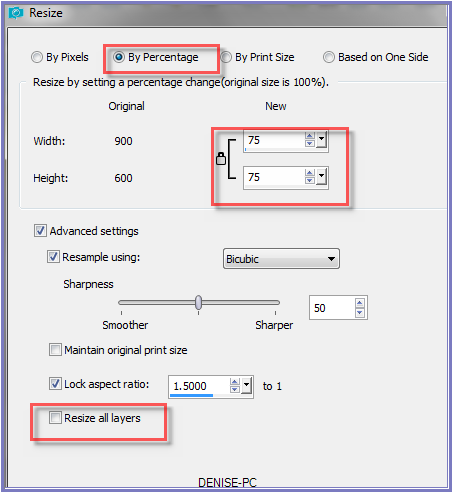
Image/Resize/75% as follows:
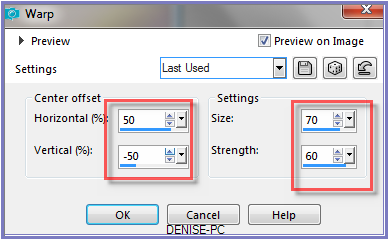
Effects/Distortion Effects/Warp as follows:
Step Five:
Layers/Duplicate
Image/Mirror/Horizontal OR Image/Mirror
Change Opacity to 50%
Layers/Merge/Merge Down
Layers/Duplicate
Image/Resize/80%
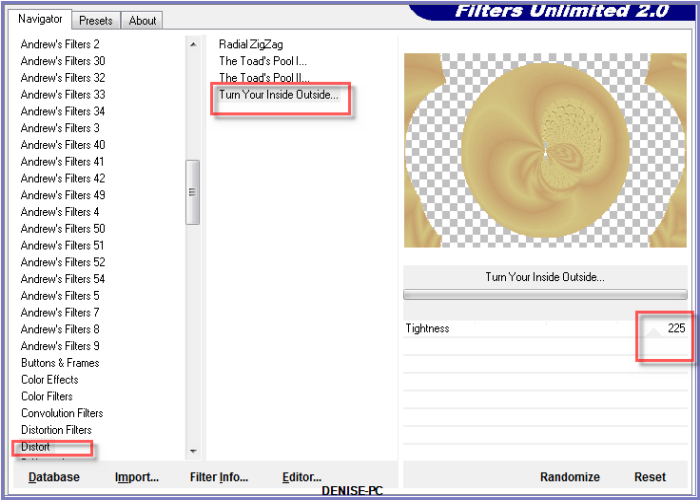
Effects/Plugins/Filters Unlimited 2.0/Distort/Turn Yourself Inside Out
as follows:
Step Six:
Selections/Load/Save Selection/Load Selection D.D.SailingHome2 from Disk
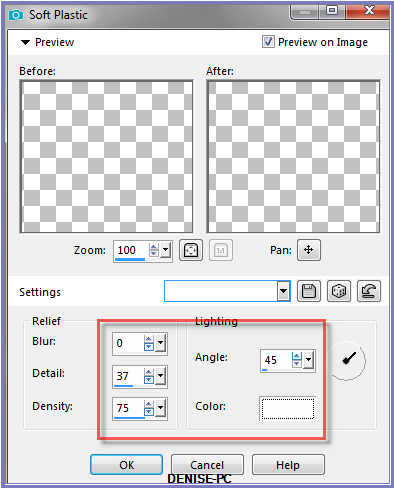
Effects/Texture Effects/Soft Plastic as follows:
Effects/3D Effects/Inner Bevel as follows:
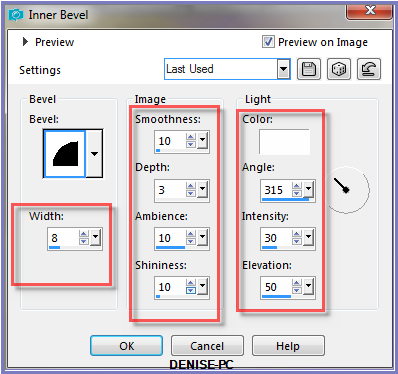 Selections/Select None
Step Seven:
Layers/New Raster Layer
Selections/Load/Save Selection/Load Selection D.D.SailingHome3 from Disk
Maximise lizztish_sailing-ships1.pspimage
Edit/Copy Edit/Paste into Selection
Change Opacity to 80%
Adjust/Sharpness/Sharpen
Select Copy of Raster 1
Selections/Select All
Edit/Paste into Selection
Selections/Select None
Change Opacity to 80%
Step Eight:
Image/Add Borders/1 pixel/Background Colour
Image/Add Borders/4 pixels/Foreground Colour
Magic Wand with the following settings:

Select with Magic Wand
Effects/3D Effects/Inner Bevel
Selections/Select None
Promote Background Layer
Image/Canvas
Size with the following settings:
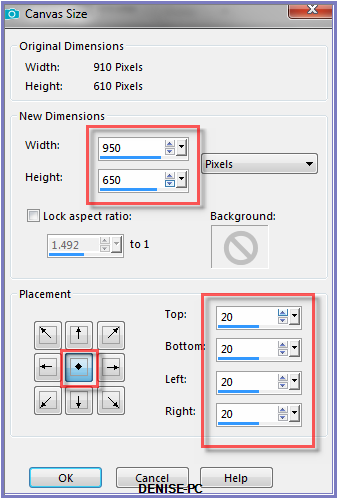
Layers/New Raster Layer
Layers/Arrange/Move Down
Flood Fill with Background Colour
Effects/Texture Effects/Texture JC_027 as follows:
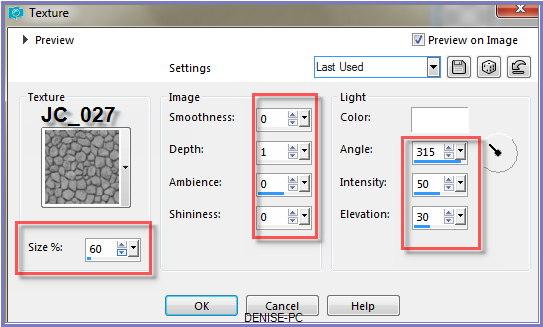
Select
Raster 1
Effects/Plugins/Eye
Candy 3.0/Drop Shadow as follows:
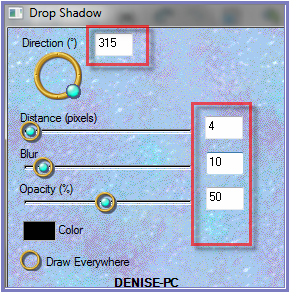
OR
Effects/Plugins/Eye Candy 4000/Shadowlab as follows:
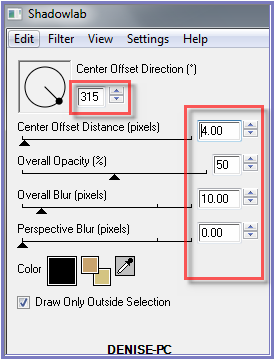 Repeat Drop Shadow/Shadowlab/Direction 135
Step Nine:
Change Foreground Colour to #b05658
Change Foreground to Gradient with the following settings:
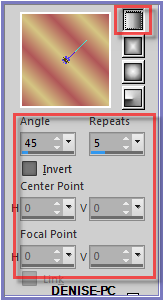
Image/Add Borders/7 pixels/White
Select with Magic Wand
Flood fill with Foreground Gradient
Effects/Plugins/Filters Unlimited 2.0/&<Sandflower
Specials"v">/ Poolshadow as follows:
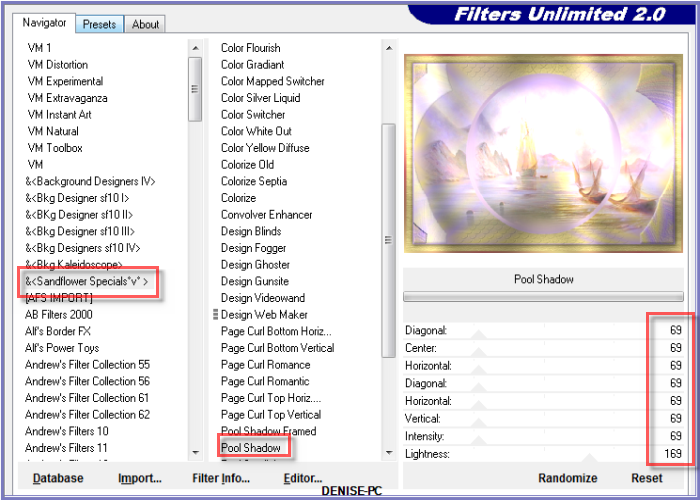
Effects/3D Effects/Inner Bevel
Effects/Plugins/Eye Candy 3.0/Drop Shadow
OR
Effects/Plugins/Eye Candy 4000/Shadowlab
Repeat Drop Shadow/Shadowlab/Direction 315
Selections/Select None
Step Ten:
Image/Add Borders/2 pixels/Background Colour
Image/Add
Borders/40 pixels/White
Select with Magic Wand
Flood Fill with Gradient
Effects/Plugins/Filters
Unlimited 2.0/&<Sandflower Specials"v">/
Poolshadow
Effects/Plugins/Filters Unlimited 2.0/VM
Natural/Lightburst as follows:
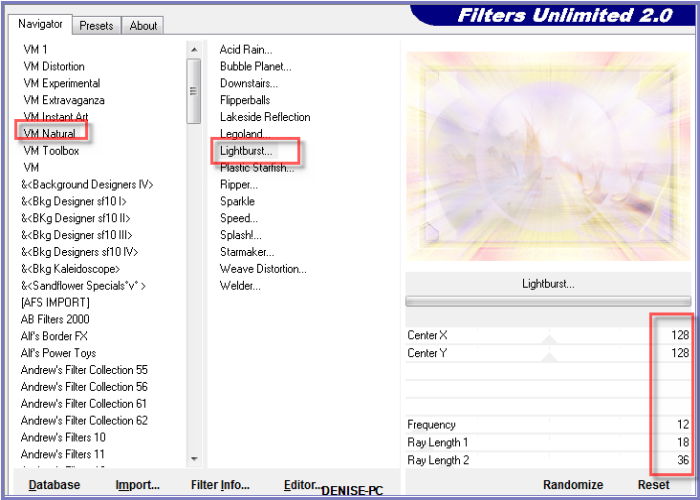
Effects/Edge Effects/Enhance More
Selections/Modify/Contract 10 pixels
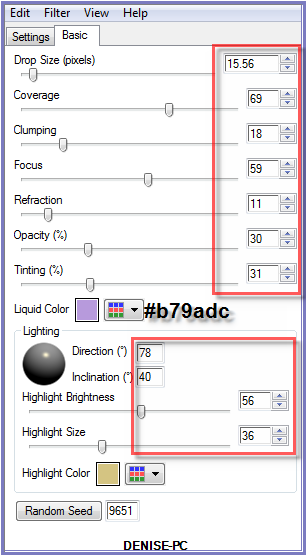
Effects/Plugins/Alien Skin Eye Candy 5/Nature/Water
Drops/D.D.SailingHomePreset OR as follows:
Adjust/Sharpness/Sharpen More
Selections/Select None
Step Eleven:
Image/Add
Borders/30 pixels/Background Colour
Select with Magic Wand
Effects/Texture Effects/Texture JC_023
Effects/Edge Effects/Enhance More
Selections/Select None
Image/Add Borders/30 pixels/White
Select with Magic Wand
Flood Fill with Gradient
Effects/Plugins/Filters
Unlimited 2.0/&<Sandflower Specials"v">/
Poolshadow
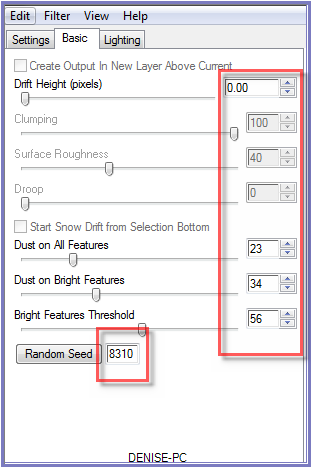
Effects/Plugins/Alien Skin Eye Candy
5/Nature/Snowdrift/D.D.SailingHomePreset2 OR as follows:
  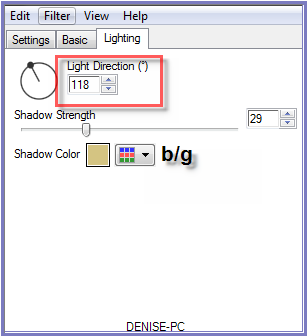
Effects/Edge Effects/Enhance
Effects/3D Effects/Inner Bevel
Effects/Plugins/Eye
Candy 3.0/Drop Shadow
OR
Effects/Plugins/Eye Candy 4000/Shadowlab
Repeat Drop Shadow/Shadowlab/Direction 135
Selections/Select None
Step Twelve:
Swap Foreground and Background Colours as follows:
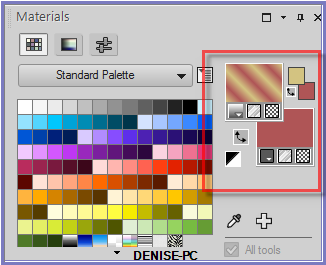
Preset Shape Tool with the following settings:


Starting at 300 pixels x 150 pixels, pull out a circle slightly larger
than the inner circle on the Layer as shown below:
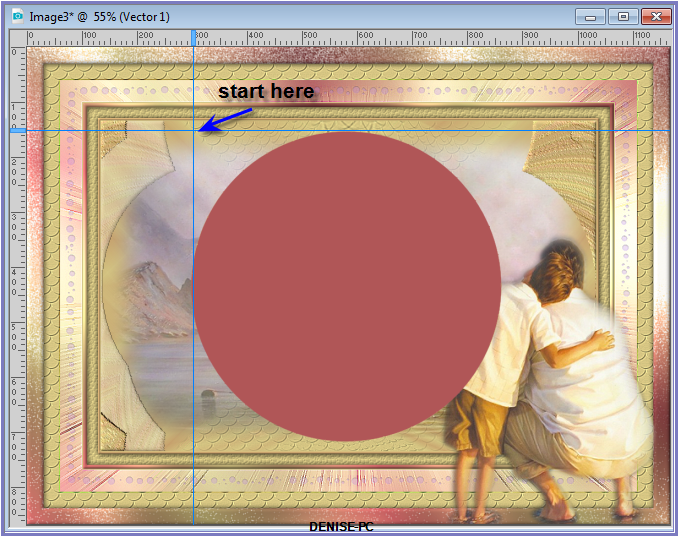
Layers/New Raster Layer
Text Tool with the following settings:


Settings may vary according to your version of PSP
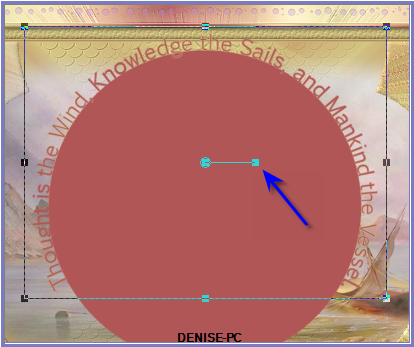
Place your mouse somewhere near the top of the circle and
when you will get this image 
Write:
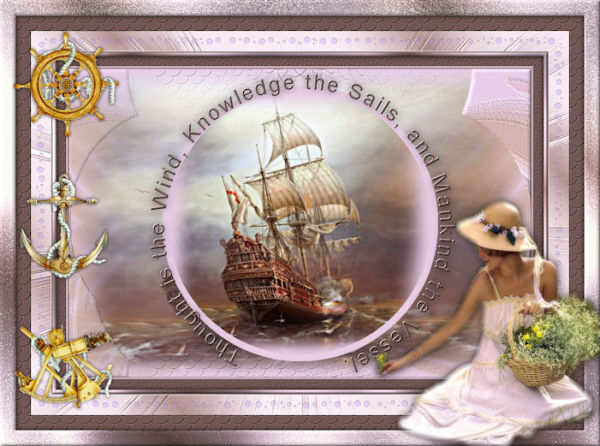
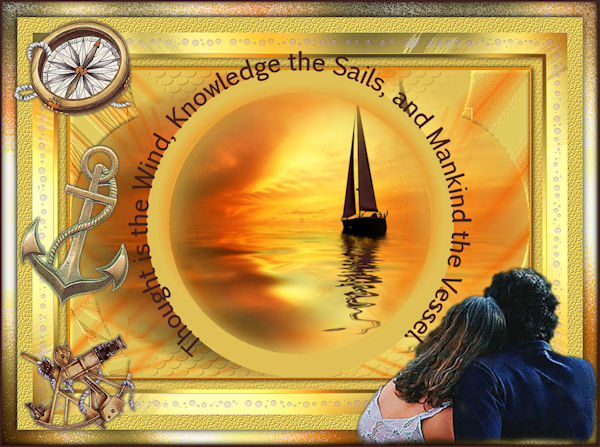
Thought is the Wind,
Knowledge the Sails, and Mankind the Vessel.
Use the arm to move the text round into place, a little at a time as
shown below:
Convert to Raster Layer
Effects/Plugins/MuRa's Seamless/Emboss at Alpha/Default Settings
Effects/3D Effects/Drop Shadow as follows:
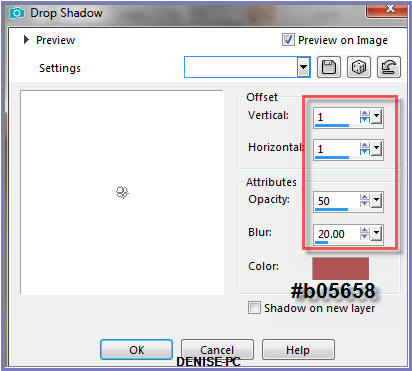
Delete Vector 1 Layer (the circle)
Step
Thirteen:
Maximise FatherSonatTheBeachMisted~PS50.pspimage
Edit/Copy Edit/Paste as New Layer
Image/Resize/140%
Adjust/Sharpness/Sharpen
Effects/Image Effects/Offset as follows:
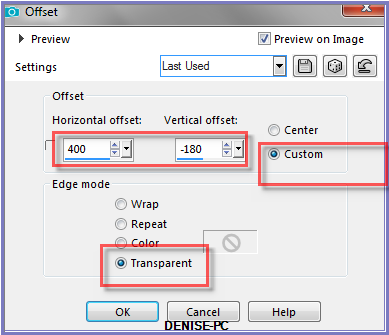
Using the Pick/Deform Tool move the image over slightly to the right to
reveal
all the text as shown below
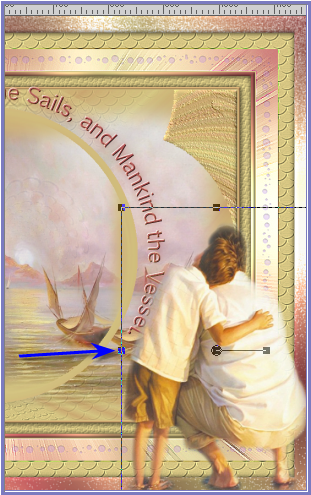
Deselect Pick/Deform Tool
Effects/Plugins/Eye
Candy 3.0/Drop Shadow
OR
Effects/Plugins/Eye Candy 4000/Shadowlab
Step Fourteen:
Maximise nautical2sheet.pspimage
Select Layer 2
Edit/Copy Edit/Paste as New Layer
Effects/Image Effects/Offset as follows:
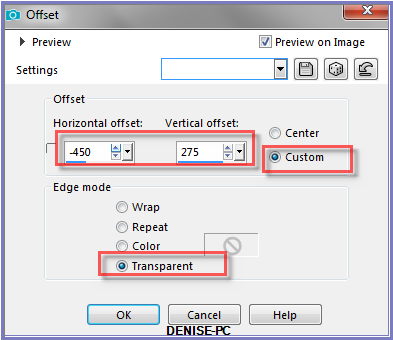
Maximise
nautical2sheet.pspimage
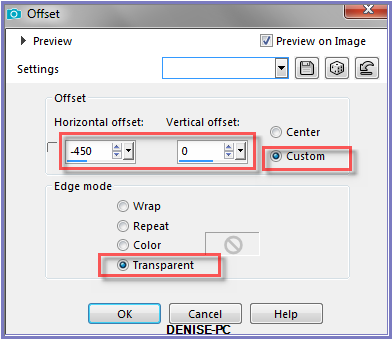
Select Layer 4
Edit/Copy Edit/Paste as New Layer
Effects/Image Effects/Offset as follows:
Maximise
nautical2sheet.pspimage
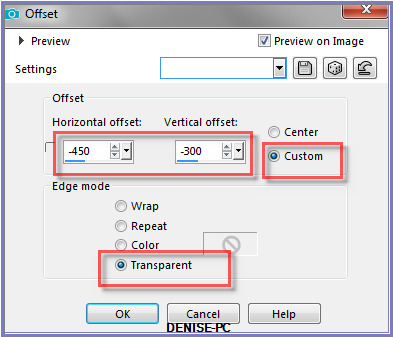
Select Layer 3
Edit/Copy Edit/Paste as New Layer
Effects/Image Effects/Offset as follows:
Layers/Merge/Merge Down
Repeat Once
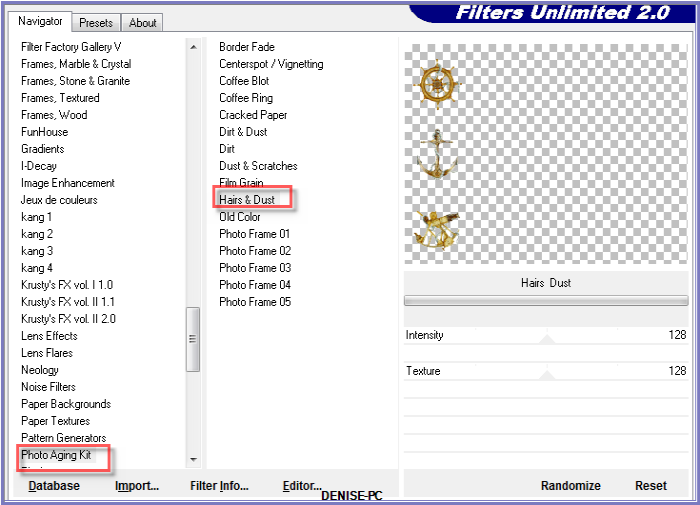
Effects/Plugins/Filters Unlimited 2.0/Photo Aging Kit/Hairs &
Dust as follows:
Effects/Plugins/Eye
Candy 3.0/Drop Shadow
OR
Effects/Plugins/Eye Candy 4000/Shadowlab
Step Fifteen:
Maximise Signature.png
Edit/Copy Edit/Paste as New Layer
Place at bottom of Layer
Layers/New Raster Layer
Add
your Watermark
Layers/Merge
All Flatten
Image/Resize/900
pixels wide - height will adjust itself
File/Export/JPEG
Optimiser/Compression Value 20
I hope you have enjoyed
this tutorial
A
big thank you to the ladies who test my Tutorials
TESTERS'
RESULTS
ELIZABETH
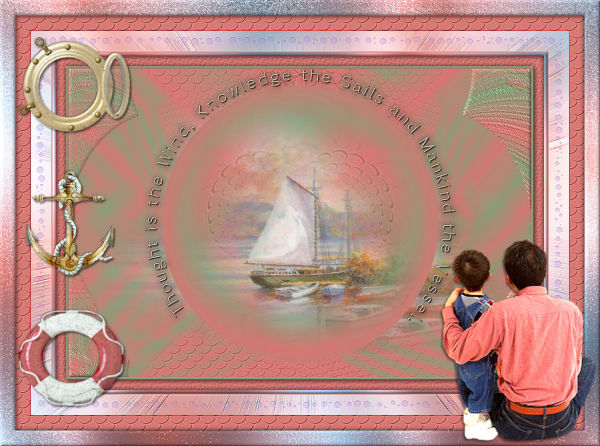
JOYCE
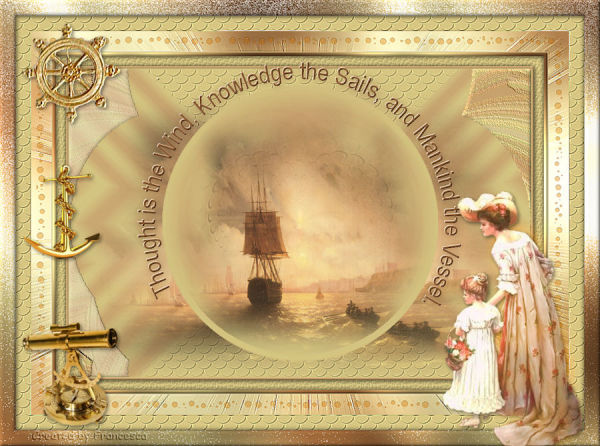
FRAN
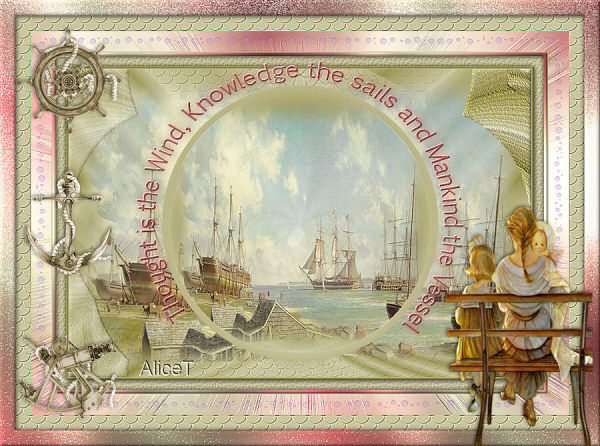
ALICE
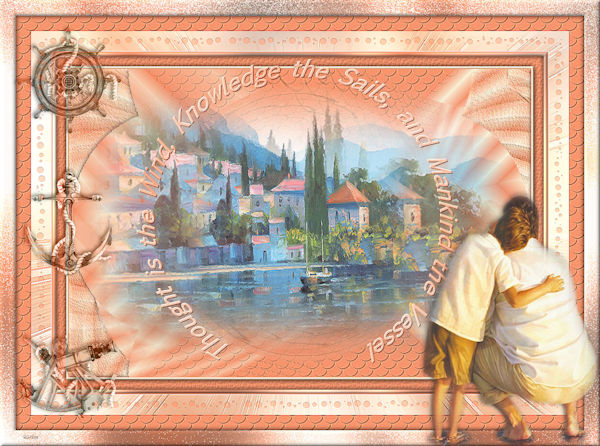
SHIRLEY NZ
BETTY
FOR
OTHER VERSIONS OF THE TUTORIAL
PLEASE
GO TO:
http://escapingtopsp2.altervista.org/SailingHomeVersions/SailingHomeVersions.html
DeniseD
2022
All Rights Reserved
Designed and Maintained by ESCAPING TO PSP GROUP
|
|
|
|