Tutorial 2017
To print click on Printer

Supplies
Images:
pots
fleuris.png
You can join this Group at:
http://monpetitjardin.olympe.in/index.htm
Butterfly
jf-single-pearls.pspimage
Obtained through Group Shares.
If this image was created by you, please let me know
so that appropriate credit can be given.
Presets:
Just a Pot of Colour
Left click on this icon  and it will be installed into your
Plugin automatically and it will be installed into your
Plugin automatically
Mask:
branches_msk_gam
Narah_mask_0546
Colour Swatch
Plugins:
Simple
Eye Candy 3.0
Xero
Alien Skin Eye
Candy 5/Impact
Found here:
 AND AND 
Notes:
This Tutorial was originally created
in PSP 5 but reworked in Corel 2019.... other
versions may need adjustment
Some of the graphics may be from Free
to Use sites or Share
Groups.
If you are the creator of one of these
please let me know
so that appropriate credit can be given.
No infringement of
copyright is intended or intentional.
Before opening PSP, download plugins
and install
Some
helpful information:
You can change the blend mode, opacity and drop shadow, as
well as colourise
the materials,
according to the tubes/colours you are using.
When applying the Resize with the All Layers option checked, this will
be
informed in the tutorial,
otherwise, apply the resize with this option unchecked.
Remember always to save your work.
Whenever you reduce an image, apply Adjust/Sharpness/Sharpen, to
maintain the
sharpness of the image.
Some tools or features have other names in earlier versions of the PSP.

Please
Note: Offset
settings provided in this tutorial may vary according to size of your
image.
Please
adjust to suit.
The
settings remain the same throughout this Tutorial unless otherwise
stated.
Set your Foreground colour to #fae4e5
Set your Background colour to #bea496
Step One:
Place Mask in PSP Mask
Folder
Install Preset
Open graphics in PSP, duplicate (Shift
D) and close the original.
Step One:
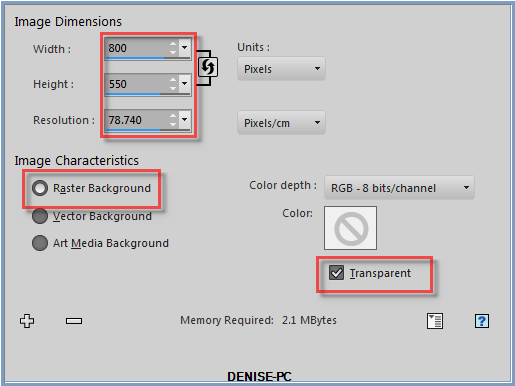
File/New/New Image 800 pixels x 550
pixels as follows:
Step Two:
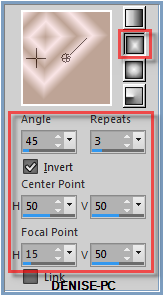
Change Foreground Colour to Foreground/Background Rectangular Gradient
as follows:
Flood Fill with Gradient
Layers/Duplicate
Image/Mirror Horizontal OR Image/Mirror
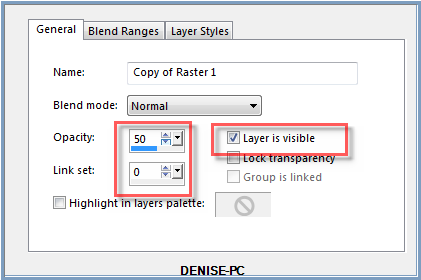
Double click on this layer in the Layers Box and change the Opacity to
50% as follows:
Layers/Merge/Merge Down
Step Three:
Effects/Plugins/Simple/Blintz
Effects/Plugins/Simple/Centre Tile
Effects/Image Effects/Seamless Tiling/Default Settings
Effects/Edge Effects/Enhance More
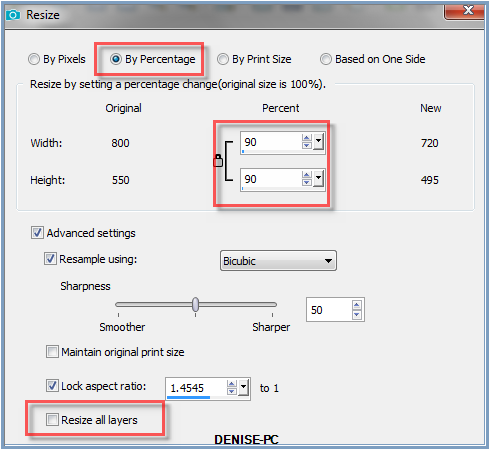
Layers/Duplicate
Image/Resize/90% as follows:
Step Four:
Effects/Plugins/Xero/Clarity as follows:
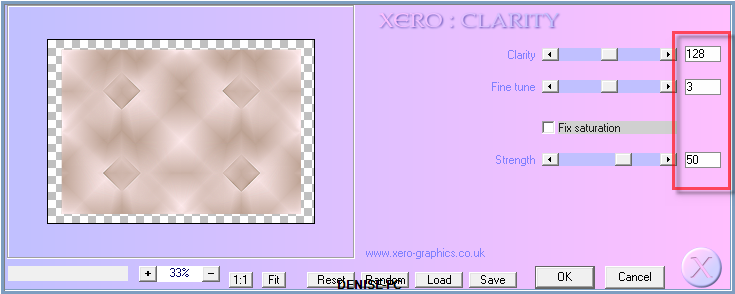
Repeat Xero/Clarity once
Effects/Geometric/Spherize as follows:
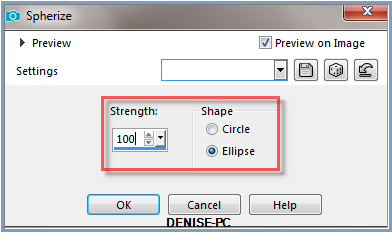
Image/Resize/95%
Image/Duplicate
Image/Resize/95%
Select Copy of Raster 1
Effects/Plugins/Eye Candy 3.0/Drop
Shadow as follows:
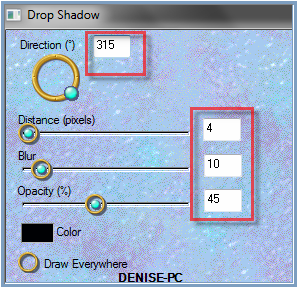
OR
Effects/Plugins/Eye Candy 4000/Shadowlab as follows:
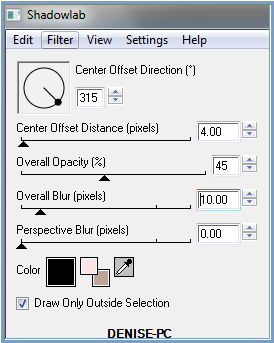
Select Copy (2) of Raster 1
Repeat Drop Shadow/Shadowlab
Step Five:
Maximise pots fleuris.png
Edit/Copy Edit/Paste as New
Layer
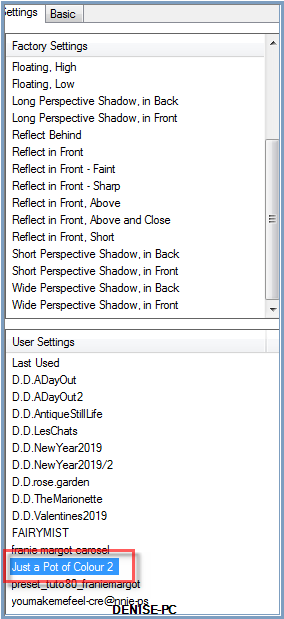
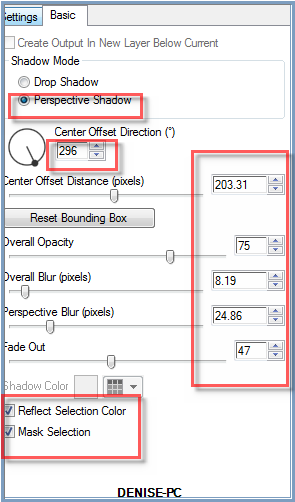
Effects/Plugins/Eye Candy 5/Impact/Perspective Shadow/Just a Pot of
Colour 2 OR as follows:
Maximise Butterfly.png
Edit/Copy Edit/Paste as New Layer
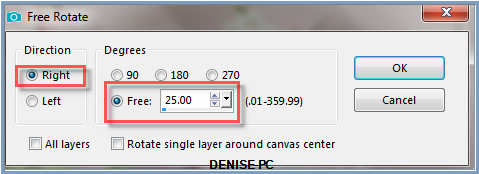
Effects/Image Effects/Free Rotate 25 degrees right as follows:
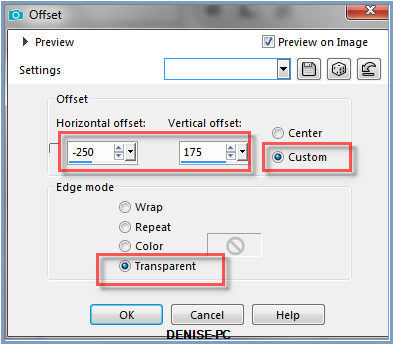
Effects/Image Effects/Offset as follows:
Effects/3D Effects/Drop Shadow as follows:
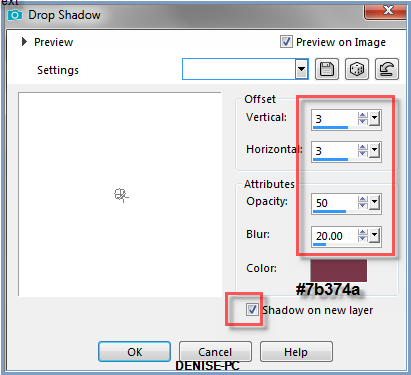
Change Blend Mode to Hard Light
Select Raster 3
Layers/Merge/Merge Down
Repeat Twice
Effects/Plugins/Xero/Artworx/Fine Lines as follows:
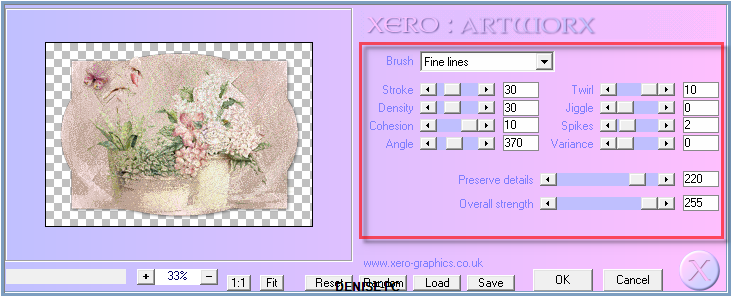
Step Six:
Select Copy of Raster 1
Effects/Texture Effects/Blinds a follows:
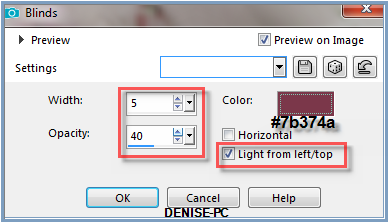
Effects/Edge Effects/Enhance
Select Copy (2) of Raster 1
Maximise jf-single-pearls.pspimage
I used Raster 3
Edit/Copy Edit/Paste as New
Layer
Effects/Image Effects/Offset as follows:
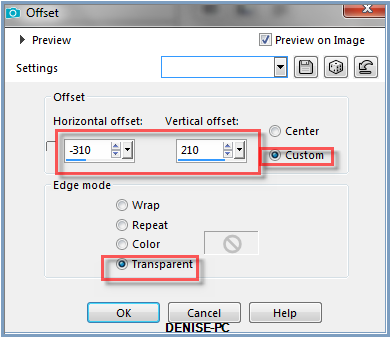
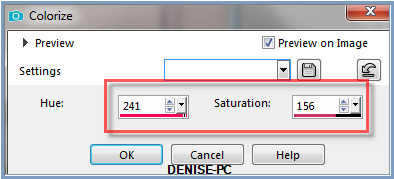
Adjust/Hue and Saturation/Colorize as follows:
Effects/3D Effects/Drop Shadow BUT untick Shadow on New Layer Box
Effects/Plugins/Simple/Top Left Mirror
Step Seven:
Select Raster 1
Change Background Colour to #9c4254
Change Gradient to the following settings:
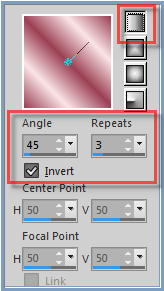
Layers/New Raster Layer
Flood Fill with Gradient
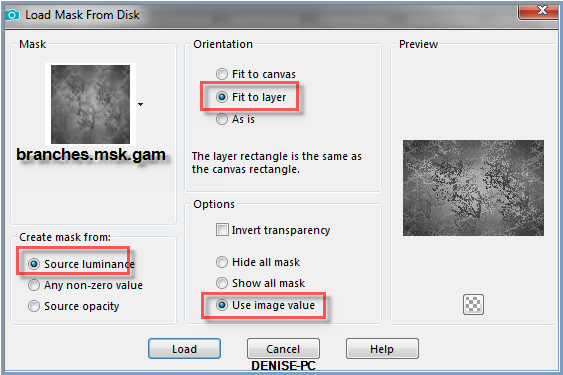
Layers/Load/Save Mask/Load Mask branches.msk.gam from Disk as follows:
Layers/Merge/Merge Group
Effects/Edge Effects/Enhance
Step Eight:
Select Group Raster 3
Layers/Merge/Merge Down
Layers Duplicate
Select Copy of Raster 1
Effects/Plugins/Eye Candy 3.0/Drop Shadow
Or
Effects/Plugins/Eye Candy 4000/Shadowlab
Repeat Drop Shadow/Shadowlab/Direction 135
Select Raster 1
Effects/Plugins/Xero/Artworx/Wedges as follows:
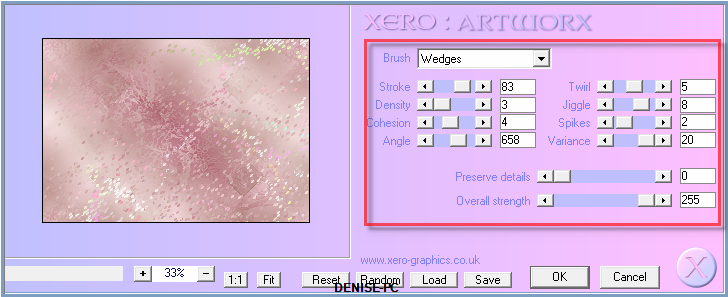
I just clicked on Random and got what image I liked to use for this one
Layers/Merge/Merge All Flatten
Step Nine:
Image/Add Borders/5 pixels/Foreground Colour
Image/Add Borders/30 pixels/White
Magic Wand with the following settings:

Select with Magic Wand
Edit/Paste Into Selection
Effects/Plugins/Xero/Artifax as follows:
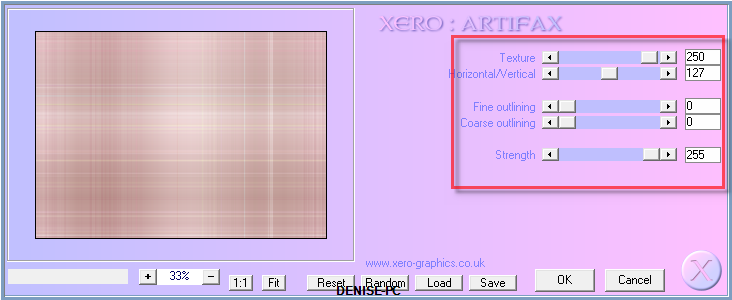
Adjust/Sharpness/Sharpen
Selections/Select None
Image/Add Borders/5 pixels/Foreground Colour
Step Ten:
Layers/New Raster Layer
Flood fill with Foreground Gradient
Layers/Load/Save/Mask/Load Mask Narah_mask_0546
from Disk
Layers/Merge/Merge Group
Effects/Edge Effects/Enhance
Change Blend Mode to Overlay
Maximise pots fleuris.png
Edit/Copy
Edit/Paste as New Layer
Effects/Plugins/Eye Candy 5/Impact/Perspective Shadow/Just a Pot of
Colour 2
Step
Eleven:
Maximise Signature.png
Edit/Copy Edit/Paste as New Layer
Place at bottom of Layer
Layers/New
Raster Layer
Add your Watermark
Layers/Merge All Flatten
Image/Resize/850 pixels wide - height will adjust itself
Adjust/Sharpness/Sharpen
File/Export/JPEG Optimiser/Compression Value 20
I hope you
have enjoyed this tutorial
A big thank you to the
ladies who test my Tutorials
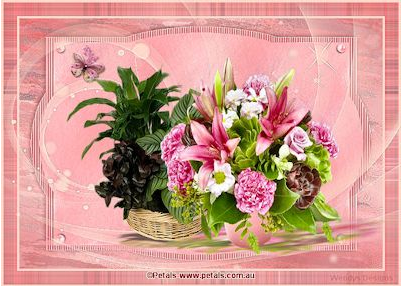
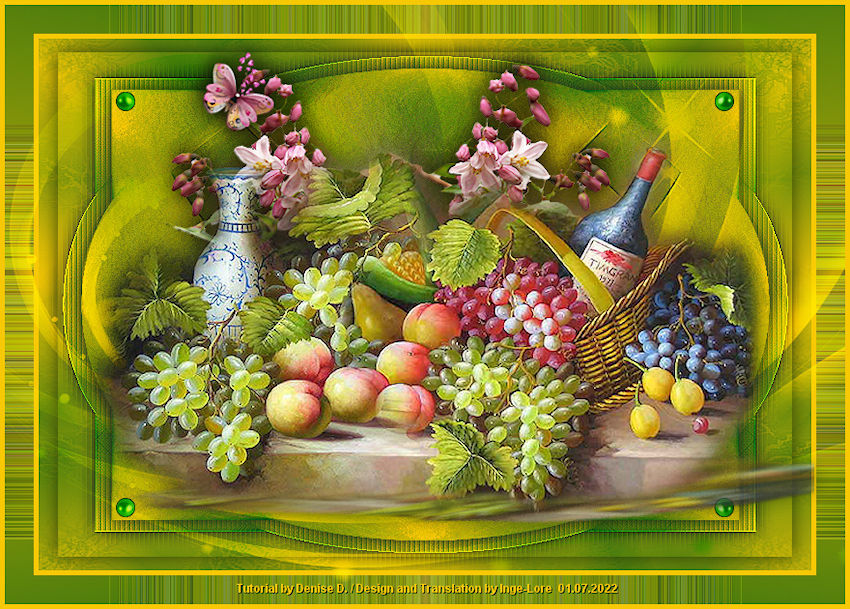
INGE-LORE

| | | |