This
tutorial is written by
Denise D. on 25th August, 2022
from
my own ideas.
Any
resemblance to other tutorials is
co-incidental and unintentional.
If
you wish to share my Tutorials, you MUST
obtain my permission first.
All I ask is that you advise me
and
credit for the tutorial is given to me and linked to
http://escapingtopsp2.altervista.org/Home/homeb.html
Please
do not upload any of my completed Tutorial images onto sites
such as Fotki, Pinterest, Photobucket or similar
FANTASY
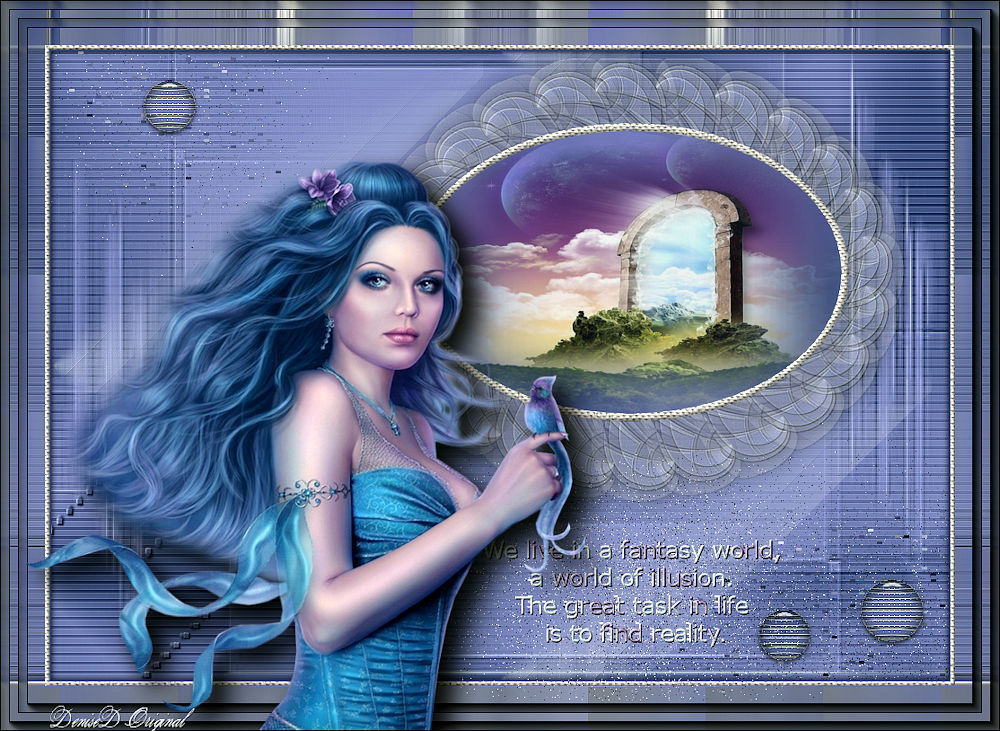
http://escapingtopsp2.altervista.org/Fantasy/Fantasy.html
![]()  Click on Arrow to follow Tutorial

Thank you Inge-Lore for this German Translation

Click on the Box to download Supplies
Supplies
Images:
Fantasy Background.png
LD-fantasy-069.png
Pattern:
SILVER BEADS.png
Mask:
077.jpg
Signature.png
Text.png
Flexify
2 Settings.q2q
D.D.Fantasy
Preset
Alpha channel
Plugins:
Filters Unlimited 2.0/Toadies
Carolaine & Sensibility
Flaming Pear
Alien Skin Eye Candy 5
AAA Frames
MuRa's Seamles
Found here:
 AND AND

Double
Click on the  icon in your supplies folder to install
this Preset in your Plugin.
Notes:
This
Tutorial was originally created in Corel 2019
.... other
versions may need adjustment
Some of
the graphics may be from Free
to Use sites or Share
Groups.
If you are
the creator of one of these
please let me know
so that appropriate credit can be given.
No
infringement of
copyright is intended or intentional.
Before
opening PSP, download plugins
and install
Some
helpful information:
You can change the blend mode, opacity and drop shadow, as
well as colourise
the materials,
according to the tubes/colours you are using.
When applying the Resize with the All Layers option checked, this will
be
informed in the tutorial,
otherwise, apply the resize with this option unchecked.
Remember always to save your work.
Whenever you reduce an image, apply Adjust/Sharpness/Sharpen, to
maintain the
sharpness of the image.
Some tools or features have other names in earlier versions of the PSP.

Please
Note: Offset
settings provided in this tutorial may vary according to size of your
image.
Please
adjust to suit.
The
settings remain the same throughout this Tutorial unless otherwise
stated.
Set your
Foreground colour to #3b4c82
Set your
Background colour to #8b93d1
Step One:
Place Pattern in PSP Pattern Folder
Place Preset in PSP Preset Folder
Save Flexify 2 setting to a place you can find it
Open
graphics in PSP, duplicate (Shift
D) and close the original.
Open Alpha Channel
Duplicate and close original
Name this Layer - Raster 1
We will work on this Alpha Channel where the selections are all hidden
Set Foreground Colour to Radial Gradient as follows:
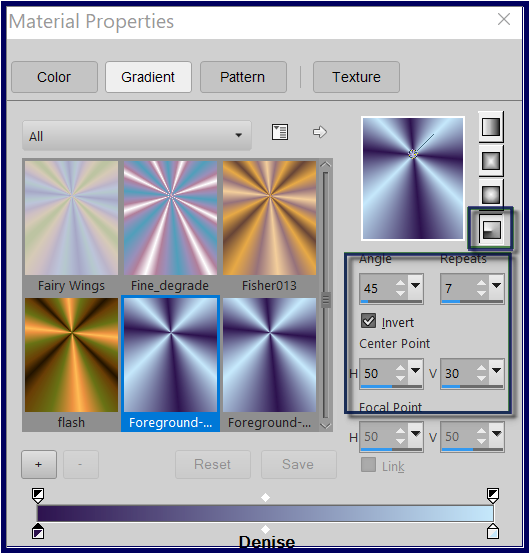
Flood fill Layer with Foreground Gradient
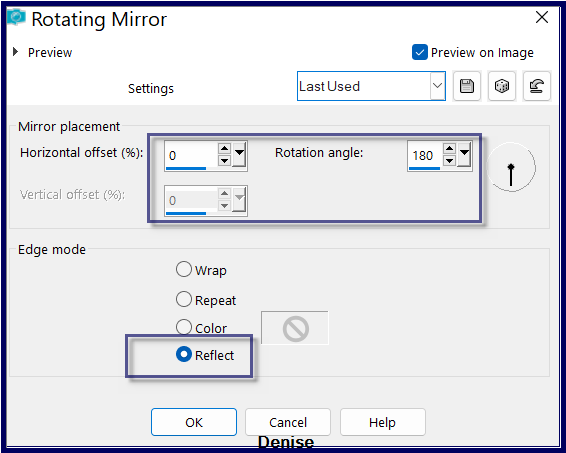
Effects/Reflection Effects/Rotating Mirror as follows:
Effects/Image Effects/Seamless Tiling/Default Settings
Step Two:
Effects/Plugins/Carolaine & Sensibility/CS_Halloween2 as
follows;
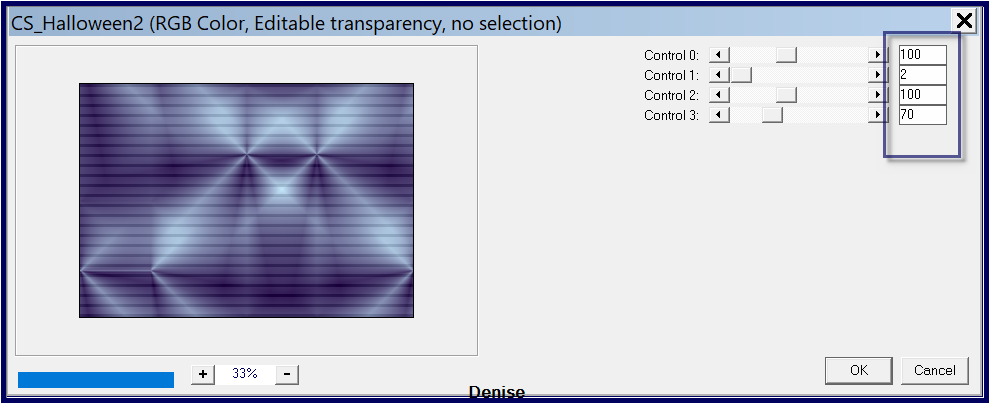
Effects/Image Effects/Seamless Tiling/Stutter a follows:
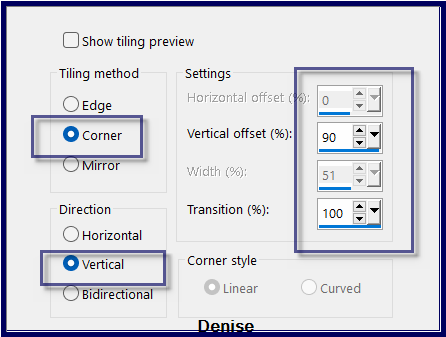
Effects/Edge Effects/Enhance
Step Three:
Layer/New Raster Layer
Flood fill with Background Colour
Layers/New Mask Layer/From Image (find 077.jpg)as follow:
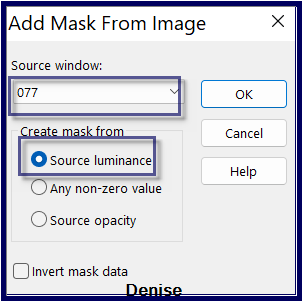
Layer/Merge/Merge Group
Effect/Edge Effects/Enhance More
Step Four:
Stay on Group Raster 1 Layer
Selections/Load/Save Selection/Load Selection #1 from Alpha Channel
Promote Selection to Layer
Selections/Select None
Effects/Plugins/Carolaine & Sensibility/CS_LDots as follows:
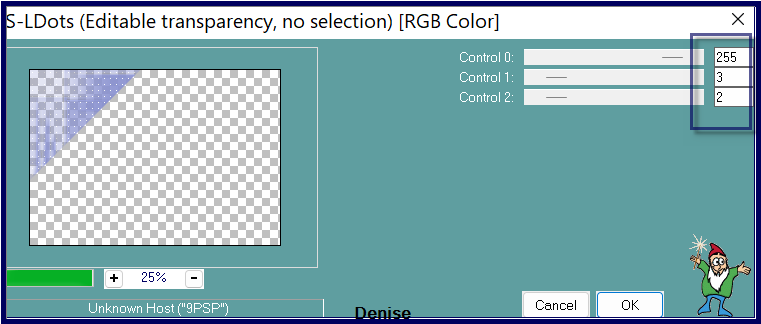
Effects/Plugins/Filters Unlimited 2.0/Toadies/What Are You? as follows:
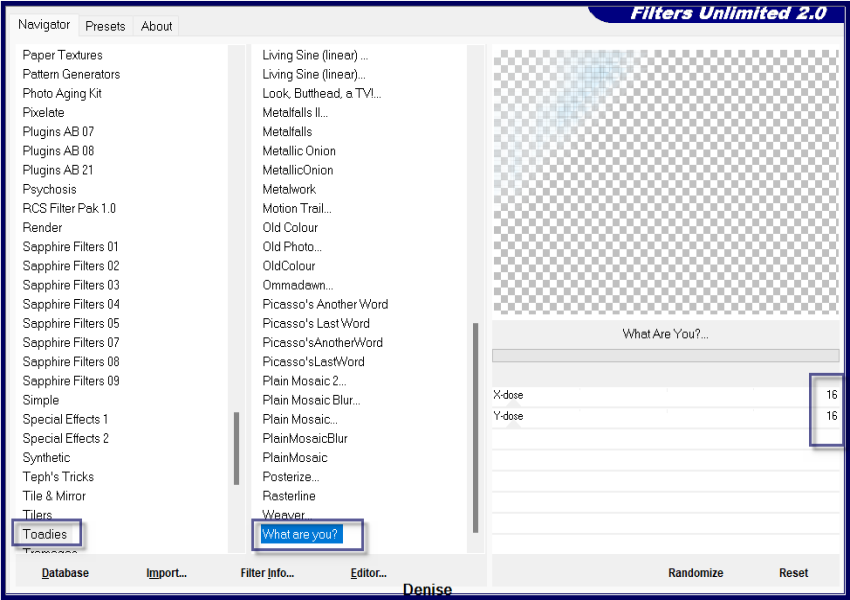
Step Five:
Layers/Duplicate
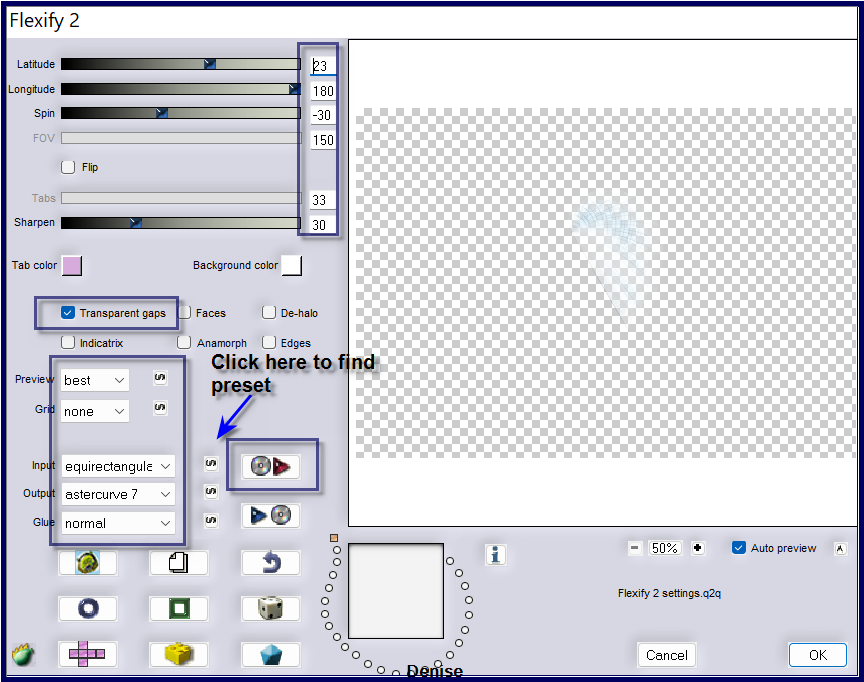
Effects/Plugins/Flaming Pear/Flexify 2/Preset OR as follows:
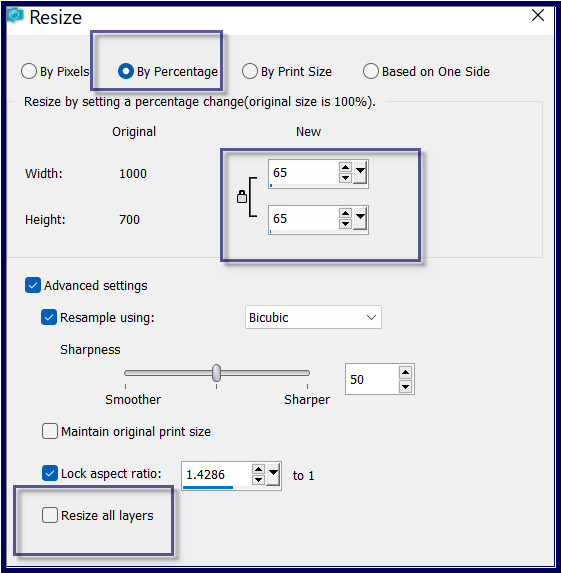
Image/Resize/65% as follows:
Effects/Edge Effects/Enhance
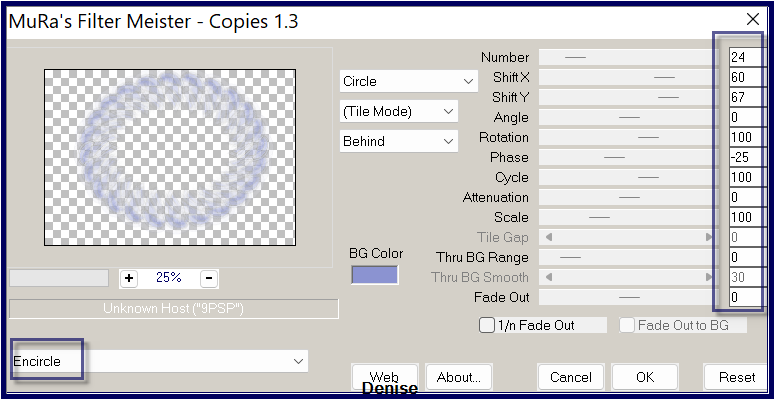
Effects/Plugins/MurA's Meister/Copies as follows:
Step Six:
Image/Resize/75%
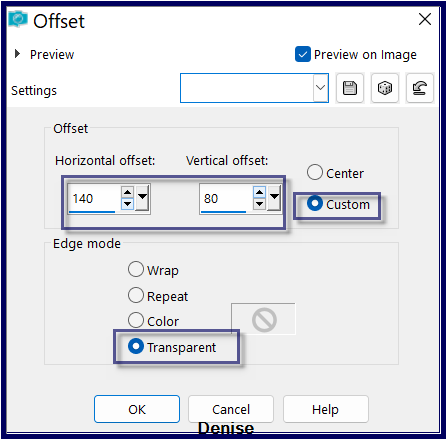
Effects/Image Effects/Offset as follows:
Adjust/Sharpness/Sharpen
Effects/3D Effects/Drop Shadow as follows:
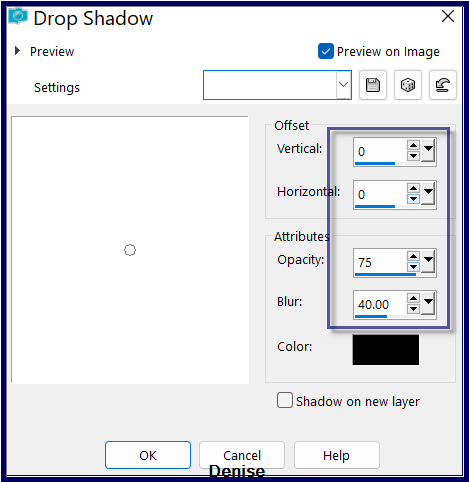
Effects/Plugin/MuRa's Seamless/Emboss at Alpha/Default Settings
Step Seven:
Selections/Load/Save Selection/Load Selection #2 from Alpha Channel
Edit/Clear
Selections/Modify/Select
Selection Borders

Change Background Colour to Pattern SILVER BEADS.png as
follows:
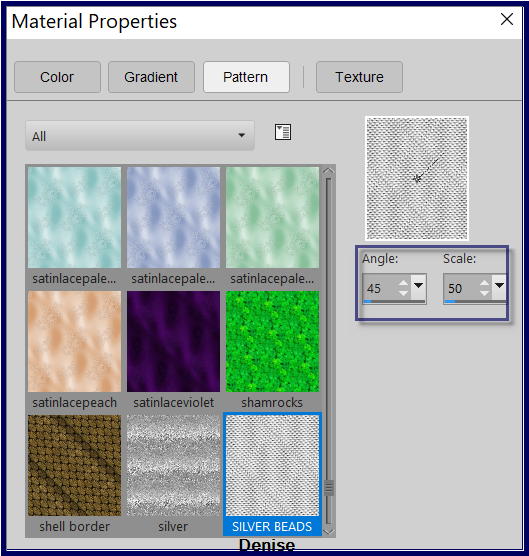
Layers/New Raster Layer
Flood fill with Background Pattern
Effects/3D Effects/Inner Bevel as follows:
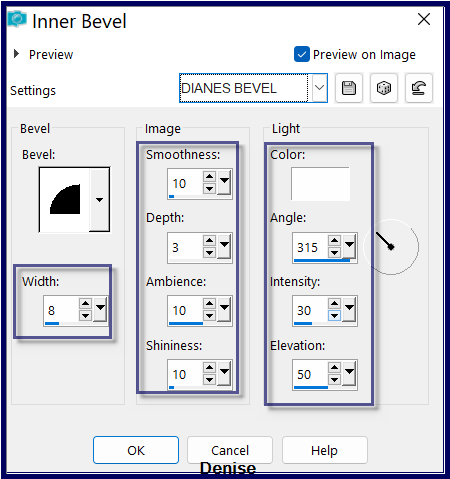
Selections/Select None
Layers/Merge/Merge Down
Step Eight:
Selections/Load/Save Selection/Load Selection #3 from Alpha Channel
Select Raster 1
Promote Selection to Layer
Layers/Arrange/Bring to Top
Adjust/Blur/Gaussian Blur as follows:
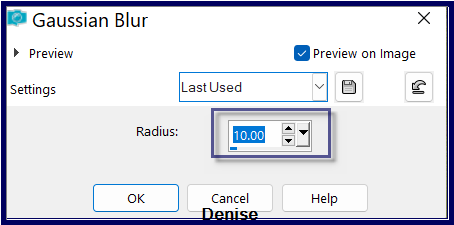
Layers/Arrange/Move Down
Layers/New Raster Layer
Maximise Fantasy Background.png
Edit/Copy Edit/Paste into Selection
Selection/Select None
Change Opacity to 90%
Select Promoted Selection Layer
Effects/Image Effects/Seamless Tiling/Default Settings
Effects/Edge Effects/Enhance
Step Nine:
Layers/New Raster Layer
Layers/Arrange/Bring to Top
Selections/Load/Save Selection/Load Selection #4 from Disk
Flood Tool with the following settings:

Change Foreground Gradient to the Linear setting same numbers as before
Flood fill with Foreground Gradient
Effects/Plugins/MuRa's Seamless/Emboss at Alpha
Effect/3D Effects/Drop Shadow as follows:
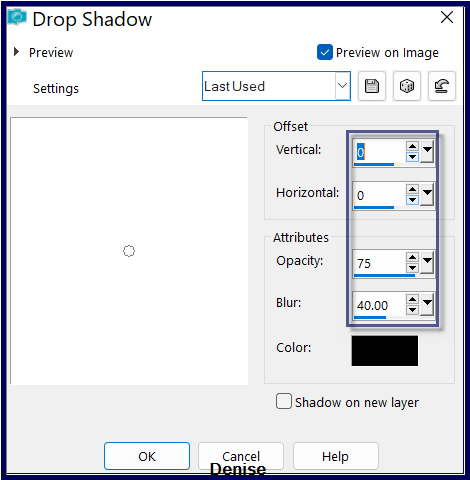
Select Raster 1
Selection/Load/Save Selection/Load Selection #5 from Alpha Channel
Promote Selection to Layer
Layers/Arrange/Bring to Top
Effects/Plugins/Carolaine & Sensibility/LDots as follows:
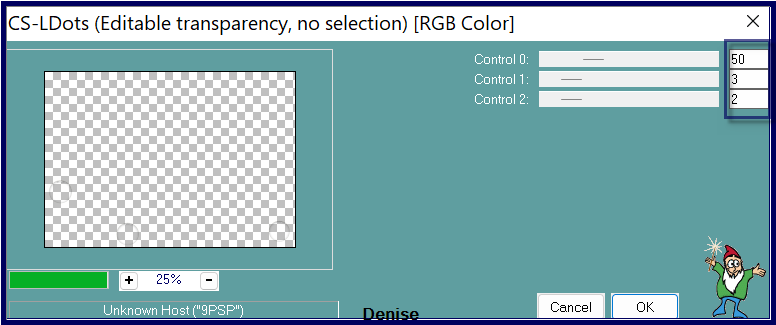
Effects/Edge Effects/Enhance
Effects/Plugins/Alien Skin Eye Candy
5/Impact/Glass/Clear /Default Settings
Selections/Select None
Step Ten:
Layers/Duplicate
Effects/Texture Effects/Mosaic Antique as follows:
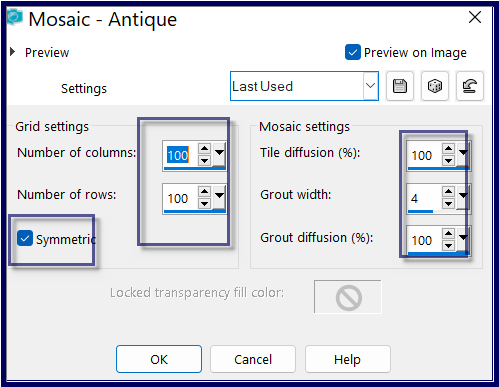
Repeat once
Layers/Arrange/Move Down
Image/Add Borders/2 pixels/Foreground Colour
Selections/Select All
Image/Add Borders/5 pixels/White
Selections/Invert
Flood fill with Background Pattern
Effects/3D Effects/Inner Bevel
Selections/Select All
Selections/Modify/Contract 7 pixels
Selections/Invert
Effects/3D Effects/Cutout as follows:
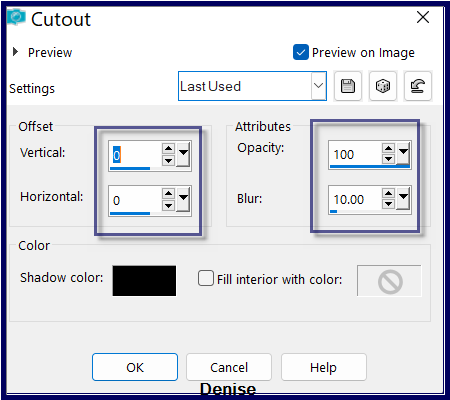
Selections/Select None
Step Eleven:
Edit/Copy
Selections/Select All
Image/Add Borders 50 pixel/White
Selection/Invert
Edit/Paste into Selection
Adjust/Blur/Gaussian Blur as follows:

Effect/Plugin/Filters Unlimited 2.0/Toadies/Weaver as follows:
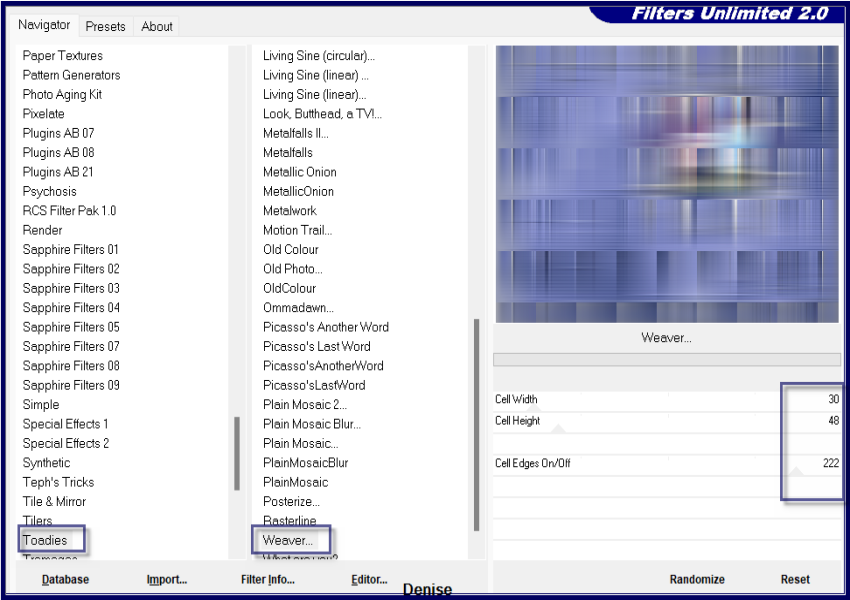
Effects/Reflection Effects/Rotating Mirror/Default Settings
Adjust/Sharpness/Sharpen
Select None
Step Twelve:
Effects/Plugins/AAA Frames/Foto Frame as follows:
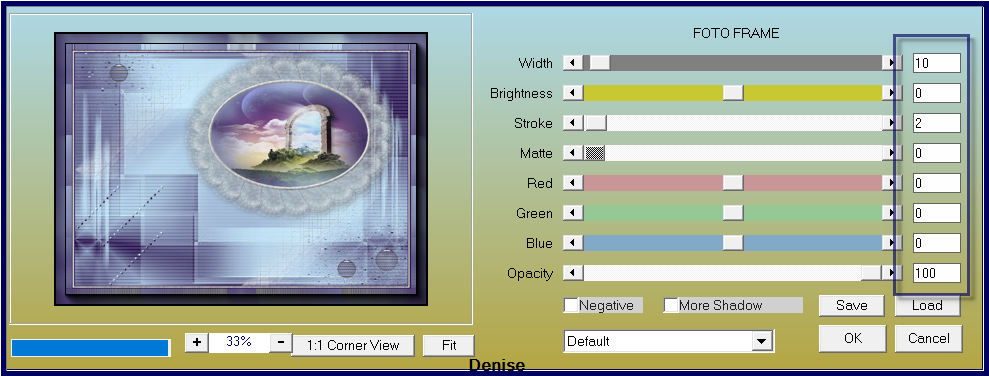
Selections/Select All
Selections/Modify/Contract 20 pixels
Effects/Plugins/AAA Frames/Foto Frame
Selections/Select None
Step Thirteen:
Maximise Text.png
Edit/Copy Edit/Paste as New Layer
Effect/Image Effects/Offset as follows:
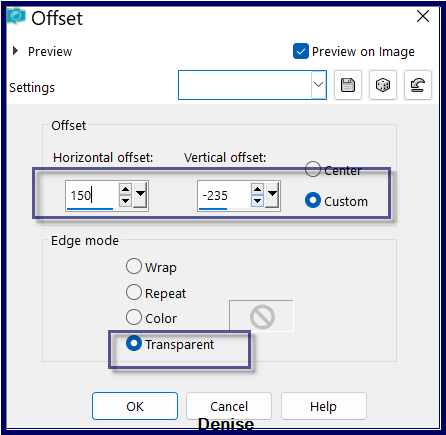
Maximise LD-fantasy-069.png
Edit/Copy Edit/Paste as New Layer
Image/Mirror/Horizontal OR Image/Mirror
Place where suitable with your image
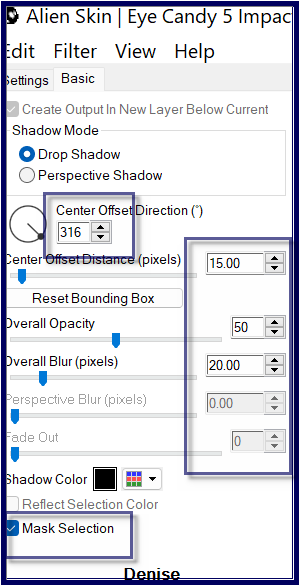
Effect/Plugins/Eye Candy 5.0/Perspective Shadow/Preset D.D.Fantasy or
as follows:
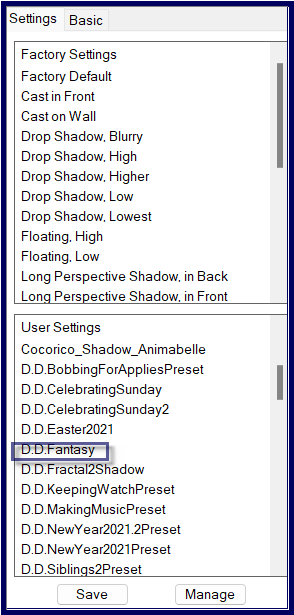
Step Fourteen:
Maximise Signature.png
Edit/Copy Edit/Paste as New Layer
Place at bottom of Layer
Layers/New
Raster Layer
Add
your Watermark
Layers/Merge
All Flatten
Image/Resize/1000
pixels wide - height will adjust itself
OPTIONAL:
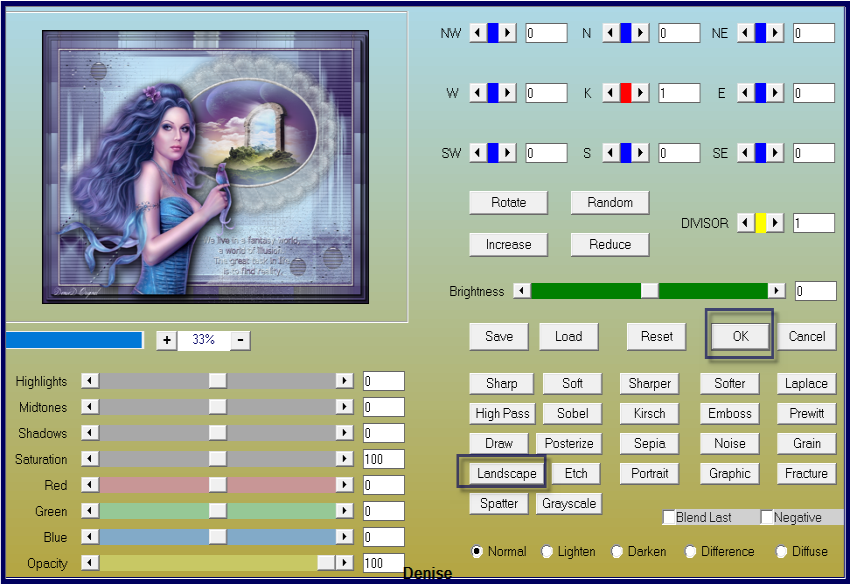
Effects/Plugins/AAA Filters/Custom/Landscape as follows:
File/Export/JPEG
Optimiser/Compression Value 20
I
hope you have enjoyed
this tutorial
A
big thank you to the ladies who test my Tutorials
TESTERS'
RESULTS
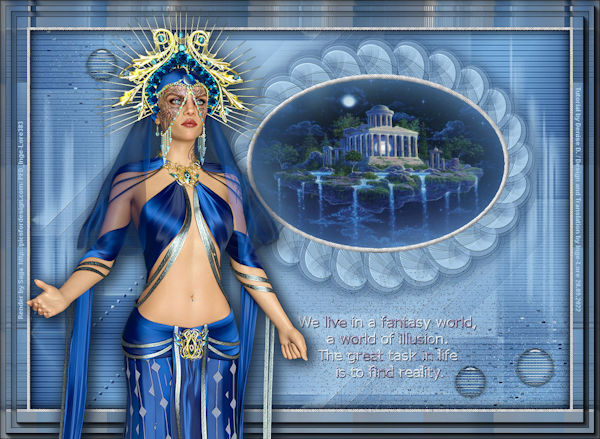
INGE-LORE
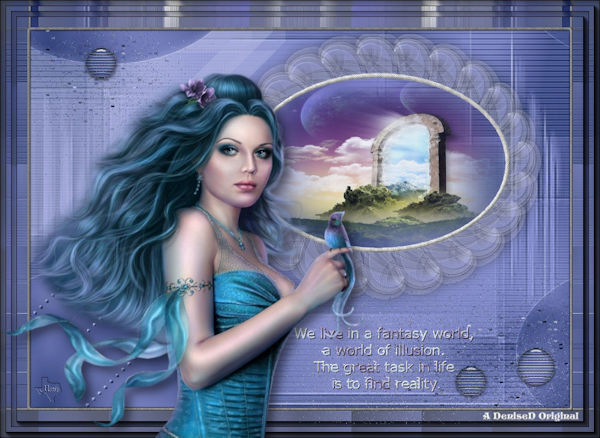
MARIE
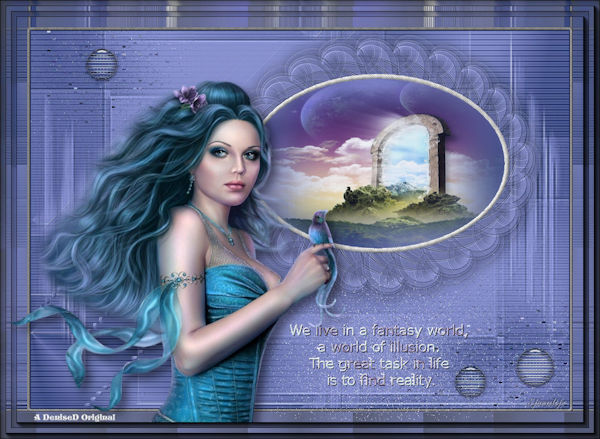
SJOERDTJE
MEMBERS VERSIONS:
http://escapingtopsp2.altervista.org/FantasyMembersVersions/FantasyMembersVersions.html
https://escapingtopsp2.blogspot.com/
DeniseD
2022
All Rights Reserved
Designed and Maintained by ESCAPING TO PSP GROUP
|
|
|
|