Tutorial 2017
This
tutorial is written by
Denise D. on 16th November, 2013
from
my own ideas.
Any
resemblance to other tutorials is
co-incidental and unintentional.
You
may share my tutorials with other
groups.
All I ask is that you advise me
and
credit for the tutorial is given to me and linked to
http://escapingtopsp2.altervista.org/Home/homeb.html
Please
do not upload any of my completed Tutorial images onto sites
such as Fotki, Pinterest, Photobucket or similar
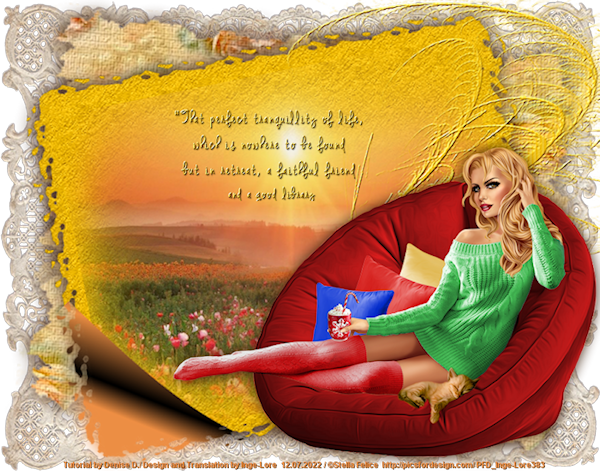
QUIET
TIME
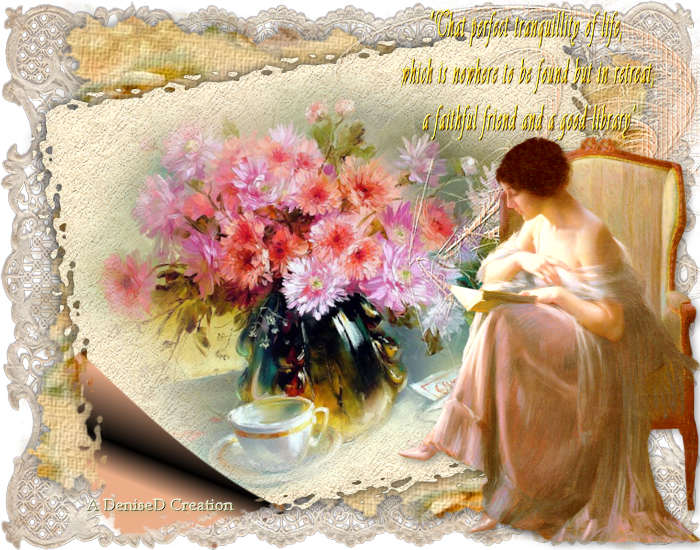
http://escapingtopsp2.altervista.org/QuietTime/QuietTime.html

Thank you Inge-Lore for this German translation

Thank you for this Portugese translation

Click on the Box to download Supplies
To print click on Printer

Supplies
Images:
Vintage Paper
Lace Card Back 4 by Donna.psp
You can join this Group at:
https://groups.yahoo.com/neo/groups/TubesandMistsbyDonna/info
Still_Life_Tsl7_Montana_Kate_Mist.pspimage
You can join this Group at:
https://groups.yahoo.com/neo/groups/montanakates-mists-only/info
JER_Enjolras_Delfin_Young_Woman_Reading_By_A_Window.psp
You can join this Group at:
https://groups.yahoo.com/neo/groups/TagalongTubes/info
Mask:
cat023
Narah_mask_Abstract126.jpg
Pattern:
D.D.YellowRoses2.jpg
Brush:
D.D.quiet.time
Copy of text
Selection:
D.D.Quiet.Time.PSPSelection
Plugins
Eye Candy 3.0
Eye Candy 4000
Filters Unlimited 2.0
Found here:
 and and 
Notes:
This Tutorial was originally created
in PSP
X5 but reworked in Corel 2019
.... other
versions may need adjustment
Some of the graphics may be from Free
to Use sites or Share
Groups.
If you are the creator of one of these
please let me know
so that appropriate credit can be given.
No infringement of
copyright is intended or intentional.
Before opening PSP, download plugins
and install
Some
helpful information:
You can change the blend mode, opacity and drop shadow, as
well as colourise
the materials,
according to the tubes/colours you are using.
When applying the Resize with the All Layers option checked, this will
be
informed in the tutorial,
otherwise, apply the resize with this option unchecked.
Remember always to save your work.
Whenever you reduce an image, apply Adjust/Sharpness/Sharpen, to
maintain the
sharpness of the image.
Some tools or features have other names in earlier versions of the PSP.
http://escapingtopsp2.altervista.org/Home/homeb.html

Please
Note: Offset
settings provided in this tutorial may vary according to size of your
image.
Please
adjust to suit.
The
settings remain the same throughout this Tutorial unless otherwise
stated.
Set your Foreground colour to #ecae88
Set your Background colour to #ffedce
Step One:
Place Pattern in PSP Pattern Folder
Place Mask in PSP Mask
Folder
Export Brush to PSP
Brush Folder
Open graphics in PSP, duplicate (Shift
D) and close the original.
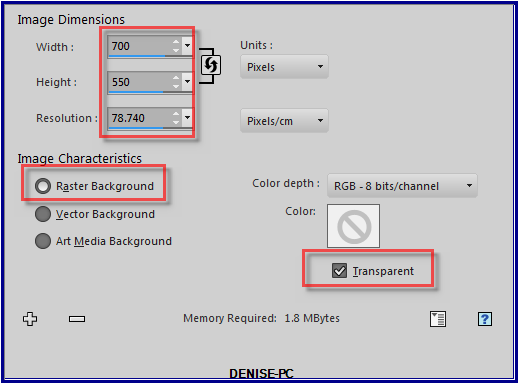
File/New/New Image 700 pixels x 550
pixels as follows:
Selections/Select
All
Maximise Vintage Paper Lace Card Back 4 by Donna.psp
Edit/Copy Edit/Paste into Selection
Adjust/Sharpness/Sharpen
Selections/Select None
Step Two:
Layers/New Raster Layer
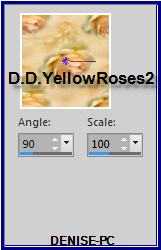
Change Foreground Colour to Pattern D.D.YellowRoses2.jpg as follows:
Flood fill with Pattern
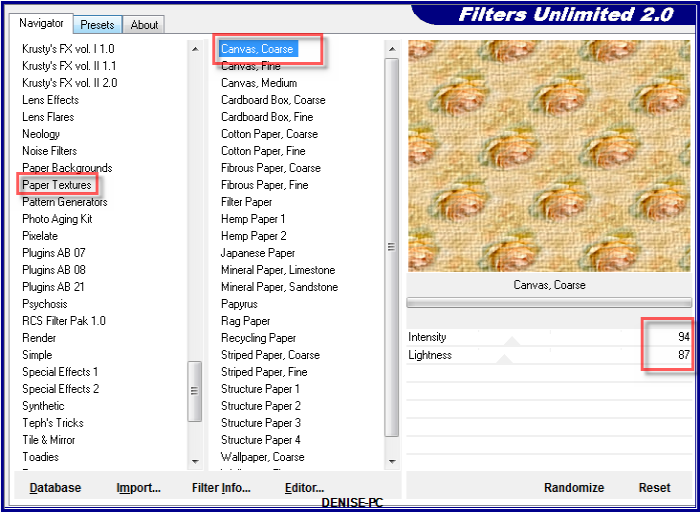
Effects/Plugins/Filters Unlimited 2.0/Paper Textures/Canvas, Coarse as
follows:
Step Three:
Layers/Load/Save
Mask/Load Mask cat023 from Disk as follows:
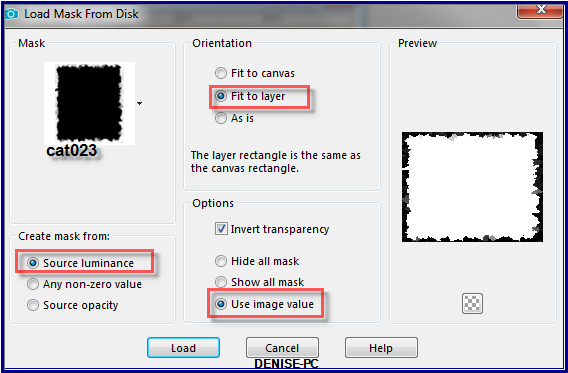
Layers/Merge/Merge Group
Image/Resize/90% as follows:
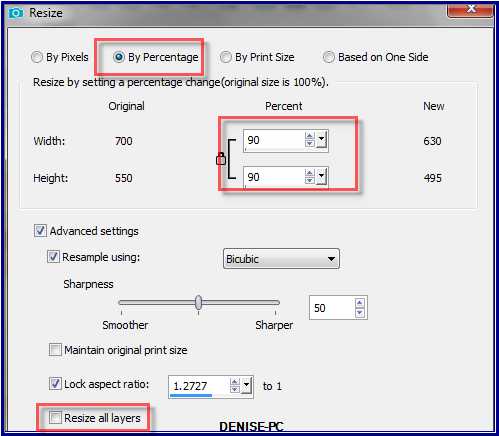
Adjust/Sharpness/Sharpen
Step Four:
Effects/Plugins/Eye
Candy 3.0/Drop Shadow as follows:
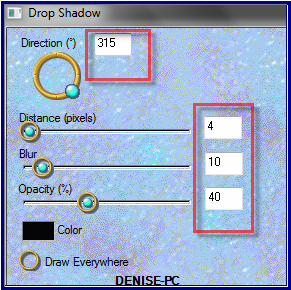
OR
Effects/Plugins/Eye Candy 4000/Shadowlab as follows:
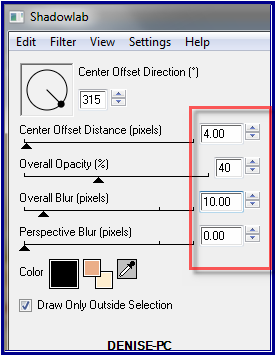
Repeat Drop Shadow/Shadowlab/Direction 135
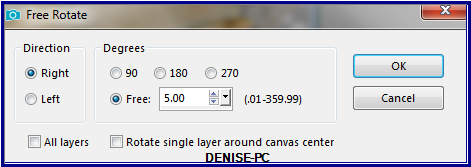
Image/Free Rotate/5 degrees/Right as follows:
Layers/Merge/Merge VISIBLE
Step Five:
Layers/New Raster Layer
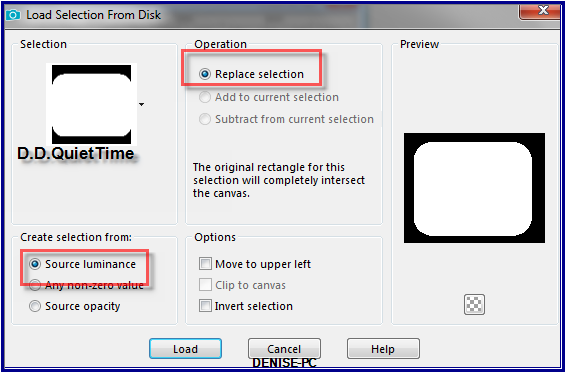
Selections/Load/Save Selection/Load Selection D.D.QuietTime from Disk
as follows:
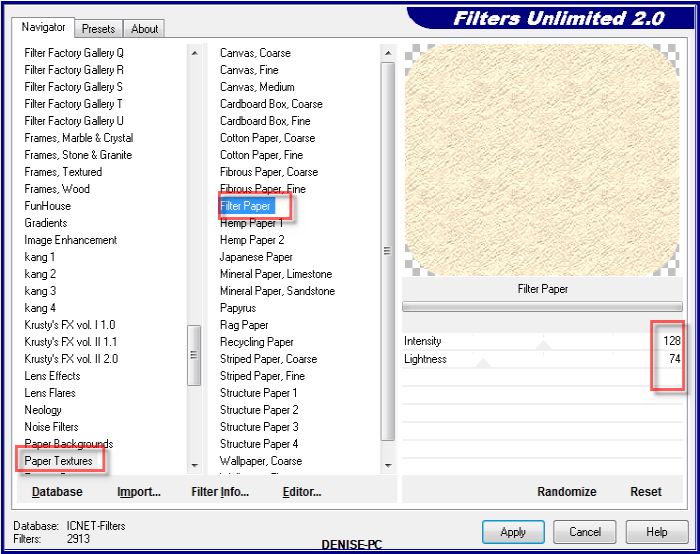
Effects/Plugins/Filters Unlimited 2.0/Paper Textures/Filter Paper as
follows:
Keep Selected
Step Six:
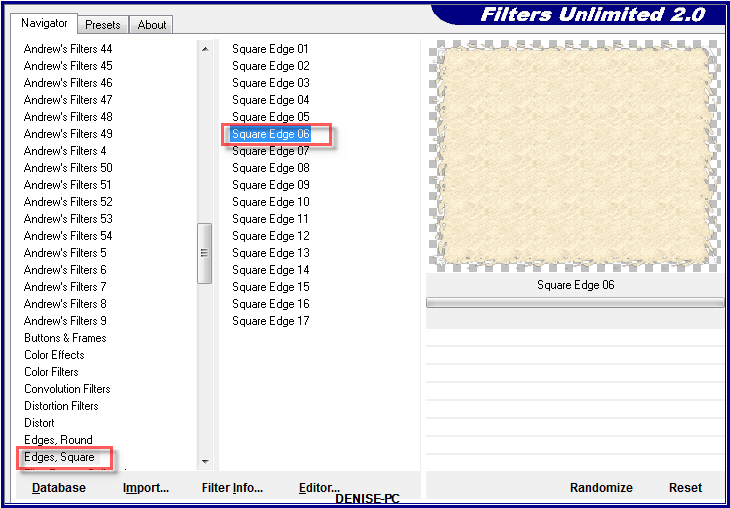
Effects/Plugins/Filters Unlimited 2.0/Edges, Square Edge 06 as follows:
Image/Free Rotate/10 Degrees/Left
Effects/Plugins/Eye Candy 3.0/Drop Shadow
OR
Effects/Plugins/Eye Candy 4000/Shadowlab
Repeat Drop Shadow/Shadowlab/Direction 314
Step Seven:
Maximise
Still_Life_Tsl7_Montana_Kate_Mist.pspimage
Edit/Copy Edit/Paste as New Layer
Image/Resize/80%
Adjust/Sharpness/Sharpen
Image/Free Rotate/10 Degrees Left
Layers/Merge/Merge Down
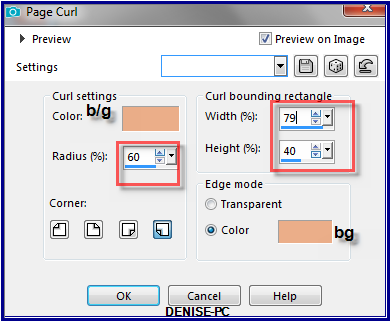
Effects/Image/Effects/Page Curl as follows:
Step Eight:
Layers/Merge/Merge
VISIBLE
Layers/New Raster Layer
Change Foreground back to Foreground Colour
Flood fill with Foreground Colour
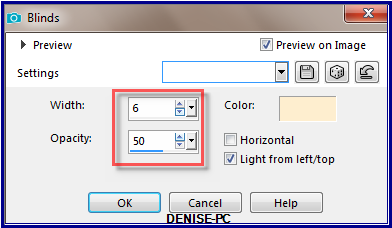
Effects/Texture Effects/Blinds as follows:
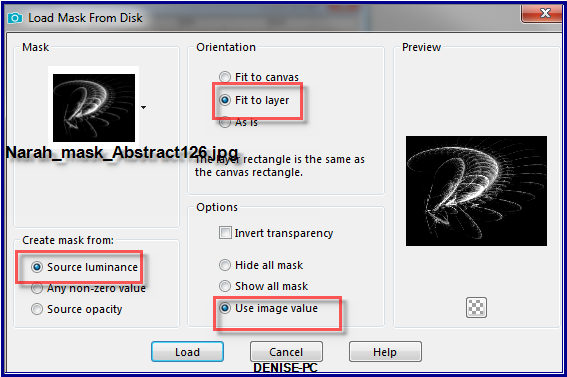
Layers/Load/Save Mask/Load Mask Narah_mask_Abstract126.jpg as follows:
Layers/Merge/Merge Group
Effects/Edge Effects/Enhance
Image/Resize/80%
Move to the top right corner
See my image for placement
Effects/Plugins/MuRa's Seamless/Emboss at Alpha/Default Settings
Step Nine:
MaximiseJER_Enjolras_Delfin_Young_Woman_Reading_By_A_Window.psp
Edit/Copy Edit/Paste as New Layer
Image/Mirror
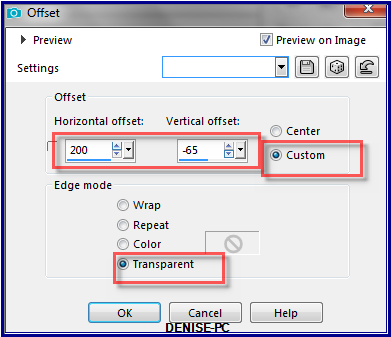
Effects/Image Effects/Offset as follows:
Effects/Plugins/Eye Candy 3.0/Drop Shadow
OR
Effects/Plugins/Eye Candy 4000/Shadowlab
Step Ten:
Layers/New Raster Layer
Select Paint
Brush/D.D.quiet.time with the following settings:


Change Background to #bb9513
Using the right side of the Mouse, click twice
(see my image for placement)
Adjust/Sharpness/Sharpen
Effects/Plugins/MuRa's Seamless Emboss at Alpha
(If you can't install the brush for some reason, I have included
in the supplies. a copy of the text)
Step Twelve:
Maximise Signature.png
Edit/Copy Edit/Paste as New Layer
Place at bottom of Layer
Layers/Merge/Merge
Visible
Layers/New Raster Layer
Add
your Watermark
Layers/Merge
All Flatten
File/Export/PNG
I hope you have enjoyed
this tutorial
A
big thank you to the ladies who test my Tutorials
INGE-LORE
| | | |