0_b60f1_84403d85_S.png Obtained through Group Shares.
If this image was created by you, please let me know
so that appropriate credit can be given. Bump
Map:
Corel_02_007.PspImage Usually
this is supplied with PSP
but if not install into Bump Files in your PSP Files Folder
Font: Old English TextMT
Plugins:
Alien Skin Eye Candy 3.0
OR
Alien Skin Eye Candy 4000 Filters Unlimited 2.0
MuRa's Seamless Found here:
AND
Notes: This Tutorial was created in Paint
Shop Pro X5 but reworked in Corel Paint Shop Pro 2019
.... other
versions may need adjustment Some of the graphics may be from Free
to Use sites or Share
Groups. If you are the creator of one of these
please let me know
so that appropriate credit can be given. No infringement of
copyright is intended or intentional. Before opening PSP, download plugins
and install Please
Note: Offset
settings provided in this tutorial may vary according to size of your
image. Please
adjust to suit. The
settings remain the same throughout this Tutorial unless otherwise
stated. Set your Foreground colour to #b40026 Set your Background colour to #893382
Step One: Place Bump Map in PSP Bump Folder
Place Pattern in PSP Pattern Folder
Place Selections in PSP Selection Folder
Place Texture in PSP Texture Folder
Install Font
Open Graphics AND Masks in PSP,
duplicate (Shift
D) and close the original.
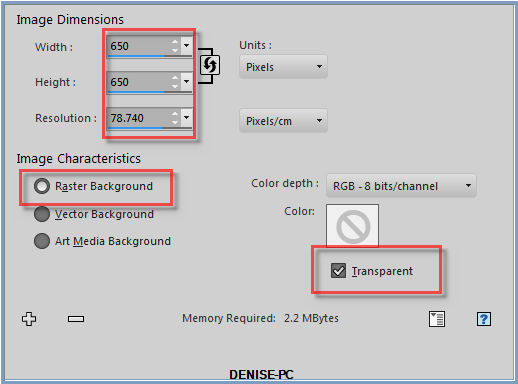
File/New/New Image 650 pixels x 650
pixels as follows:
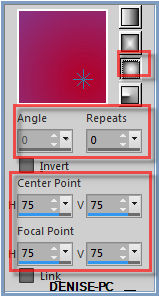
Change
Foreground Colour to
Foreground/Background Sunburst Gradient as follows:
Flood fill with Gradient
Step Two:
Effects/Plugins/Filters Unlimited 2.0/Paper Textures/Striped Paper,
Fine as follows:
Effects/Edge Effects/Enhance
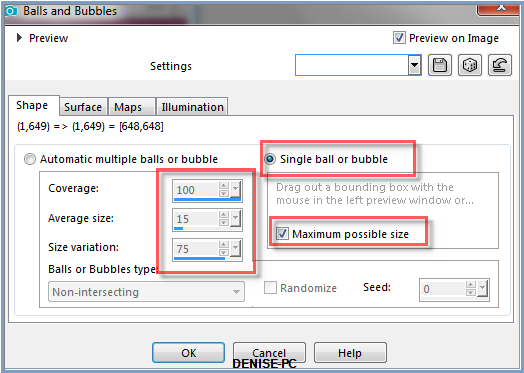
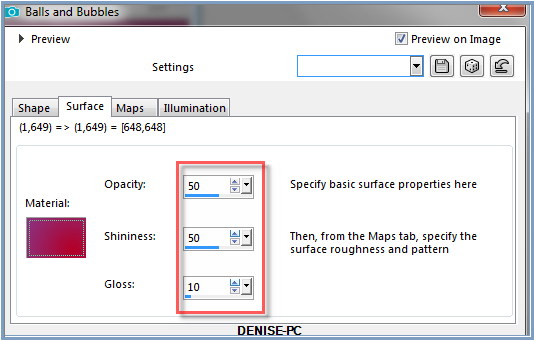
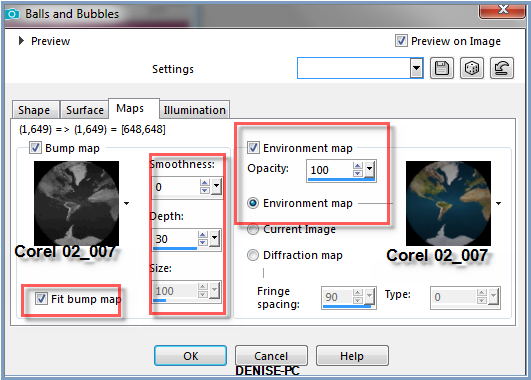
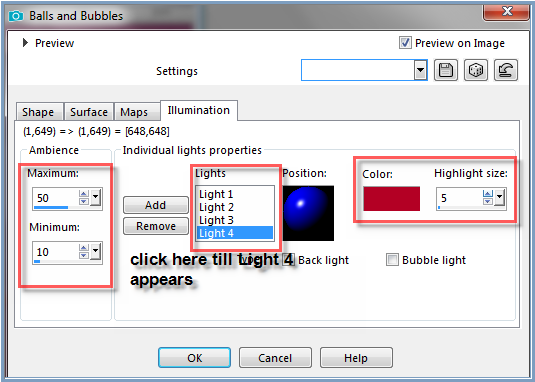
Step Three: Effects/3D Effects/Artistic
Effects/Balls and Bubbles as follows:
Layers/Duplicate
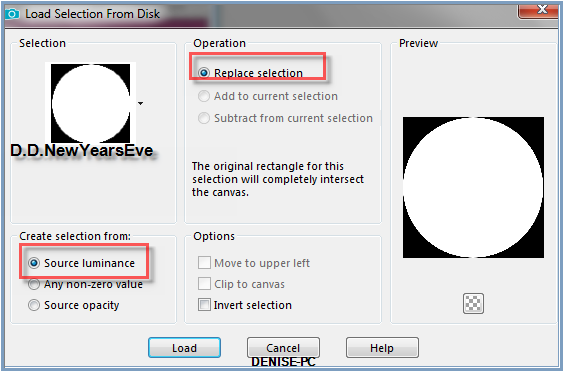
Selections/Load/Save Selection from Disk D.D.NewYearsEve as follows:
Selections/Invert
Select Raster 1
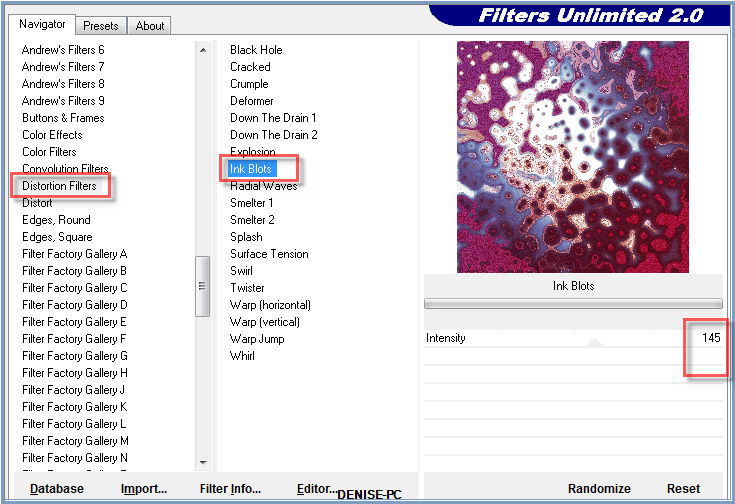
Effects/Plugins/Filters Unlimited 2.0/Distortion Filters/Ink Blots as
follows:
Step Four:
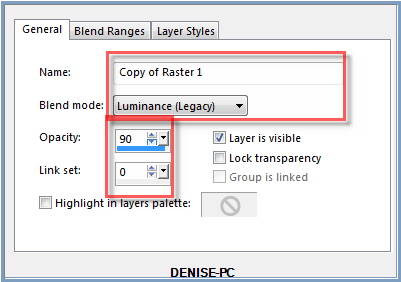
Select Copy of Raster 1 Layer
Using the right side of the Mouse, Double click on this layer and
change Opacity and
Blend Mode as follows:
Selections/Select None Image/Add
Borders/1 pixels/Black Image/Add Borders/5 pixels/White
Magic Wand with the following settings
Select
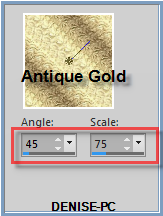
Border with Magic Wand Change Background Colour to Pattern antique_gold as follows:
Flood
Fill with Pattern
Adjust/Sharpness/Sharpen
Selections/Select None
Image/Add Borders/1 pixel/Black
Step Five:
Image/Add Borders/10 pixels/White
Select with Magic Wand
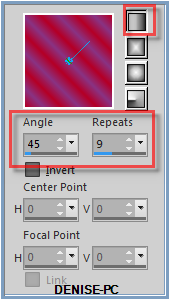
Change Foreground Gradient to Foreground/Background/Linear Gradient as
follows:
Flood fill with Gradient
Selections/Select None
Image/Add Borders/1 pixel/Black Image/Add
Borders/5 pixels/White
Select with Magic Wand
Flood Fill with Background Pattern
Adjust/Sharpness/Sharpen
Selections/Select None
Image/Add Borders/1 pixels/Black
Step Six: Selections/Select
All
Selections/Modify/Contract 24 pixels
Selections/Invert
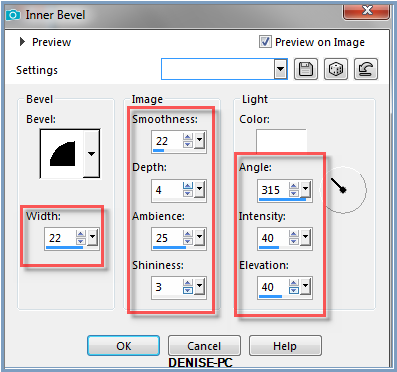
Effects/3D Effects/Inner Bevel as follows
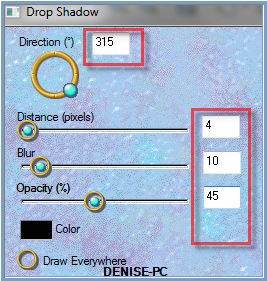
Effects/Plugins/Eye
Candy 3.0/Drop Shadow as follows:
OR
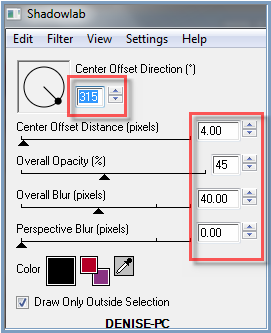
Effects/Plugins/Eye Candy 4000/Shadowlab as follows:
Repeat Drop Shadow/Shadowlab/Direction 135 Edit/Copy
Edit/Paste as a New Image
Minimise for the moment
Selections/Select None
Step Seven:
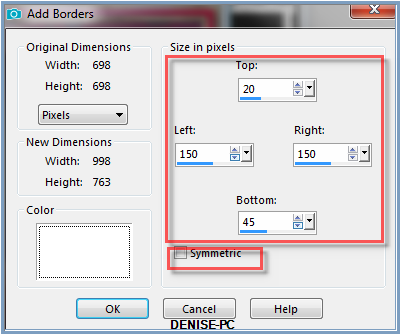
Image/Add Borders as follows:
Select
with Magic Wand
Flood Fill with Background Pattern
Layers/New Raster Layer
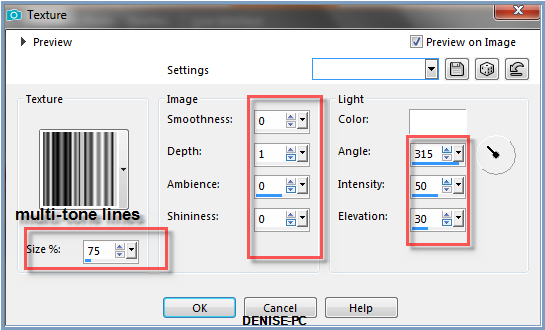
Flood Fill with Gradient Effects/Texture Effects/Texture as follows:
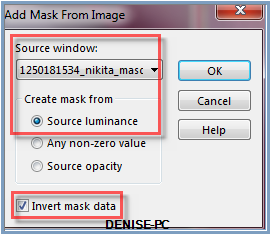
Layers/New Mask Layer/From Image(find Mask
1250181534_nikita_masques.jpg)
as follows:
Layers/Merge/Merge Group
Effects/Edge Effects/Enhance More
Selections/Select None
Step Eight: Maximise
Frame Duplicate
Edit/Copy Edit/Paste as New
Layer
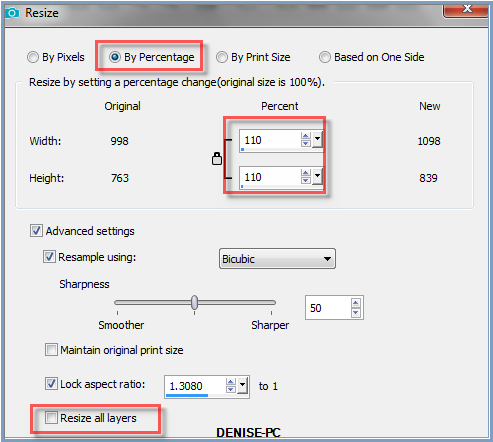
Image/Resize 110%as
follows:
Adjust/Sharpness/Sharpen
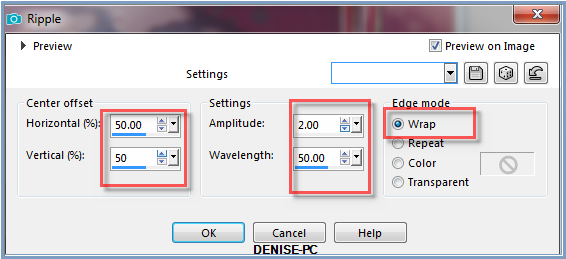
Effects/Distortion Effects/Ripple as follows;
Step Nine:
Image/Add Borders/1 pixels/Black Image/Add
Borders/10 pixels/White (tick Symmetric box)
Select with Magic Wand
Flood Fill with Background Pattern
Adjust/Sharpness/Sharpen
Selections/Select None
Image/Add Borders/1 pixel/Black
Image/Add Borders/15 pixels/White
Select with Magic Wand
Change Foreground Gradient back to Linear Gradient
Flood Fill with Gradient
Selections/Select None
Image/Add Borders/1 pixels/Black
Image/Add Borders/10 pixels/White
Flood Fill with Background Pattern
Adjust/Sharpness/Sharpen
Selections/Select None
Image/Add Borders.1 pixel/Black
Step
Ten: Select
All
Selections/Modify/Contract 39 pixels
Selections/Invert
Effects/3D Effects/Inner Bevel
Effects/Plugins/Eye Candy 3.0/Drop Shadow
OR
Effects/Plugins/Eye Candy 4000/Shadowlab
Repeat Drop Shadow/Shadowlab/Direction 315
Selections/Select None
Maximise 014_CFT_2013.pspimage Layers/New
Mask Layer/From Image(find Mask 1217491302_masques.jpg) Untick Invert Mask Data Box Layers/Merge/Merge
Group
Edit/Copy Edit/Paste as New
Layer
Image/Resize/55%
Adjust/Sharpness/Sharpen
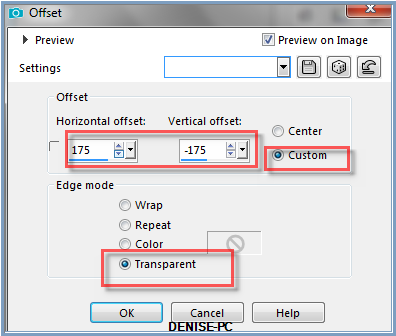
Effects/Image Effects/Offset as follows:
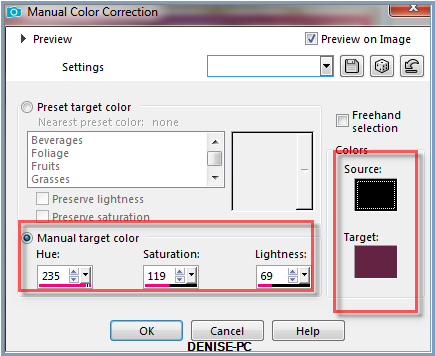
Manual Colour Correction Tool as follows:
Change Opacity to 60%
Step Eleven: Maximise
calguisDoroninaTatianaSweetMagic02102011.jpg
Edit/Copy Edit/Paste as New
Layer
Image/Mirror
Image/Resize 65%
Adjust/Sharpness/Sharpen
Effects/Image Effects/Offset as follows:
Effects/Plugins/Eye Candy 3.0/Drop Shadow
OR
Effects/Plugins/Eye Candy 4000
Step Twelve:
Text Tool with the following settings:
Settings
may vary according to your version of PSP
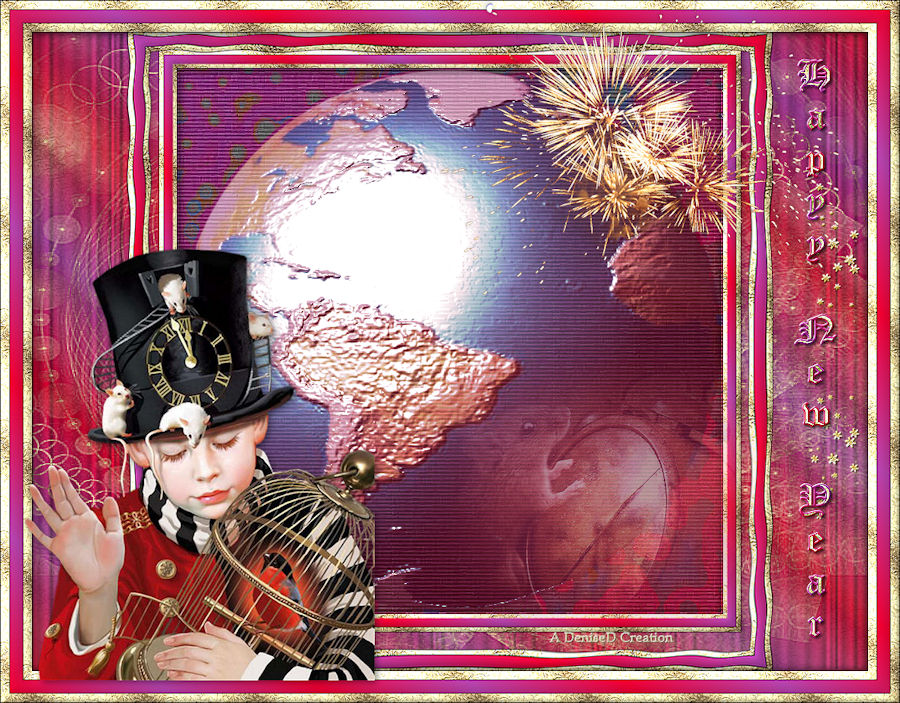
Write:
Happy New Year
Use the arrows on the text to adjust to fit (see my image)
Effects/Edge Effects/Enhance
Effects/Plugins/MuRa's Seamless/Emboss at Alpha/Default Settings
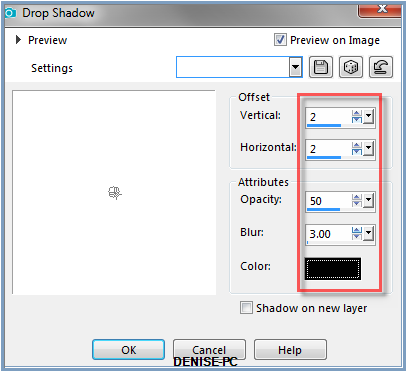
Effects/3D Effects/Drop Shadow as follows:
Step
Thirteen: Maximise
0_b60f1_84403d85_S.png
Edit/Copy Edit/Paste as New
Layer
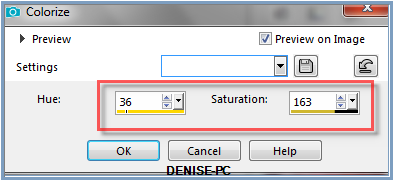
Adjust/Hue and Saturation/Colorize as follows:
Adjust/Sharpness/Sharpen More
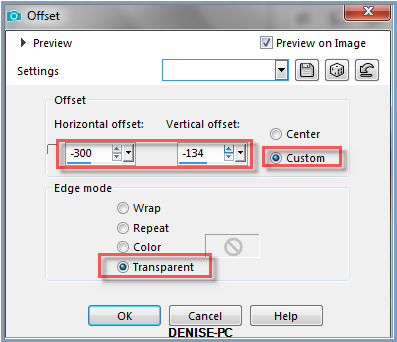
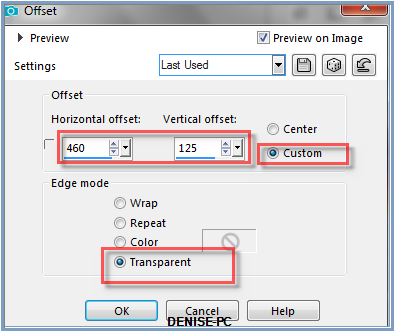
Effects/Image Effects/Offset as follows:
Layers/Arrange/Layers
Move Down
Layers/Duplicate
Image/Mirror/Flip OR Image/Flip
Layers/Merge/Merge Down
Effects/Plugins/MuRa's Seamless/Emboss at Alpha/Default Settings
Step Fourteen: Maximise
12283242563_divers_nikita.pspimage
Edit/Copy Edit/Paste as New
Layer
Image/Resize/75%
Adjust/Sharpness/Sharpen
Image/Mirror Horizontal Or Image/Mirror
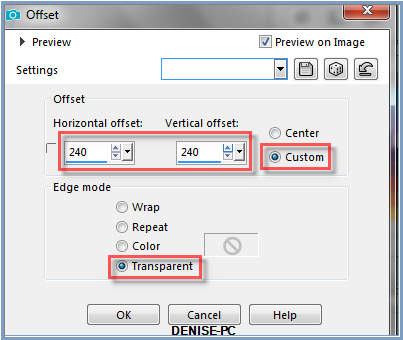
Effects/Image Effects/Offset as follows:
Layers/New
Raster Layer
Add
your Watermark
Layers/Merge
All Flatten
Image/Resize/900
pixels wide - height will adjust itself
File/Export/JPEG
Optimiser/Compression Value 20
I hope you have enjoyed
this tutorial A
big thank you to the ladies who test my Tutorials TESTERS'
RESULTS