Tutorial 2017
This Tutorial was written by
Denise D on 29th January, 2016
from my own ideas.
Any resemblance to any other tutorial is purely co-incidental
and unintentional.
You may share my Tutorial with others.
All I ask that permission is asked and credit given to the links
below.
http://escapingtopsp2.altervista.org/Home/homeb.html
and
https://groups.google.com/forum/#!forum/escaping-to-psp2
Please do not upload any of my
completed Tutorial images onto sites
such as Fotki, Pinterest,
Photobucket or similar
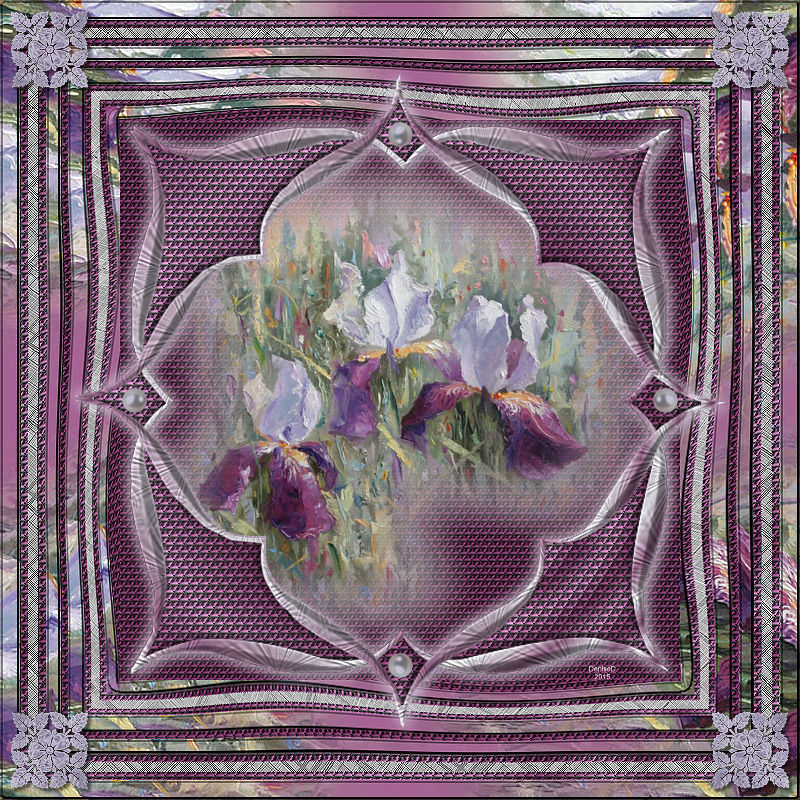
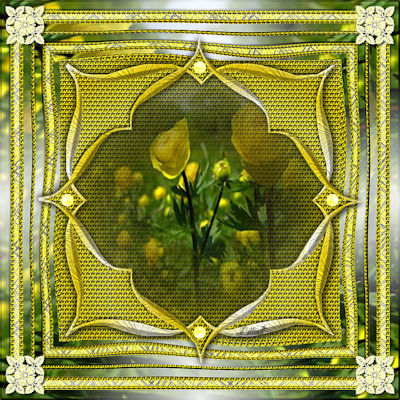
MY FAVOURITE FLOWER
![]() To follow Tutorial, hold down pencil - left click to move it
To follow Tutorial, hold down pencil - left click to move it


To print click on Printer

Double Click on the Box to download
Supplies
Images:
MKM 2016 JAN SERIES ©OLEG TROFIMOV_T3
You can join her group at:
https://groups.yahoo.com/neo/groups/montanakates-mists-only/info
Bracket
designer+accents+shimmers+55+Image21
jf-single-pearls
Obtained through Internet
If this image was created by you,
please let me know
so that appropriate credit can be
given.
Pattern:
Pattern 14
Texture:
JC_045
Plugins:
Simple
Eye Candy 3.0
Found here:
http://www.chezviolette17.com/02filtres/Filtres.htm
http://janaly.com/Filtres/Filtre.html
http://www.adromaplace.nl/cert/Filtercode%60s.htm
Notes:
This Tutorial was created in PSP
X7....
other versions may need adjustment
Some of the graphics may be from Free
to Use sites or Share Groups.
If you are the creator of one of these
please let me know so that appropriate credit can be given.
No infringement of copyright is
intended or intentional.
Before opening PSP, download plugins
and install
Place Pattern in PSP Pattern Folder
Place Texture in PSP Texture Folder
Open graphics in PSP, duplicate (Shift
D) and close the original.
The
settings remain the same throughout this Tutorial unless otherwise
stated.
Set your Foreground colour to #d5d6db
Set your Background colour to #995d89
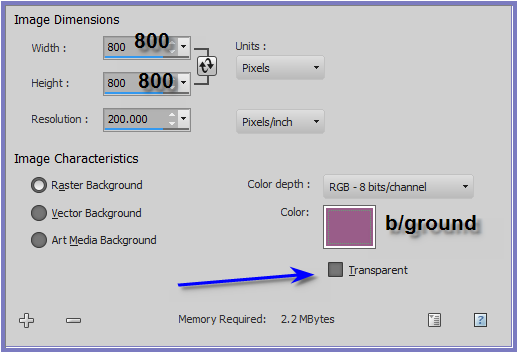
Step One:
File/New/New Image 800 pixels x 800
pixels as follows:
Step Two:
Selections/Select All
Maximise MKM 2016 JAN SERIES ©OLEG TROFIMOV_T3
Edit/Copy
Edit/Paste into Selection
Effects/Plugins/Simple/Blintz
Selections/Modify/Contract 20 pixels
Selections/Invert
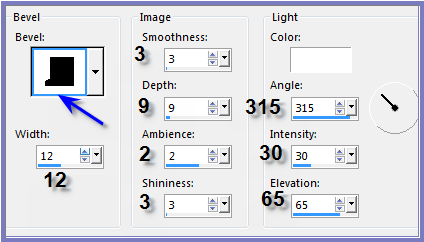
Effects/3D Effects/Inner Bevel as
follows:
Selections/Invert
Layers/New Raster Layer
Change Foreground Colour to
Foreground/Background/Sunburst Gradient as follows:

Flood Fill with Gradient
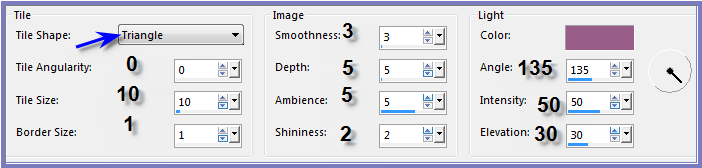
Effects/Texture Effects/Tiles/Triangle
as follows:
Selections/Modify/Contract 8 pixels
Edit/Clear
Step Three:
Layers/New Raster Layer
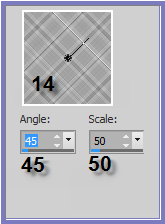
Change Background Colour to Pattern14
as shown below:
Flood Fill with Pattern
Effects/Edge Effects/Enhance
Selections/Modify/Contract 10 pixels
Edit/Clear
Layers/New Raster Layer
Flood Fill with Gradient
Effects/Texture Effects/Tiles/Triangle
Selections/Modify/Contract 8 pixels
Edit/Clear
Selections/Modify/Contract 15 pixels/
Select Background Layer
Edit/Clear
Effects/Texture Effects/Tiles/Triangle
Step Four:
Selections/Modify/Select Selection
Borders as follows:

Effects/3D Effects/Inner Bevel
Selections/Select None
Layers/Merge/Merge All Flatten
Step Five:
Selections/Select All
Selections/Modify/Contract 60 pixels
Selections/Invert
Layers/Duplicate
Selections/Select None
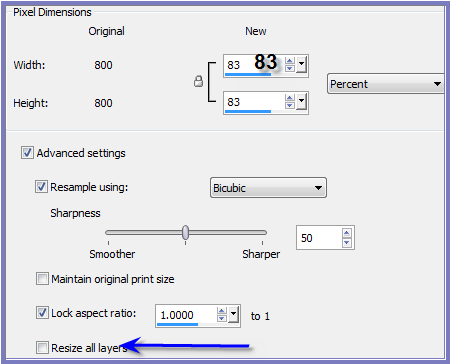
Image/Resize/83% as follows:
Layers/Merge/Merge Down
Step Six:
Maximise Bracket
Edit/Copy
Edit/Paste as New Layer
Image/Resize 120%
Adjust/Sharpness/Sharpen
Selections/Select All
Selections/Float
Selections/Defloat
Layers/New Raster Layer
Flood Fill with Gradient
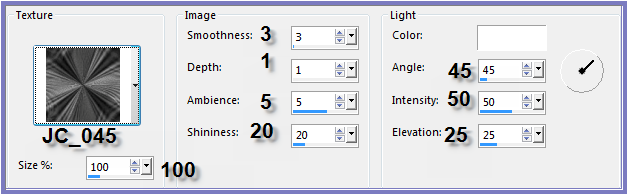
Effects/Texture Effects/Texture as
follows:
Adjust/Sharpness/Sharpen More
Effects/3D Effects/Inner Bevel same
settings as before but change the Bevel to No. 1
Selections/Select None
Layers/Duplicate
Image/Resize 85%
Adjust/Sharpness/Sharpen
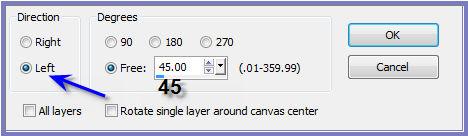
Image/Free Rotate 45 degrees Left as
follows:
Layers/Merge/Merge Down
Step Seven:
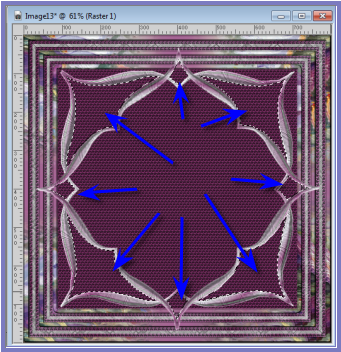
Magic Wand with Tolerance 10/Use all
layers UNTICKED/Anti-alias/Inside TICKED as follows:

Select the following areas:
Layers/New Raster Layer
Layers/Arrange/Move Down
Selections/Modify/Expand 3 pixels
Flood Fill with Gradient
Effects/Texture Effects/Tiles/Triangle
Effects/3D Effects/Inner Bevel BUT
change the Bevel to No 2
Selections/Select None
Step Eight:
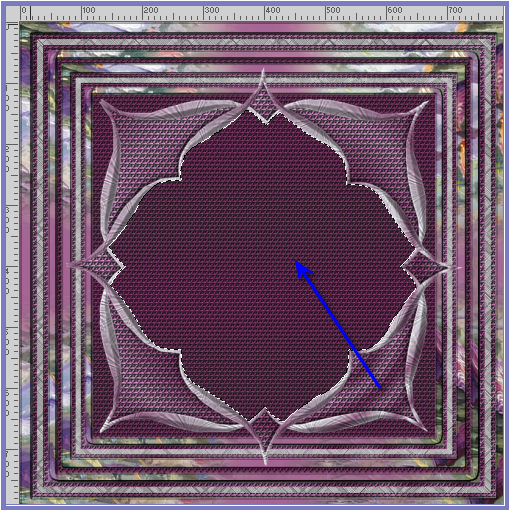
Select Raster 2
With Magic Wand select the centre of
frame as shown below:
Layers/New Raster Layer
Layers/Arrange/Move Down
Maximise MKM 2016 JAN SERIES ©OLEG
TROFIMOV_T3
Edit/Copy
Edit/Paste into Selection
Selections/Select None
Close off Background Layer
Layers/Merge/Merge Visible
Open Background Layer
Effects/Plugins/Eye Candy 3.0/Drop
Shadow as follows:
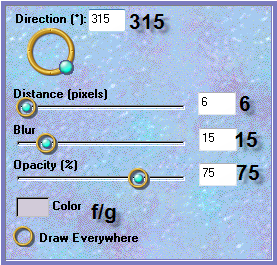
Repeat Drop Shadow Direction 135
Step Nine:
Maximise
designer+accents+shimmers+55+Image21
I chose Layer 9 - you can choose which
ever one you like
Edit/Copy
Edit/Paste as New Layer
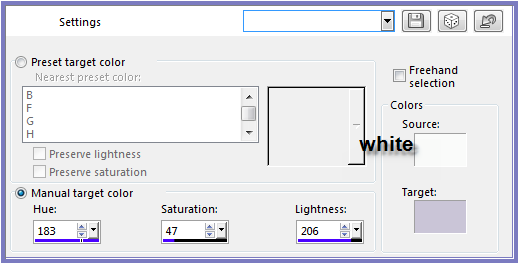
Manual Color Correction Tool as
follows:

With the following settings (or colour
of your choice)
If you don't have Manual
Color CorrectionTool installed go to
https://groups.yahoo.com/neo/groups/EscapingtoPSP/files
and download the tutorial as to how to
install it.
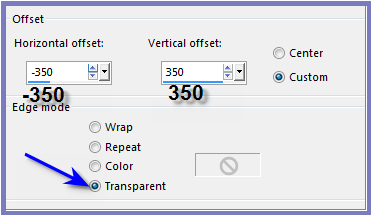
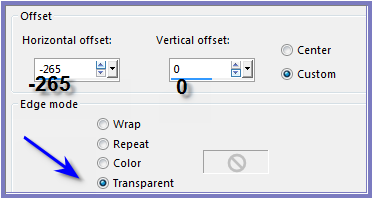
Effects/Image Effects/Offset as
follows:
Effects/Plugins/Simple/Top Left Mirror
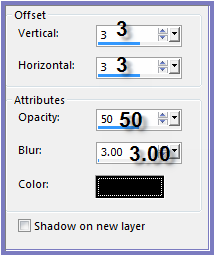
Effects/3D Effects/Drop Shadow as
follows:
Step Ten:
Maximise jf-single-pearls
I chose the middle pearl
Edit/Copy
Edit/Paste as New Layer
Manual Color Correction Tool (same
settings as before)
Effects/Image Effects/Offset as
follows:
Layers/Duplicate
Image/Mirror
Layers/Merge/Merge Down
Layers/Duplicate
Image/Free Rotate/Right 90 degrees
Step
Eleven:
Select Background Layer
Selections/Select All
Selections/Modify/Contract 120
pixels
Selections/Invert
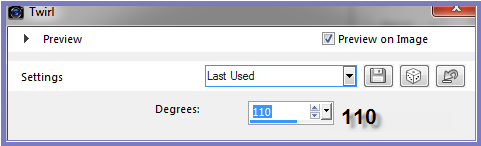
Effects/Distortion Effects/Twirl
as follows:
Adjust/Sharpness/Sharpen
Layers/New Raster Layer
Add your Watermark
Layers/Merge All Flatten
File/Export/JPEG
Optimiser/Compression Value 20
I
hope you have enjoyed this tutorial
A big thank you to Alice
T,Annie, Betty, Elizabeth, Gisela, Lillian, Sjoertdje, Shirley and Jani,
the ladies who test my Tutorials
TESTERS' RESULTS
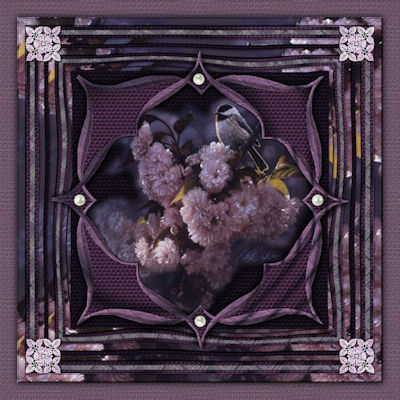
BETTY
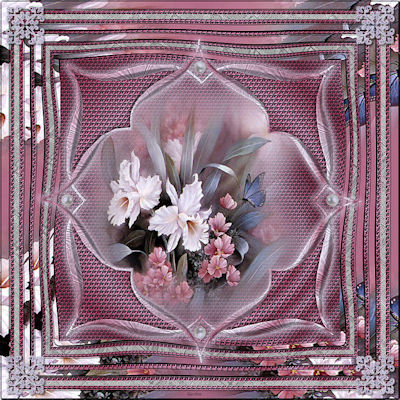
SHIRLEY

ELIZABETH
LILLIAN
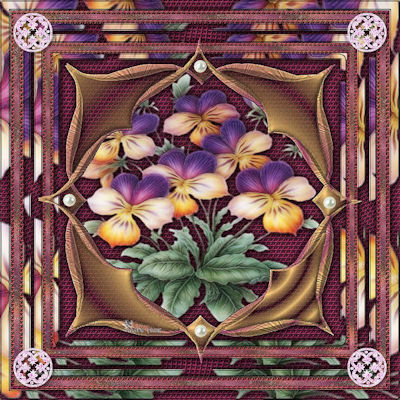
JANI
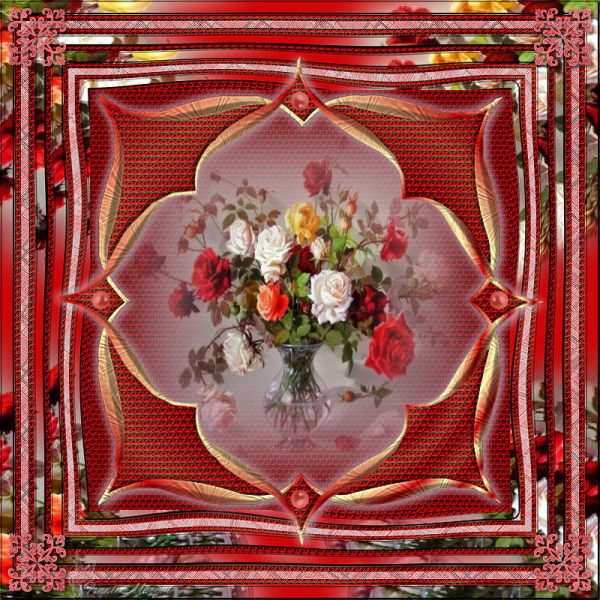
FRANIE MARGOT
FOR
OTHER VERSIONS OF THE TUTORIAL
PLEASE
GO TO:
https://goo.gl/photos/aRgxZTvXUTsreBL7A
DeniseD
2017
All Rights Reserved
Designed and Maintained by ESCAPING TO PSP GROUP
|
|
|
|
|
|