Tutorial 2017
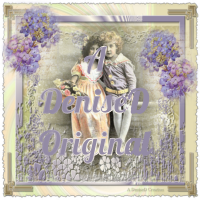
This
tutorial is written by
Denise D. on 14th March, 2014
from
my own ideas.
Any
resemblance to other tutorials is
co-incidental and unintentional.
You
may share my tutorials with other
groups.
All I ask is that you advise me
and
credit for the tutorial is given to me and linked to
http://escapingtopsp2.altervista.org/Home/homeb.html
Please
do not upload any of my completed Tutorial images onto sites
such as Fotki, Pinterest, Photobucket or similar
in
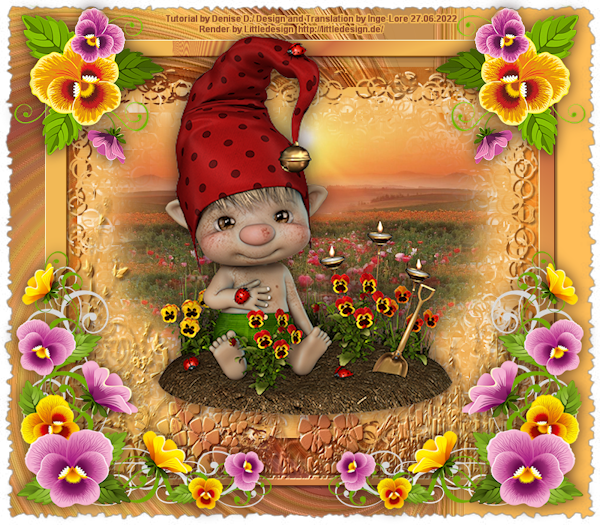
a flower garden
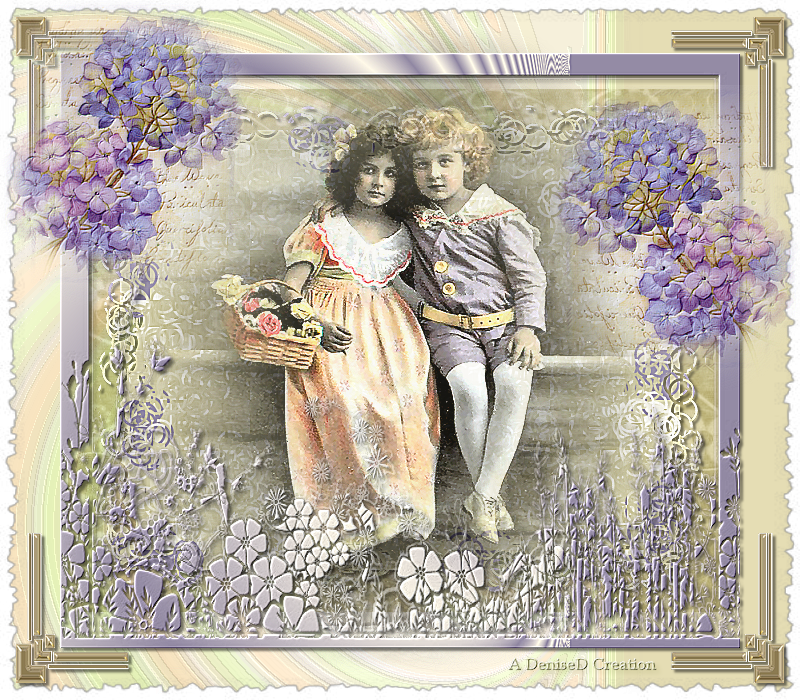
http://escapingtopsp2.altervista.org/InAFlowerGarden/InAFlowerGarden.html
 Thank
you Inge-Lore for this German Translation
Click on the Box to download Supplies

To print click on Printer
![]()
Supplies
Images:
Kids_0032.psp
You can join this group at:
http://tech.groups.yahoo.com/group/Creative_for_fun/
Misted_Purple_Hydrangea_RM.psp
- Inspirational Mists by Roxanne
Obtained through Group Shares.
If this image was created by you, please let me know
so that appropriate credit can be given.
Paper:
003.jpg
Mask:
c25.masques 2014.inedit122
Obtained through Group Shares
Corner:
8goldconrer1a.tub
Plugins:
Mehdi
Simple
Filters Unlimited
2.0
MuRa's Seamless
FM Tile Tools
This image was obtained from the
Internet
If you are the owner of this
image, please contact me
so that credit can be given to
you
Found here:
 AND AND

Notes:
This Tutorial was originally created
in PSPX5 and reworked
in Corel Paint Shop Pro 2019.... other
versions may need adjustment
Some of the graphics may be from Free
to Use sites or Share
Groups.
If you are the creator of one of these
please let me know
so that appropriate credit can be given.
No infringement of
copyright is intended or intentional.
Before opening PSP, download plugins
and install
You
can change the blend mode, opacity and drop shadow, as
well as colourise
the materials,
according to the tubes/colours you are using.
When applying the Resize with the All Layers option checked, this will
be
informed in the tutorial,
otherwise, apply the resize with this option unchecked.
Remember always to save your work.
Whenever you reduce an image, apply Adjust/Sharpness/Sharpen, to
maintain the
sharpness of the image.
Some tools or features have other names in earlier versions of the PSP.
http://escapingtopsp2.altervista.org/Home/homeb.html

Please
Note: Offset
settings provided in this tutorial may vary according to size of your
image.
Please
adjust to suit.
The
settings remain the same throughout this Tutorial unless otherwise
stated.
Set your Foreground colour to #fff8e7
Set your Background colour to #e2ddb4
Step One:
Place Mask in PSP Mask
Folder
Open graphics in PSP, duplicate (Shift
D) and close the original.
Change Foreground to
Foreground/Background Sunburst Gradient as follows:
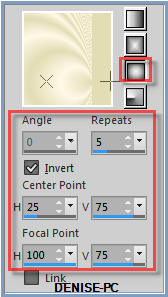
File/New/New Image 800 pixels x 700
pixels as follows:
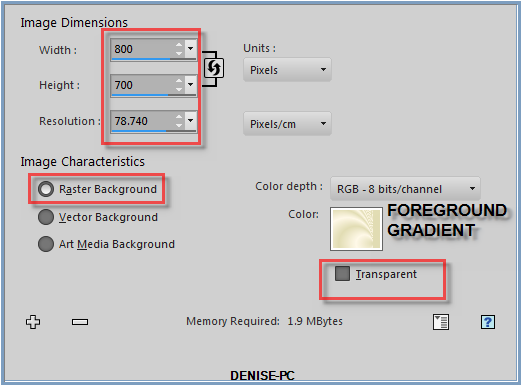
To find Gradient, left click onthe
Colour Box and select the Gradient from the Materials Properties
If you don't have this option,
just open a New Image and Flood Fill with Gradient
Step
Two:
Effects/Texture Effects/Soft Plastic
as follows:
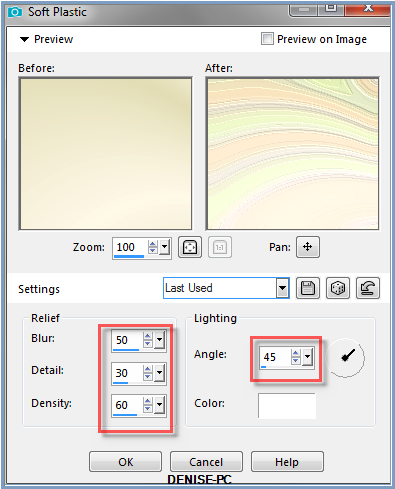
Effects/Texture Effects/Soft Plastic
as follows:
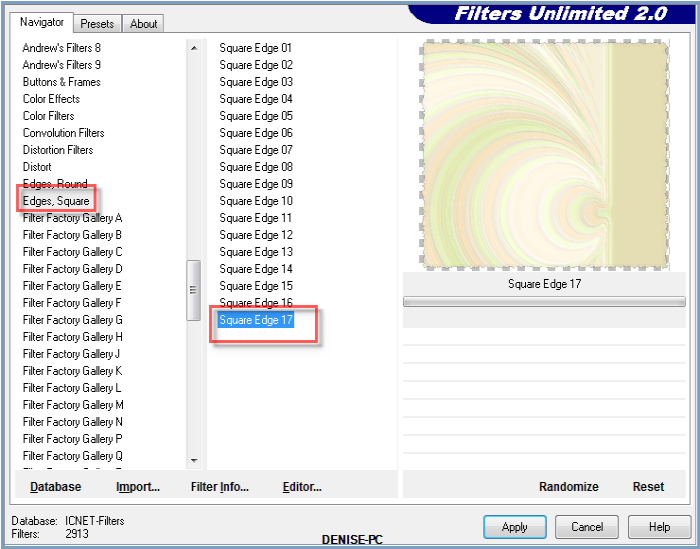
Step Three:
Maximise
003.jpg
Edit/Copy
Edit/Paste as a New Image
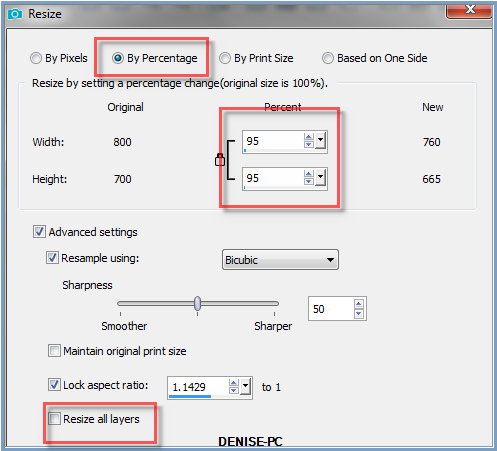
Image/Resize/95% as follows:
Adjust/Sharpness/Sharpen
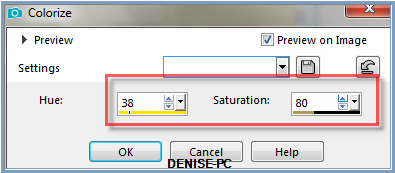
Adjust/Hue and Saturation/Colorize as follows:
Double
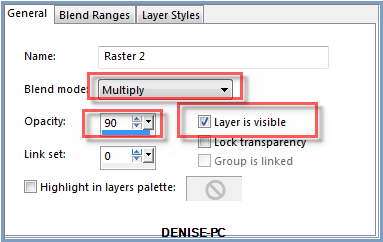
click on Raster 2
Change the Opacity and Blend Mode as follows:
Step
Four:
Change
Background Colour to #958ba5
Layers/New Raster Layer
Flood Fill with Gradient Colour
Image/Mirror/Horizontal OR Image/Mirror
Image/Resize/85%
Layers/Load/Save
Mask/Load Mask
c25.masques 2014.inedit122 from Disk as follows:
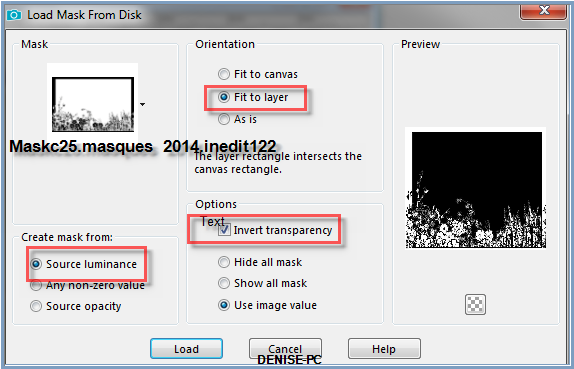
Adjust/Sharpness/Sharpen
Layers/Merge/Merge Group
Effects/Plugins/MuRa's Seamless/Emboss At Alpha/Default Settings
Effects/3D Effects/Drop Shadow as follows:

Step
Five:
Maximise 003.jpg
Edit/Copy Edit/Paste as New
Layer
Adjust/Hue and Saturation/Colorize
Image/Resize/80%
Layers/Arrange/Move Down
Effects/Plugins/Mehdi/Sorting Tiles as follows:
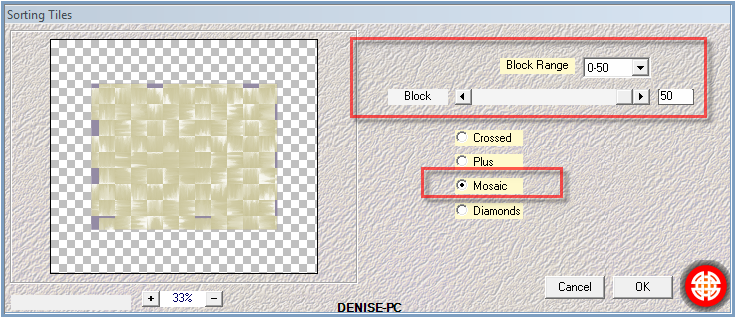 Effects/Plugins/Mehdi/Fur
2 as follows:
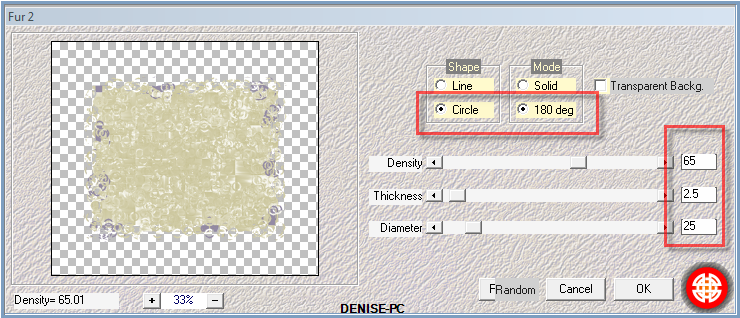
Adjust/Sharpness/Sharpen
More
Effects/3D Effects/Drop Shadow
Step Six:
Maximise Kids_0032.psp
Edit/Copy
Edit/Paste as New Layer
Adjust/Sharpness/Sharpen
Leave it where it is
Change Opacity to 85%
Maximise
8goldconrer1a.tub
Edit/Copy Edit/Paste as New
Layer
Image/Resize/75%
Adjust/Sharpness/Sharpen
Effects/Image Effects/Offset as follows:
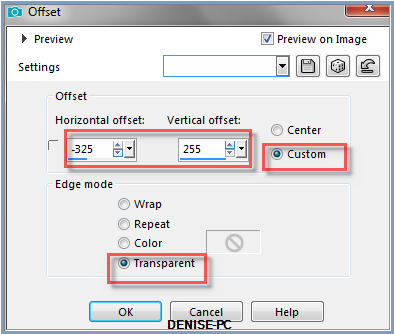
Effects/Plugins/Simple/Top Left Mirror
Effects/3D Effects/Drop Shadow
Layers/Merge/MERGE
VISIBLE
Step Seven:
Maximise
Misted_Purple_Hydrangea_RM.psp
Edit/Copy
Edit/Paste as New Layer
Image/Resize/80%
Layers/Arrange/Bring to Top
Adjust/Sharpness/Sharpen More
Effects/Image Effects/Offset as follows:

Layers/Duplicate
Image/Mirror
Using the Move Tool, move the image down a little bit. (see my image
for placement)
Layers/Merge/Merge Down
Effects/Plugins/FM Tile Tools/Blend Emboss/Default Settings
Step
Eight:
Maximise
Signature.png
Edit/Copy Edit/Paste as New Layer
Place at bottom of Layer
Layers/New
Raster Layer
Add your Watermark
Layers/Merge VISIBLE
File/Export/PNG Optimiser
I hope you have enjoyed
this tutorial
A
big thank you to the ladies who test my Tutorials
INGE-LORE
| | | |