Tutorial 2017
This
tutorial is written by
Denise D. on 21st February, 2014.
from
my own ideas.
Any
resemblance to other tutorials is
co-incidental and unintentional.
You
may share my tutorials with other
groups.
All I ask is that you advise me
and
credit for the tutorial is given to me and linked to
http://escapingtopsp2.altervista.org/Home/homeb.html
Please
do not upload any of my completed Tutorial images onto sites
such as Fotki, Pinterest, Photobucket or similar
FARMYARD
FRIENDS
VERSION 1
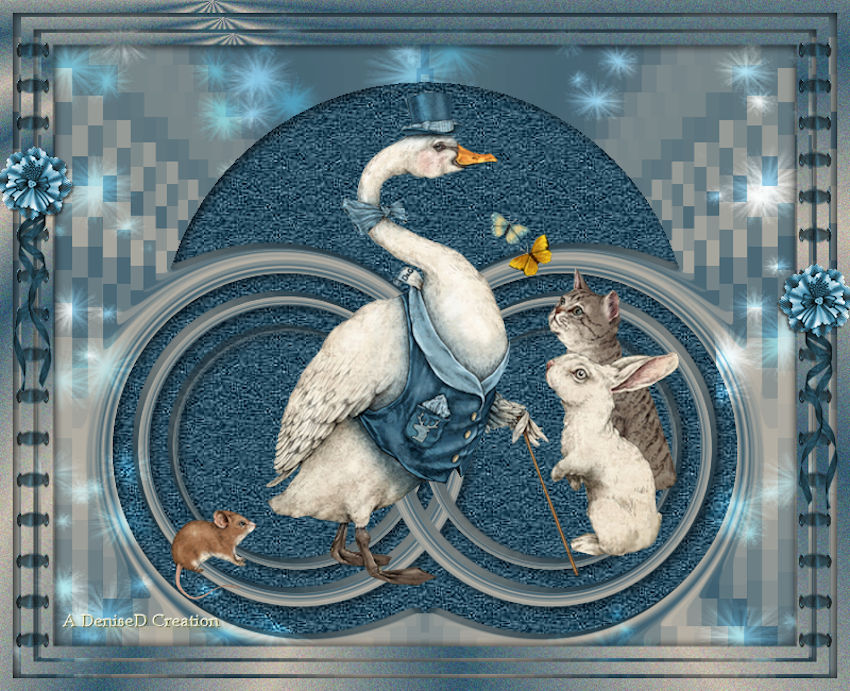
VERSION 2
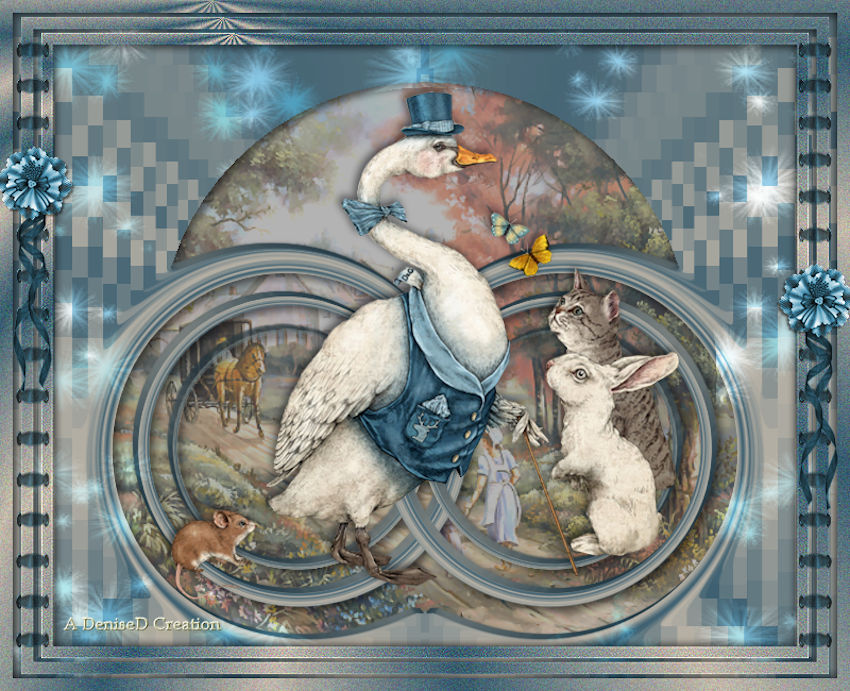
http://escapingtopsp2.altervista.org/Farmyard%20Friends/FarmyardFriends.html
Use this pencil to follow the steps
hold down left click to grab and move it

Click on the Box to download Supplies

To print click on Printer
![]()
Supplies
Images:
Mom_0022.psp
portrait-swan-web.png
You can join this Group at:
D.D.ribbon.sideborder.pspimage
pasteltwinkles.psp
This image was obtained from the
Internet
If you are the owner of this
image, please contact me
so that credit can be given to
you
Selection:
D.D.Farmyard Friends
Plugins:
Alien Skin Eye Candy 3.0
OR
Alien Skin Eye Candy 4000
Filters Unlimited 2.0
Found here:
 AND AND

Notes:
This Tutorial was originally created
in PSPX5 and reworked
in Corel Paint Shop Pro 2019.... other
versions may need adjustment
Some of the graphics may be from Free
to Use sites or Share
Groups.
If you are the creator of one of these
please let me know
so that appropriate credit can be given.
No infringement of
copyright is intended or intentional.
Before opening PSP, download plugins
and install
You
can change the blend mode, opacity and drop shadow, as
well as colourise
the materials,
according to the tubes/colours you are using.
When applying the Resize with the All Layers option checked, this will
be
informed in the tutorial,
otherwise, apply the resize with this option unchecked.
Remember always to save your work.
Whenever you reduce an image, apply Adjust/Sharpness/Sharpen, to
maintain the
sharpness of the image.
Some tools or features have other names in earlier versions of the PSP.
http://escapingtopsp2.altervista.org/Home/homeb.html

Please
Note: Offset
settings provided in this tutorial may vary according to size of your
image.
Please
adjust to suit.
The
settings remain the same throughout this Tutorial unless otherwise
stated.
Set your Foreground colour to #c3b9aa
Set your Background colour to #365b6e
Step One:
Place Selection in PSP
Selection Folder
Open graphics in PSP, duplicate (Shift
D) and close the original.
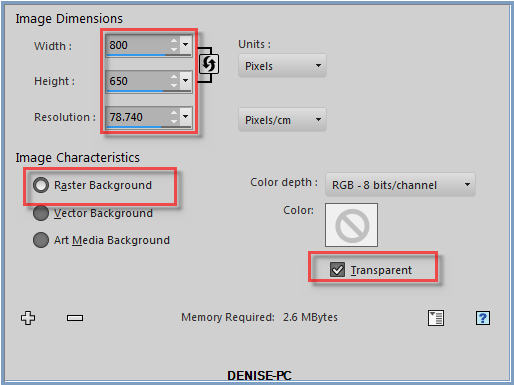
File/New/New Image 800 pixels x 650
pixels as follows:
Change Foreground Colour to Foreground/Background/Radial Gradient as
follows:
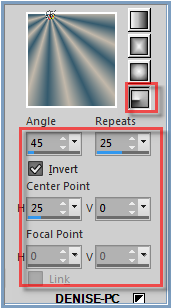
Flood Fill with Gradient
Step Two:
Effects/Distortion
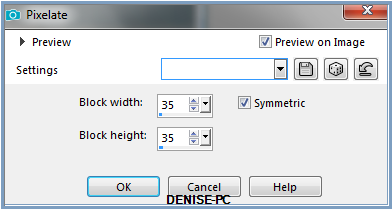
Effects/Pixilate as follows:
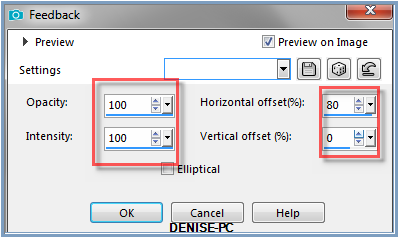
Effects/Reflection Effects/Feedback as follows:
Step Three:
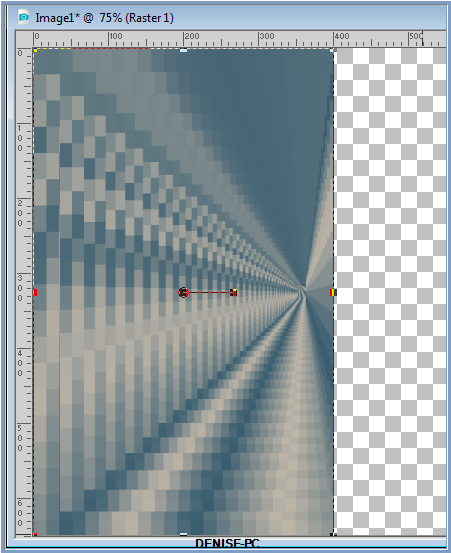
Deform/Pick Tool as follows:

Push the right side of the Layer over to 400 pixels as shown below:
Deselect Deform/Pick Tool
Step Four:
Selections Tool/Circle as follows:

Starting at 400 pixels x 325 pixels, draw out a circle to
150 pixels x 650 pixels as shown below:
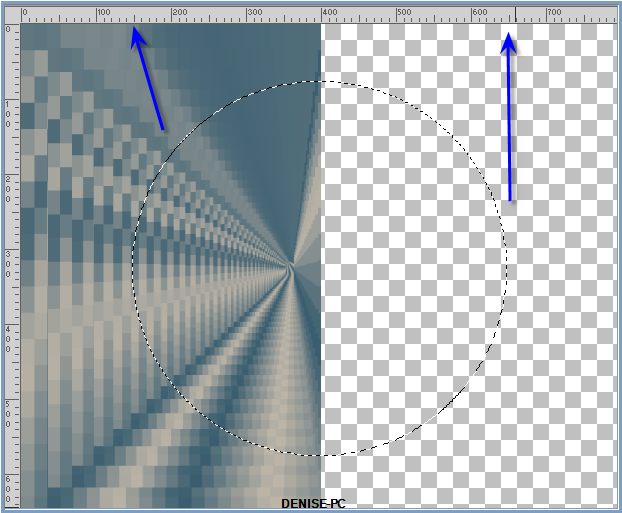
Edit/Clear
Selections/Select None
Step Five:
Select Warp
Brush as follows:
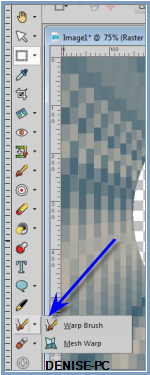 Some versions of PSP
may have this in a different folder Some versions of PSP
may have this in a different folder

Hold the Circle over the areas shown below:
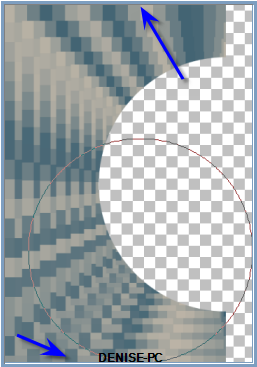
Holding
down the left side of the Mouse all the time pull out the
following shape.
(It will just happen and when it is the right size just take your
finger off
the Mouse)
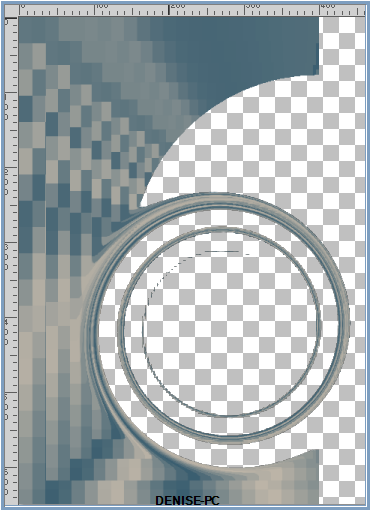
Click Apply as follows:

Deselect Warp Brush
Step Six:
Effects/Plugins/Alien
Skin Eye Candy 5/Impact as follows:
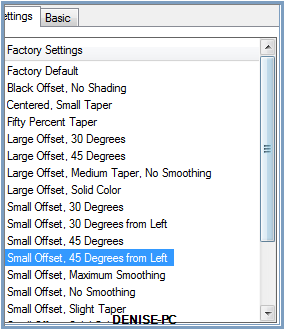 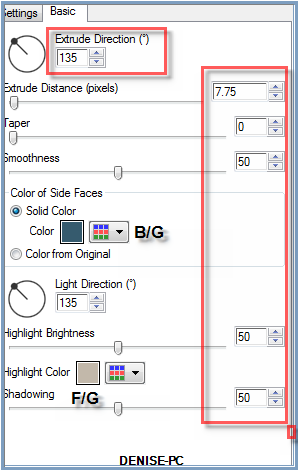
Layers/Duplicate
Image/Mirror/Horizontal OR Image/Mirror
Layers/Merge/Merge Visible
Effects/Plugins/Eye Candy 3.0/Drop Shadow as follows:
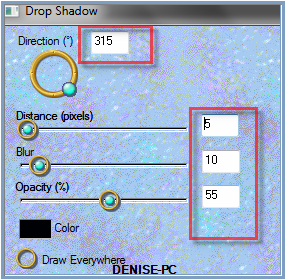
OR
Effects/Plugins/Eye Candy 4000/Shadowlab as follows:
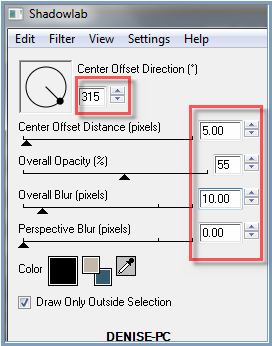
Step Seven:
Layers/New Raster Layer
Layers/Arrange/Move Down
VERSION 1
Flood fill with Background Colour
Effects/Plugins/Filters Unlimited 2.0/Paper Textures/Hemp 2 as follows:
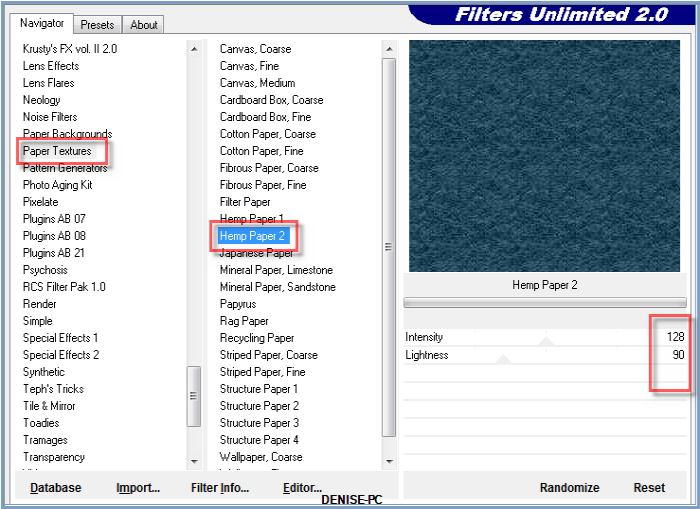
Adjust/Sharpness/Sharpen More
VERSION 2
Selections/Select All
Maximise
Mom_0022.psP
Edit/Copy Edit/Paste into Selection
Selections/Select None
Change Blend Mode to Soft Light
Carry on now for both versions
Step Eight:
Layers/New
Raster Layer
Layers/Arrange/Bring to Top
Selections/Select All
Maximise
pasteltwinkles.psp
Edit/Copy Edit/Paste into Selection
Selections/Select None
Change Blend Mode to Overlay
Selections/Load/Save Selection/Load Selection D.D.Farmyard Friends from
Disk as follows:
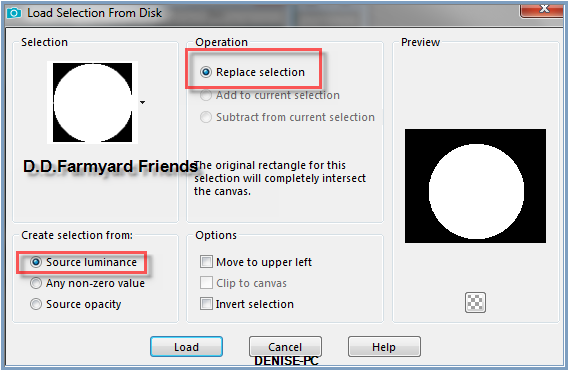
Hit the Delete Button
Step Nine:
Maximise portrait-swan-web.png
Edit/Copy Edit/Paste as New Layer
Leave where it is
Effects/Plugins/Eye Candy 3.0/Drop Shadow
OR
Effects/Plugins/Eye Candy 4000/Shadowlab
Selections/Select All
Selections/Modify/Contract 12 pixels
Selections/Invert
Layers/New Raster Layer
Flood fill with Gradient
Adjust/Add/Remove Noise Add Noise as follows:
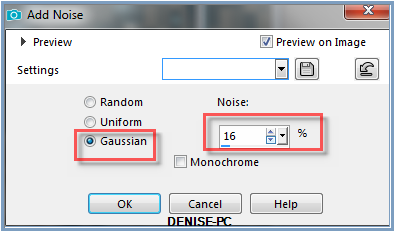
Effects/Edge Effects/Enhance
Effects/Plugins/Eye Candy 3.0/Drop Shadow
OR
Effects/Plugins/Eye Candy4000/Shadowlab
Repeat Drop Shadow/Shadowlab/Direction 135
Selections/Select None
Layers/Duplicate
Image/Resize/95% as follows:
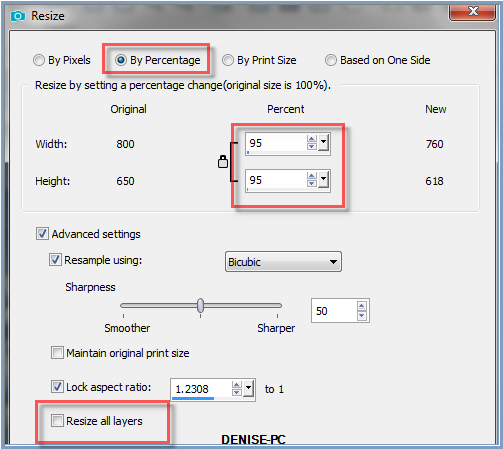
Adjust/Sharpness/Sharpen
Layers/Duplicate
Image/Resize/95%
Adjust/Sharpness/Sharpen
Step Ten:
Maximise D.D.ribbon.sideborder.pspimage
Edit/Copy Edit/Paste as New Layer
Maximise Signature.png
Edit/Copy Edit/Paste as New Layer
Place at bottom of Layer
Layers/New
Raster Layer
Add
your Watermark
Layers/Merge
All Flatten
Image/Resize/850
pixels wide - height will adjust itself
File/Export/JPEG
Optimiser/Compression Value 20
I hope you have enjoyed
this tutorial
A
big thank you to the ladies who test my Tutorials

| | | |