13206013515_noel_nikita You can join this Group at: http://www.reveries.fr/accueil.php deco_vivi SE_wordART_Christmas_Quote_10 Obtained through Internet If this image was created by you,
please let me know so that appropriate credit can be
given. Mask: masque_221_franiemargot You can join this Group at: http://www.tuber1941.web44.net/
1250181399_nikita_masques You can join this group at: http://www.reveries.fr/accueil.php Selections: D.D.ChristmasVillage D.D.ChristmasVillage1 D.D.ChristmasVillage2 Plugins: Filters Unlimited 2.0 Eye Candy 3.0 AAA Frames MuRa's Seamless Found here: http://www.chezviolette17.com/02filtres/Filtres.htm http://janaly.com/Filtres/Filtre.html Notes: This Tutorial was created in PSP
X7.... other
versions may need adjustment Some of the graphics may be from Free
to Use sites or Share
Groups. If you are the creator of one of these
please let me know
so that appropriate credit can be given. No infringement of
copyright is intended or intentional. Before opening PSP, download plugins
and install Place Selections in PSP Selections
Folder Place Masks in PSP Mask Folder Open graphics in PSP, duplicate (Shift
D) and close the original. The
settings remain the same throughout this Tutorial unless otherwise
stated. Set your Foreground colour to #d57f3f Set your Background colour to #8e422d
Step One: File/New/New Image 800 pixels x 550
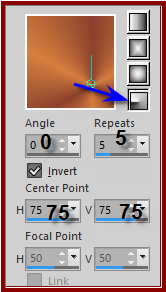
pixels as follows: Change Foreground Colour to
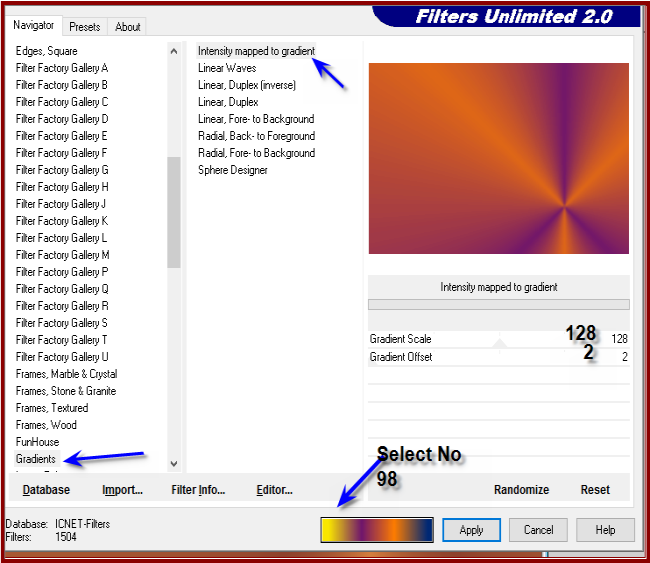
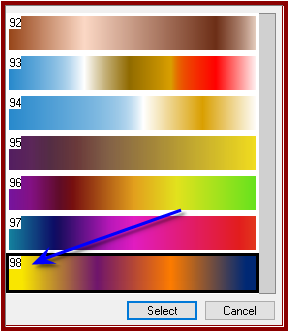
Foreground/Background/Radial Gradient as follows: Flood Fill with Gradient Effects/Plugins/Filters Unlimited
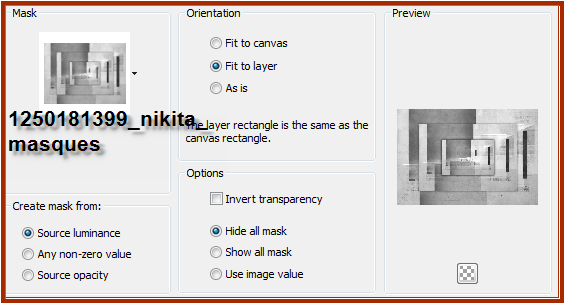
2.0/Gradient/Intensity mapped to gradient as follows: Step Two: Layers/New Raster Layer Flood Fill with Background Colour Layers/Load/Save Mask/Load Mask
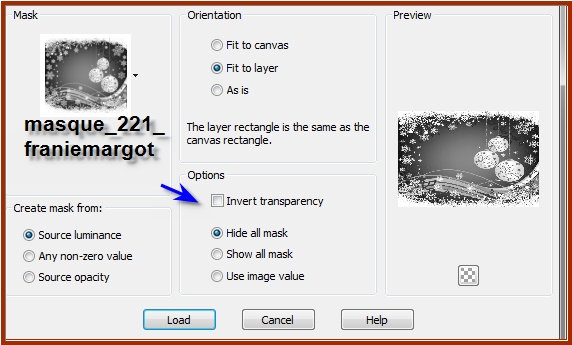
1250181399_nikita_masques from Disk as follows: Layers/Merge/Merge Group Effects/Edge Effects/Enhance Step Three: Layers/New Raster Layer Flood Fill with Foreground Gradient Layers/Load/Save Mask/Load Mask
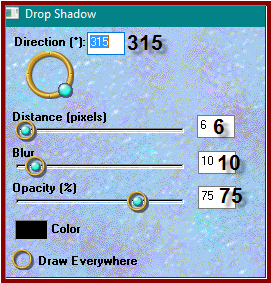
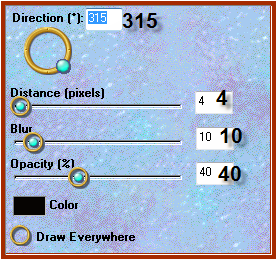
masque_221_franiemargot as follows: Layers/Merge/Merge Group Effects/Edge Effects/Enhance Effects/Plugins/Eye Candy 3.0/Drop
Shadow as follows: OR
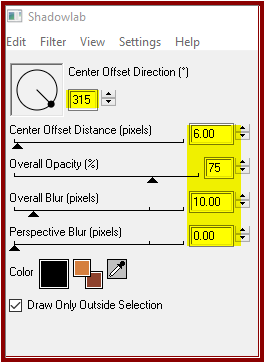
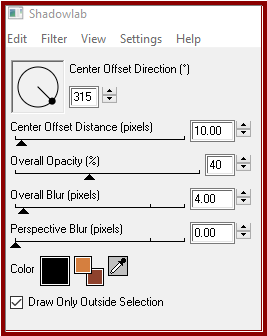
Effects/Plugins/Eye Candy 4000/Shadowlab as follows:
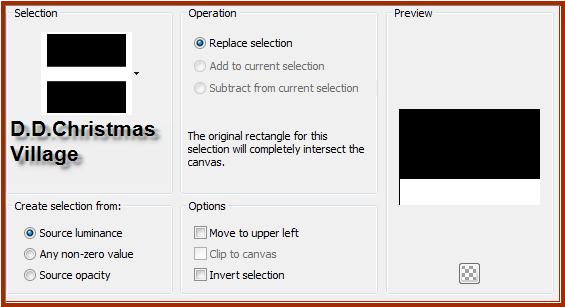
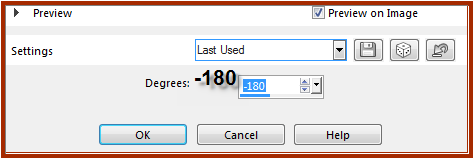
Step Four: Selections/Load/Save Selection/Load
Selection D.D.ChristmasVillage from Disk as follows: Effects/Distortion Effects/Twirl as
follows: Selections/Select None Step Five: Maximise MKM 2015 DEC SEREIES
CHRISTMAS_1_T3 Edit/Copy
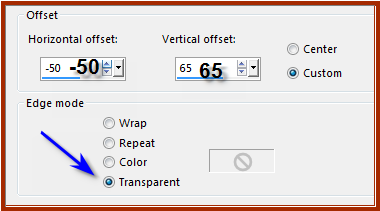
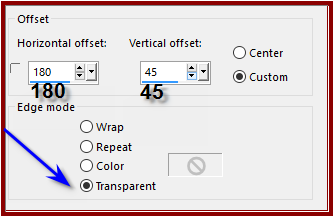
Edit/Paste as New Layer Effects/Image Effects/Offset as
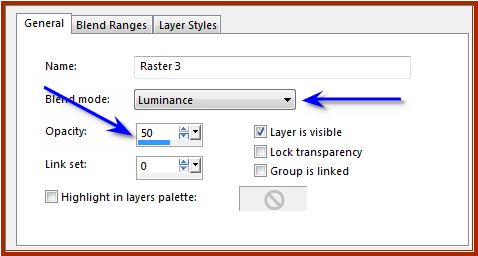
follows: Right Click on Raster 2
Select Properties Option Change Blend Mode and Luminance as
follows: Step Six: Selections/Load/Save Selection/Load
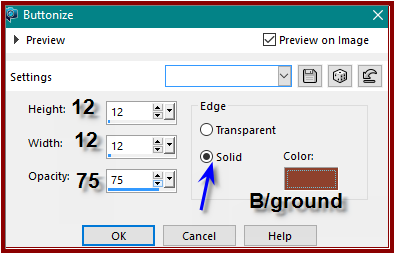
Selection D.D.ChristmasVillage1 from Disk Effects/3D Effects/Buttonize with the
following settings: Effects/Plugins/Eye
Candy 3.0/Drop Shadow as follows: OR
Effects/Plugins/Eye Candy 4000/Shadowlab as follows:
Repeat Drop Shadow/Shadowlab/Direction
135 Selections/Select None Step Seven: Selections/Load/Save Selection/Load
Selection D.D.ChristmasVillage2 from Disk Effects/3D Effects/Buttonize Effects/Plugins/Eye Candy 3.0/Drop
Shadow
OR
Effects/Plugins/Eye Candy 4000/Shadowlab Repeat Drop Shadow/Shadowlab/Direction
315 Selections/Select None Image/Add Borders/2 pixels/Background
Colour Image/Add Borders/5 pixels/White Magic Wand with the following settings: Flood Fill with Gradient Effects/Plugins/Filters Unlimited
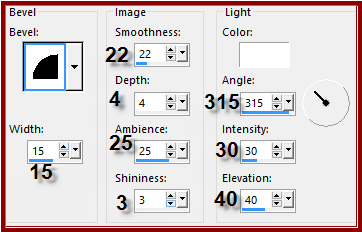
2.0/Gradient/Intensity mapped to gradient as follows: Effects/Edge Effects/Enhance Effects/3D Effects/Inner Bevel with
the following settings: Effects/Plugins/Eye Candy 3.0/Drop
Shadow
or
Effects/Plugins/Eye Candy 4000/Shadowlab Repeat Drop Shadow/Shadowlab Direction
135 Selections/Select None Step
Eight: Image/Add Border with the following
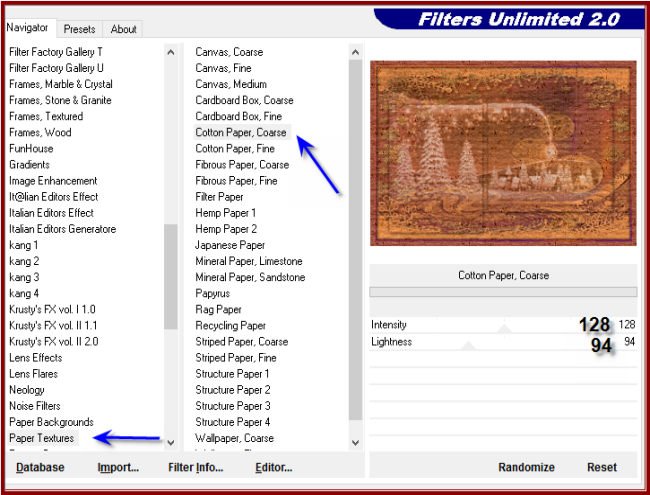
settings: Select with Magic Wand Effects/Plugins/Filters Unlimited
2.0/Paper Textures/Cotton Paper, Coarse as follows; Adjust/Sharpness/Sharpen Selections/Select None Step Nine: Image/Add Borders/10 pixels/White(symmetric box ticked) Select with Magic Wand Flood Fill with Gradient Effects/Plugins/Filters Unlimited
2.0/Gradient/Intensity mapped to gradient as follows: Effects/Edge Effects/Enhance Effects/3D Effects/Inner Bevel Effects/Plugins/Eye Candy 3.0/Drop
Shadow
OR
Effects/Plugins/Eye Candy 4000/Shadowlab Repeat Drop Shadow/Shadowlab Direction
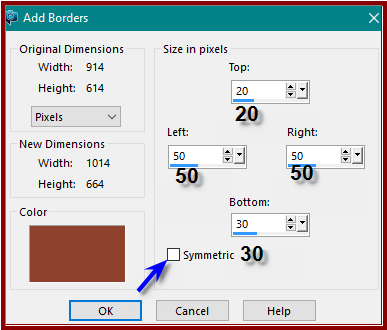
315 Selections/Select None Image/Add Borders/50 pixels/Foreground
Colour Select with Magic Wand Effects/Plugins/Filters Unlimited
2.0/Paper Textures/Cotton Paper, Coarse Adjust/Sharpness/Sharpen Effects/Plugins/AAA Frames/Foto Frame
as follows: Step Ten: Maximise Ket_Navidad006 Edit/Copy
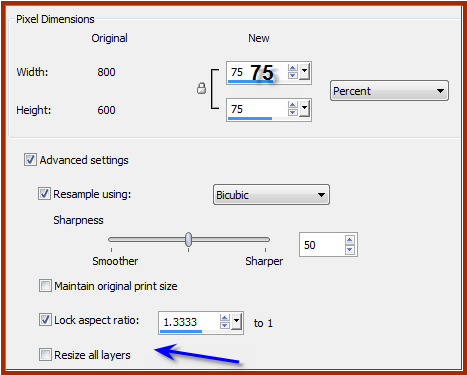
Edit/Paste as New Layer Image/Resize/75% as follows: Adjust/Sharpness/Sharpen Image/Mirror Effects/Image Effects/Offset as
follows: Change Blend Mode to Luminance Effects/Plugins/MuRa's Seamless/Emboss
at Alpha/Default Settings Step Eleven: Maximise 13206013515_noel_nikita Edit/Copy
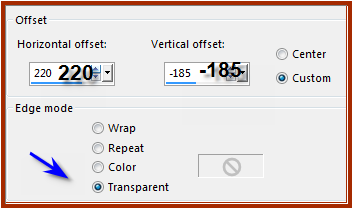
Edit/Paste as New Layer Image/Resize/35% Adjust/Sharpness/Sharpen Effects/Image Effects/Offset as
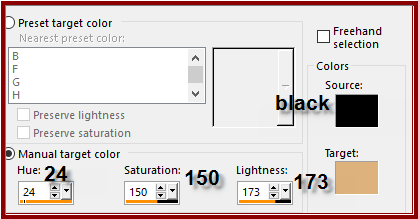
follows: Change to Target Brush with the
following settings: Wipe over the image with Foreground
Gradient Deselect Change to Target Brush Effects/Plugins/Eye Candy 3.0/Drop
Shadow
OR
Effects/Plugins/Eye Candy 4000/Shadowlab Step
Twelve: Maximise deco_vivi Edit/Copy
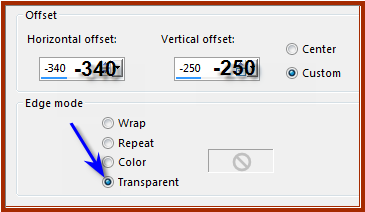
Edit/Paste as New Layer Image/Resize/80% Adjust/Sharpness/Sharpen More Effects/Image Effects/Offset as
follows: Effects/Plugins/Eye Candy 3.0/Drop
Shadow
OR
Effects/Plugins/Eye Candy 4000/Shadowlab Maximise SE_wordART_Christmas_Quote_10
Edit/Copy
Edit/Paste as New Layer Image/Resize/75% Adjust/Sharpness/Sharpen More Effect/Image Effects/Offset as follows: Selections/Select All Selections/Float
Selections/Defloat Manual Colour Selection Tool as
follows: If you don't have this tool installed
go to the link below to see mini tutorial: https://groups.yahoo.com/neo/groups/EscapingtoPSP/files/MINI%20TUTORIALS/