bugsnhearts-tya.psp bugs and flowers.psp aed_inchworm_2003.psp DC-CuteBee2.pspimage wilma star edge.png Obtained through Internet If this image was created by you,
please let me know so that appropriate credit can be
given. Texture: Cobblestone
Plugins: MuRa's Meister MuRa's Seamless Texture Flaming Pear Simple Filters Unlimited 2.0 Found here: http://www.saturnelladesign.fr/pages/filtres.htm http://janaly.com/Filtres/Filtre.html http://www.maidiregrafica.eu/paginafiltri/filtri.html Notes: This Tutorial was created in PSP
X9.... other
versions may need adjustment Some of the graphics may be from Free
to Use sites or Share
Groups. If you are the creator of one of these
please let me know
so that appropriate credit can be given. No infringement of
copyright is intended or intentional. Before opening PSP, download plugins
and install Open graphics in PSP, duplicate (Shift
D) and close the original. Please
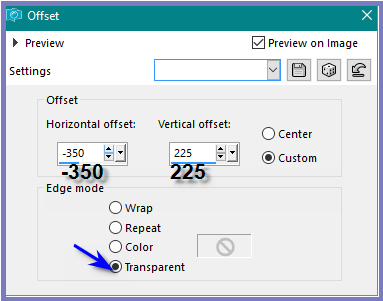
Note: Offset
settings provided in this tutorial may vary according to size of your
image. Please
adjust to suit. The
settings remain the same throughout this Tutorial unless otherwise
stated. Set your Foreground colour to #fbfac9 Set your Background colour to #b1e0d6
It is helpful
to create a Swatch in the Materials Box of the
Colours/Patterns/Gradients etc. you will be using as they
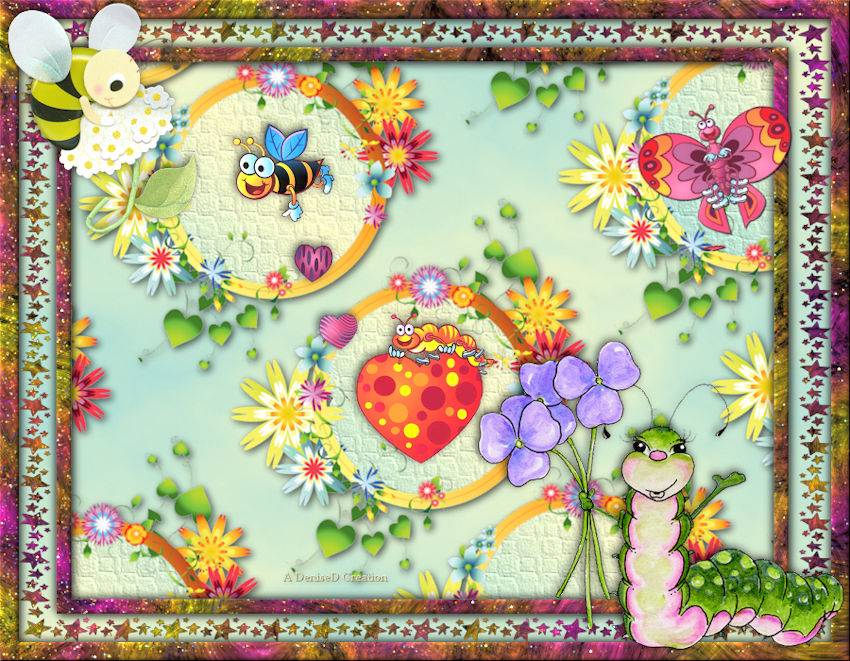
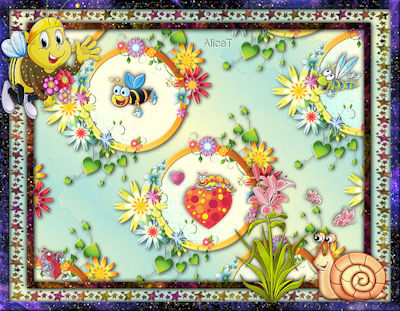
change regularly in this Tutorial. Step One: File/New/New Image 900 pixels x 700
pixels as follows: Step
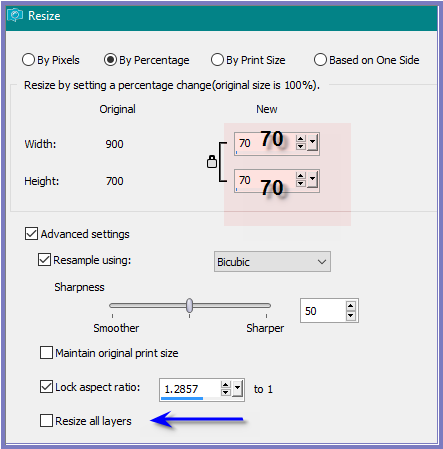
Two: Maximise cercle fleuri.pspimage Edit/Copy
Edit/Paste as New Layer Image/Resize/70% as follows:
Effects/Plugins/MuRa's Seamless/Emboss
at Alpha/Default Settings
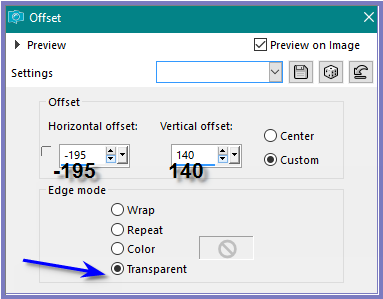
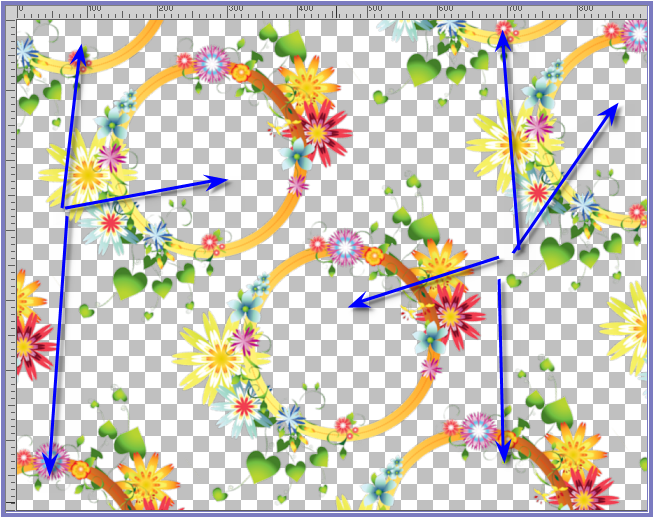
Effects/Image Effects/Offset as follows: Effects/Plugins/MuRa's
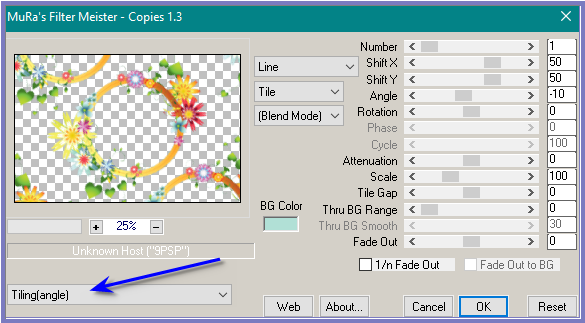
Meister/Copies/Tiling Angle/Default Settings as follows:
Step
Three: Magic Wand with the following settings: Select inside all the circles as
follows:
Step
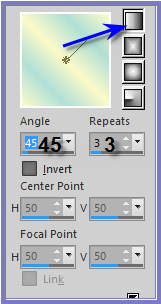
Four: Change Foreground Colour to
Foreground/Background Linear Gradient as follows: Layers/New Raster Layer Layers/Arrange/Move Down Selections/Modify/Expand 15 pixels Flood Fill with Gradient Effects/Texture
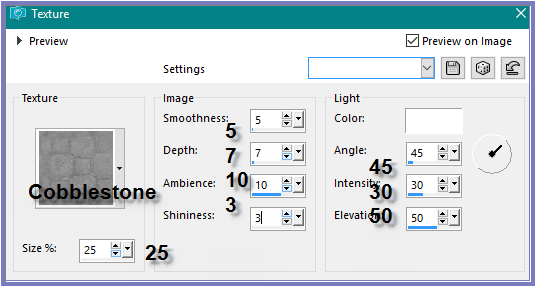
Effects/Texture/Cobblestone as follows: Selections/Select None Layers/Merge/Merge Visible Step
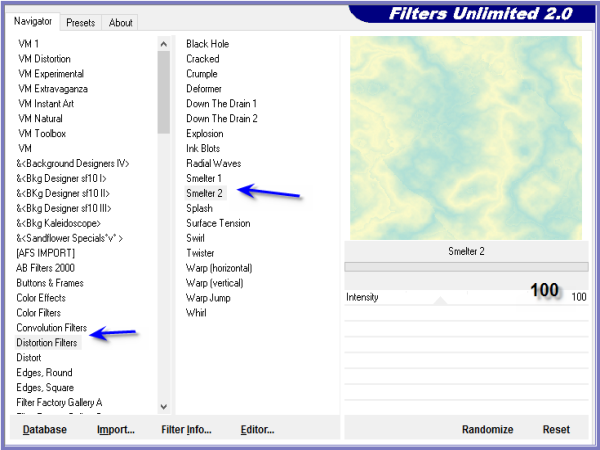
Five: Layers/New Raster Layer Layers/Arrange/Send to Bottom Flood Fill with Gradient Effects/Plugins/Simple/4 Way Average Effects/Plugins/Filters Unlimited
2.0/Distortion Filters/Smelter2 as follows:
Effects/Edge Effects/Enhance More Step
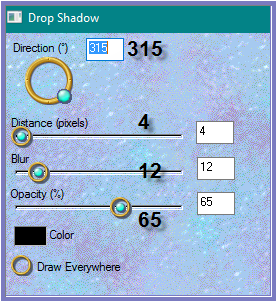
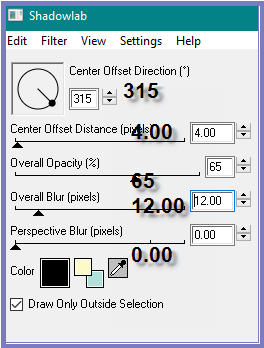
Six: Select Merged Layer Effects/Plugins/Eye Candy 3.0/Drop
Shadow as follows: OR Eye Candy 4000/Shadowlab as follows: Layers/Merge/Merge All Flatten Step Seven: Promote Background Layer Image/Resize/85% Layers/New Raster Layer Layers/Arrange/Move Down Flood Fill with Gradient Effects/Plugins/Simple/4 Way Average Effects/Plugins/Filters Unlimited
2.0/Distortion Filters/Smelter2/Intensity 100 Effect/Edge Effects/Enhance More Selections/Select All Selections/Modify/Contract 20 pixels Selections/Invert Layers/New Raster Layer Flood Fill with Background Colour Step
Eight: The next few steps will need to be
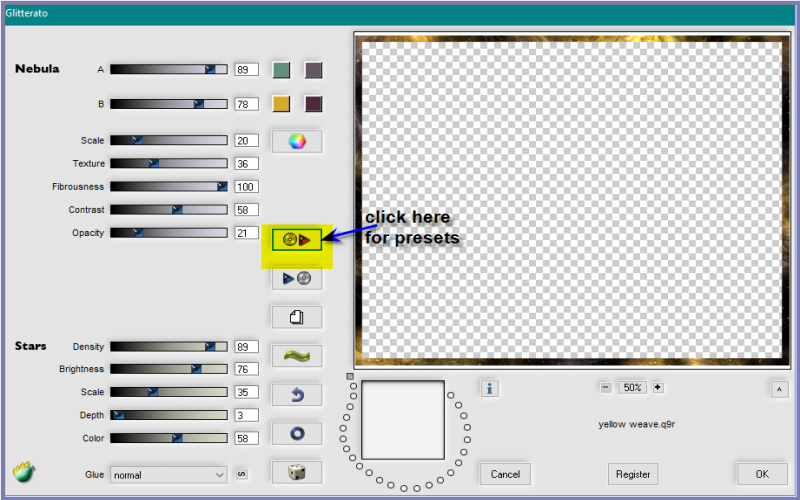
followed exactly. Effects/Plugins/Flaming
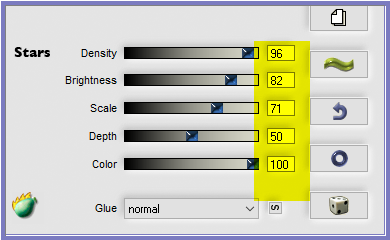
Pear/Glitterato as follows: Click on the RED ARROW to open up the
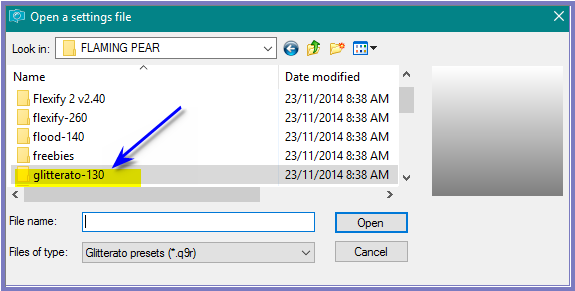
Presets Go to the file where you have saved
your Plugin Flaming Pear and find the file for Glitterato as follows: Open this file There will be another file called
Glitterato Presets Open this file and scroll down till
you find a setting that you like. I choose disco glitter preset with
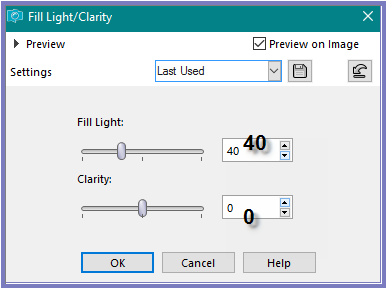
these star settings: Adjust/Brightness and Contract/Fill
Light/Clarity as follows:
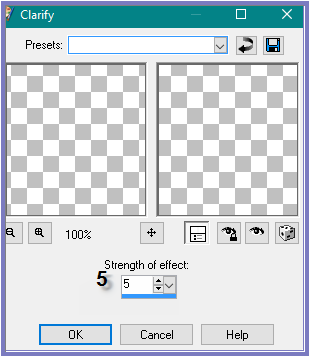
OR FOR OLDER VERSIONS:
Adjust/Brightness and Contrast/Clarify (you may have to play with the
settings to get to your liking)
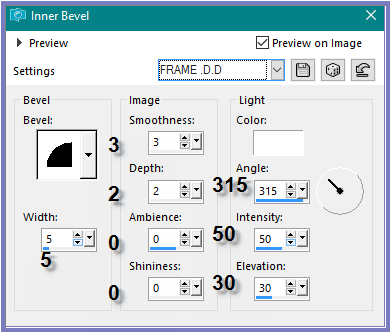
Step Nine: Effects/3D Effects/Inner Bevel as
follows: Effects/Plugins/Eye Candy 3.0/Drop
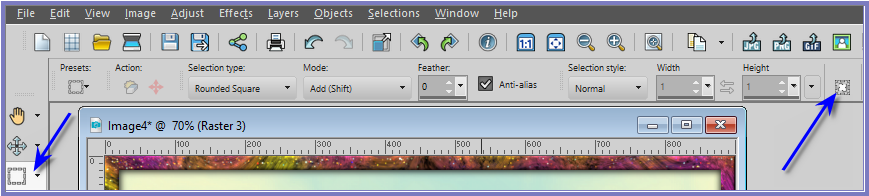
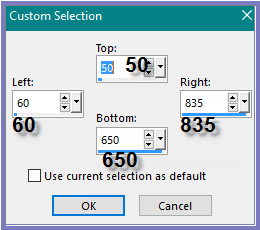
Shadow OR Eye Candy 4000/Shadowlab Repeat Drop Shadow Direction 135 Selections/Select None Step Ten: Selection Tool/Custom Select as
follows: Selections/Modify/Select Selection
Borders/15 pixels/Inside Layers/New Raster Layer Layers/Arrange/Bring to Top Flood Fill with Background Colour Effects/Plugins/Flaming
Pear/Glitterato/disco glitter (or preset of your choice) Effects/3D Effects/Inner Bevel Effects/Plugins/Eye Candy 3.0/Drop
Shadow OR Eye Candy 4000/Shadowlab Repeat Drop Shadow Direction 315 Selections/Select None Step
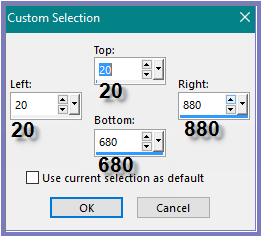
Eleven: Layers/New Raster Layer Selection Tool/Custom Selection as
follows: Maximise wilma star edge.png Edit/Copy
Edit/Paste into Selection Selections/Float
Selections/Defloat Effects/Plugins/Flaming
Pear/Glitterato/disco glitter (or preset of your choice) Adjust/Brightness and Contract/Fill
Light/Clarity Selections/Select None Step
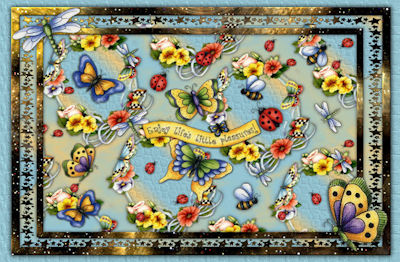
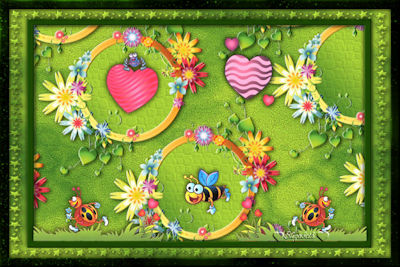
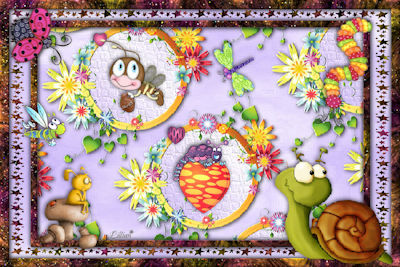
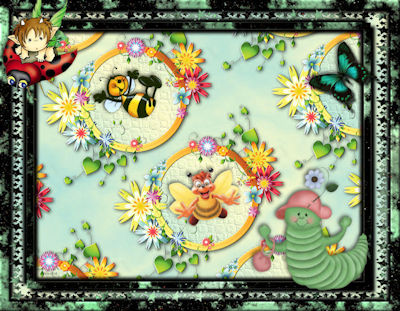
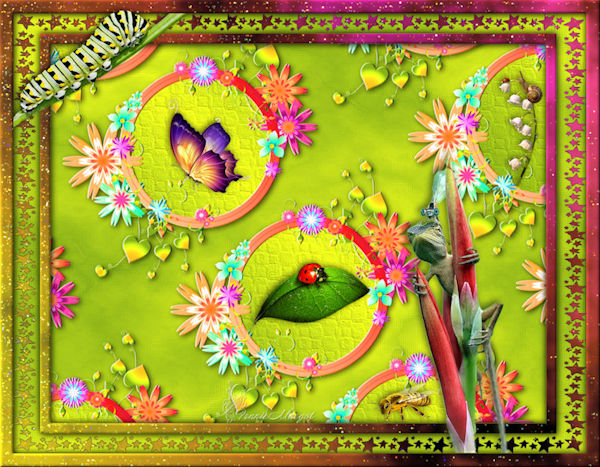
Twelve: I have included several bug images for
you to choose from. You may need to enlarge or reduce the
size of some of them Don't forget to add a drop shadow as
used in this Tutorial Effects/Plugins/Eye Candy 3.0/Drop
Shadow/Direction 135 OR Eye Candy 4000/Shadowlab/Direction 135 Maximise aed_inchworm_2003.psp Edit/Copy
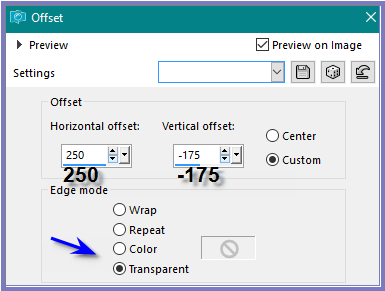
Edit/Paste as New Layer Image/Resize/75% Adjust/Sharpness/Sharpen Effects/Image Effects/Offset as
follows: Effects/Plugins/Eye Candy 3.0/Drop
Shadow/Direction 135 OR Eye Candy 4000/Shadowlab/Direction 135 Step
Thirteen:
Maximise DC-CuteBee2.pspimage
Edit/Copy
Edit/Paste as New Layer
Effects/Image Effects/Offset as follows:
Effects/Plugins/Eye Candy 3.0/Drop
Shadow/Direction 135 OR Eye Candy 4000/Shadowlab/Direction 135
Step Fourteen: Layers/New
Raster Layer Add
your Watermark Layers/Merge
All Flatten Image/Resize/850
pixels wide - height will adjust itself File/Export/JPEG
Optimiser/Compression Value 20
I hope you have enjoyed
this tutorial A
big thank you to Annie, Lillian, Betty, Elizabeth, the ladies who test
my Tutorials