Tutorial 2017
This
tutorial is written by
Denise D. on 22nd June, 2018
from
my own ideas.
Any
resemblance to other tutorials is
co-incidental and unintentional.
You
may share my tutorials with other
groups.
All I ask is that you advise me
and
credit for the tutorial is given to me and linked to
http://escapingtopsp2.altervista.org/Home/homeb.html
Please
do not upload any of my completed Tutorial images onto sites
such as Fotki, Pinterest, Photobucket or similar
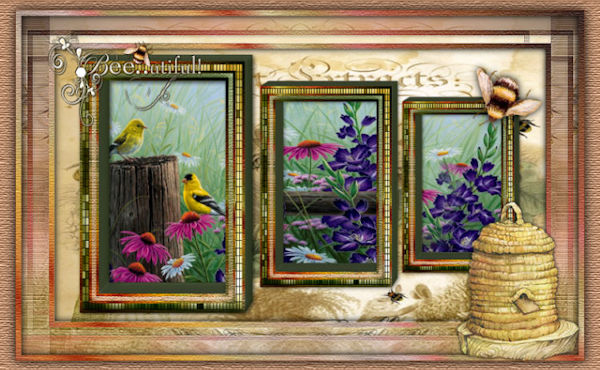
BIRDS
AND BEES
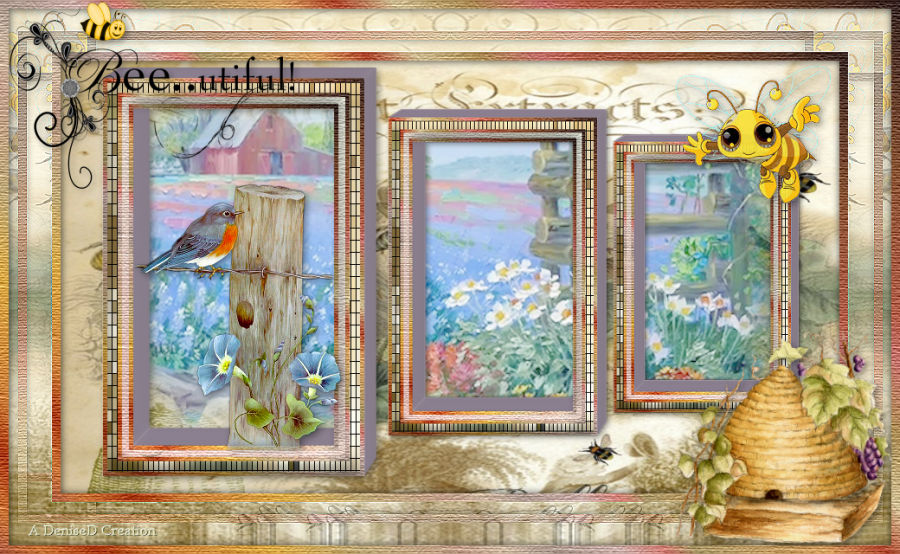
.gif) Click on Arrow to follow Tutorial
Click on Arrow to follow Tutorial
http://escapingtopsp2.altervista.org/BirdsAndBees/BirdsAndBees.html
Click on the Box to download Supplies

To print click on Printer

Supplies
Images:
Brand New Day_LR-6-20-18.png
You can join this Group at:
or
https://groups.google.com/forum/#!forum/treschicboutique
lizztish_be-kind1.pspimage
You can join this Group at:
https://groups.google.com/forum/?fromgroups#!forum/emotivemists
Vintage Elegance.pspimage
D.D.CuteBee.png
rw-BeeHive-8-05-07.png
LGiles_WordArtSetNo1_9Bees.png
This image was obtained from the Internet
If you are the owner of this
image, please contact me
so that credit can be given to
you
Signature.png
Gradient:
Geisha 11
Selection:
D.D.BirdsAndBees
Presets:
D.D.BirdsAndBees
Double Click on the  icon in your supplies folder to install this Preset in your Plugin.
Plugins:
Alien Skin Eye Candy 3.0
OR
Alien Skin Eye Candy 4000
Toadies (Import into
Filters Unlimited 2.0)
Texture
Adjust
Found here:
http://www.saturnelladesign.fr/pages/filtres.htm
http://www.maidiregrafica.eu/paginafiltri/filtri.html
Notes:
This Tutorial was created in PSP
X9.... other
versions may need adjustment
Some of the graphics may be from Free
to Use sites or Share
Groups.
If you are the creator of one of these
please let me know
so that appropriate credit can be given.
No infringement of
copyright is intended or intentional.
Before opening PSP, download plugins
and install
Some
helpful information:
You can change the blend mode, opacity and drop shadow, as
well as colourise
the materials,
according to the tubes/colours you are using.
When applying the Resize with the All Layers option checked, this will
be
informed in the tutorial,
otherwise, apply the resize with this option unchecked.
Remember always to save your work.
Whenever you reduce an image, apply Adjust/Sharpness/Sharpen, to
maintain the
sharpness of the image.
Some tools or features have other names in earlier versions of the PSP.

Please
Note: Offset
settings provided in this tutorial may vary according to size of your
image.
Please
adjust to suit.
The
settings remain the same throughout this Tutorial unless otherwise
stated.
Set your Foreground colour to #deb5ae
Set your Background colour to #b6bf9d
Step One:
Place Gradient in PSP
Gradient Folder
Place Selection in PSP
Selection Folder
Import Preset
Open graphics in PSP, duplicate (Shift
D) and close the original.
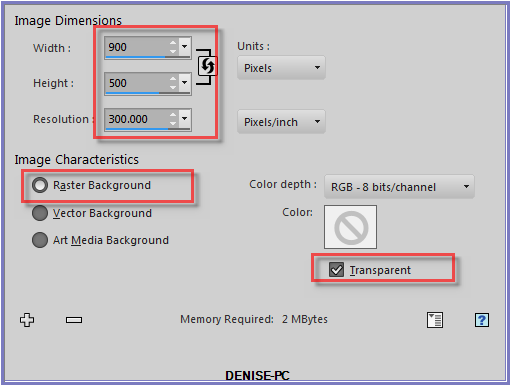
File/New/New Image 900 pixels x 500
pixels as follows:
Change
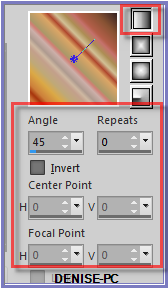
Foreground Colour to
Foreground/Background/Linear Gradient Geisha 11 as follows:
Step Two:
Selections/Select All
Maximise Vintage Elegance.pspimage
Edit/Copy Edit/Paste into Selection
Selection/Select None
Layers/Duplicate
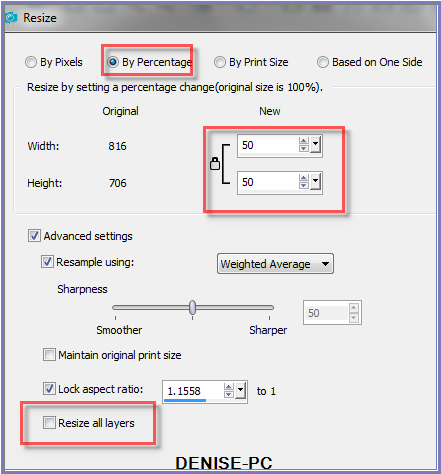
Image/Resize/50% as follows:
Image/Free Rotate/90 degrees/Right
Step Three:
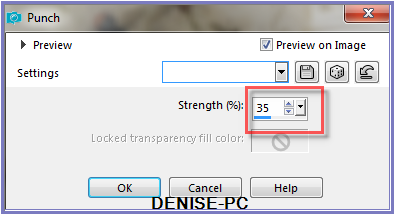
Effects/Distortion Effects/Punch as follows:
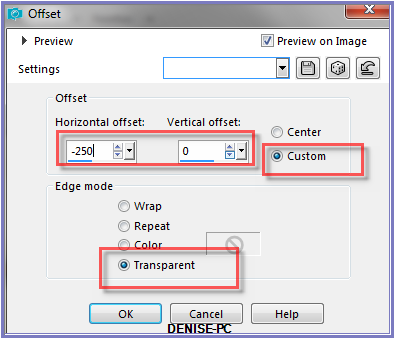
Effects/Image Effects/Offset as follows:
Step Four:
Selections/Select All
Selections/Float Selections/Defloat
Layers/New Raster Layer
Flood Fill with Foreground Gradient
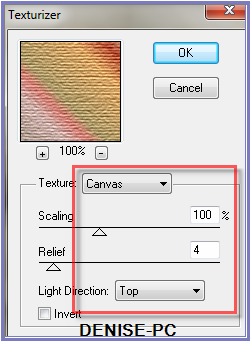
Effects/Plugins/Texture/Texturizer/Canvas as follows:
Selections/Modify/Contract 5 pixels
Edit/Clear
Select Copy of Raster 1
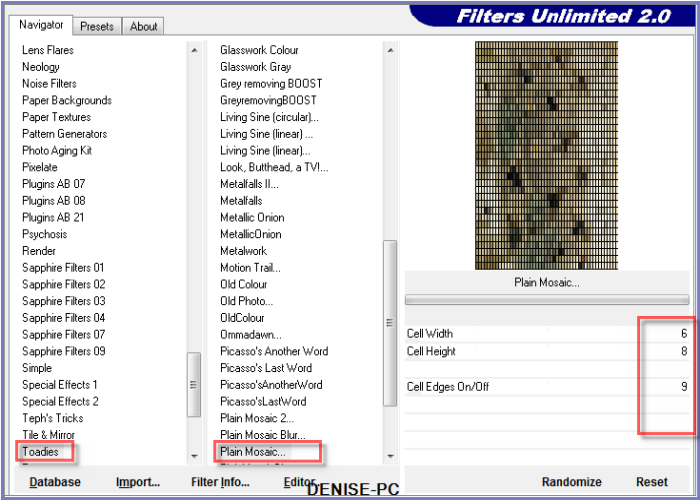
Effects/Plugins/Filters Unlimited 2.0/Toadies/Plain Mosaic as follows:
Selections/Modify/Contract 12 pixels
Layers/New Raster Layer
Flood Fill with Foreground Gradient
Effects/Plugins/Texture/Texturizer/Canvas
Selections/Modify/Contract 5 pixels
Edit/Clear
Step Five:
Change Background Colour to Foreground/Background/Linear Gradient as
follows:

Layers/New Raster Layer
Flood Fill with Background Gradient
Effects/Plugins/Texture/Texturizer/Canvas
Selections/Modify/Contract 8 pixels
Edit/Clear
Layers/New Raster Layer
Flood fill with Foreground Gradient
Effects/Plugins/Texture/Texturizer/Canvas
Selections/Modify/Contract 5 pixels
Edit/Clear
Selections/Select None
Select Copy of Raster 1
Edit/Clear
Close Off Raster 1
Layers/Merge/Merge Visible
Open Raster 1
Step
Six:
Selections/Select
All
Selections/Float
Selections/Defloat
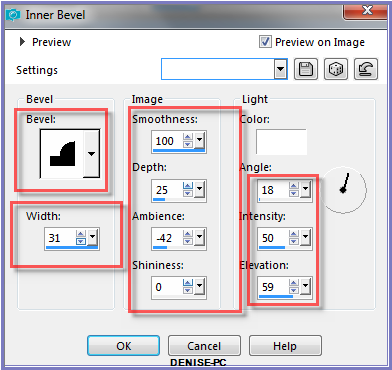
Effects/3D Effects/Inner Bevel as follows:
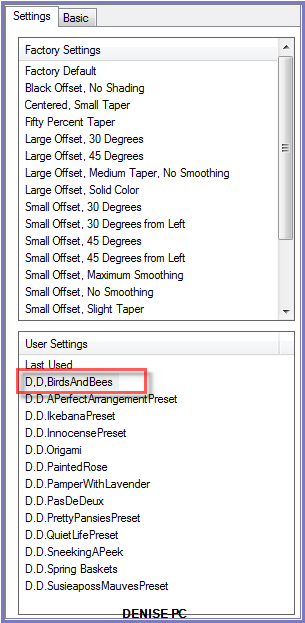
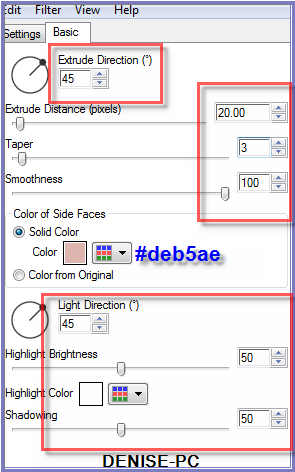
Effects/Alien Skin 5.0/Impact/Extrude/D.D.BirdsAndBees Preset OR as
follows:
Selections/Select None
Step Seven:
Effects/Plugins/Eye
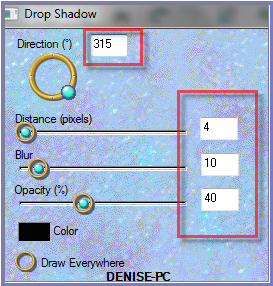
Candy 3.0/Drop Shadow as follows:
OR
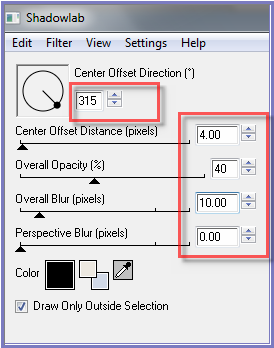
Effects/Plugins/Eye Candy 4000/Shadowlab as follows:
 Layers/Duplicate
Image/Resize/80%
Adjust/Sharpness/Sharpen
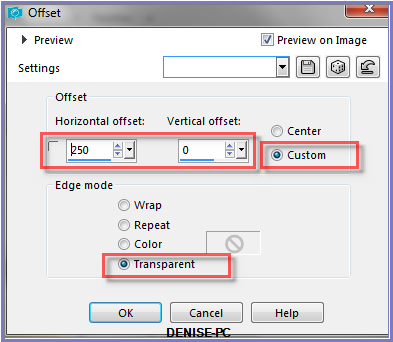
Effects/Image Effects/Offset as follows:
Step Eight:
Layers/Duplicate
Image/Resize 85%
Adjust/Sharpness/Sharpen
Effects/Image Effects/Offset as follows:

Layers/Merge/Merge Down
Repeat once
Step Nine:
Layers/New Raster Layer
Layers/Arrange/Move Down
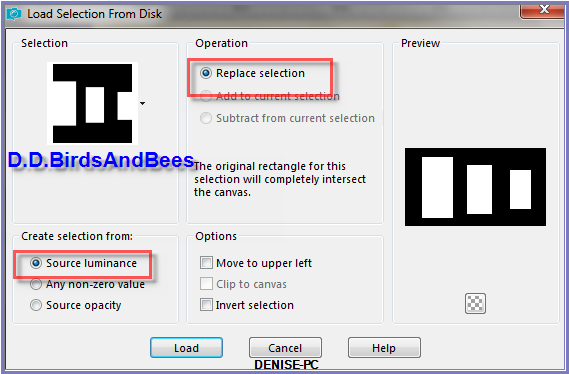
Selections/Load/Save Selection/Load Selection D.D.BirdsAndBees from
Disk as follows:
Maximise lizztish_be-kind1.pspimage
Edit/Copy Edit/Paste into Selection
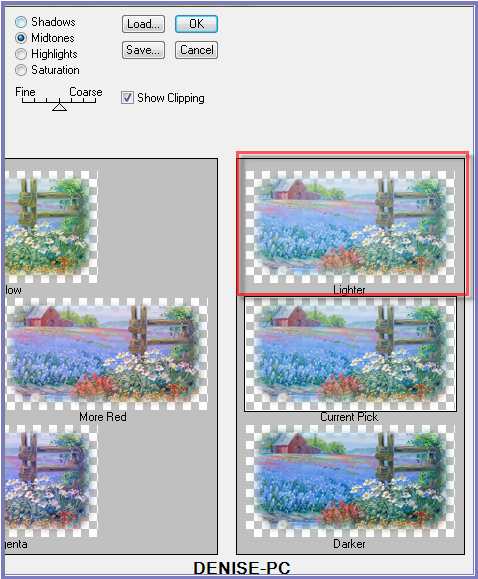
Effects/Plugins/Adjust/Variations/Lighter as follows:
Selections/Select None
Step Ten:
Maximise Brand
New Day_LR-6-20-18.png
Edit/Copy Edit/Paste as New Layer
Layers/Arrange/Bring to Top
Image/Resize/50%
Adjust/Sharpness/Sharpen
Effects/Image Effects/Offset as follows:
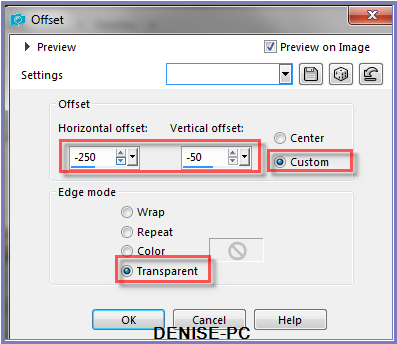
Carefully erase the watermark with Eraser Tool
Effects/Plugins/Eye Candy 3.0/Drop Shadow
OR
Effects/Plugins/Eye Candy 4000/Shadowlab
Using the Eraser Tool get rid of the wire as shown below:
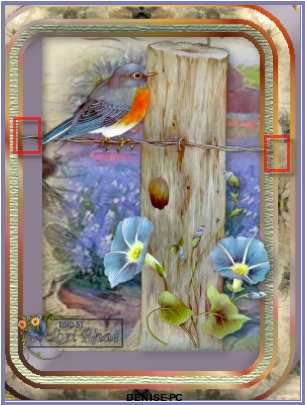
Step Eleven:
Maximise D.D.CuteBee.png
Edit/Copy Edit/Paste as New Layer
Image/Resize/75%
Adjust/Sharpness/Sharpen
Effects/Image Effects/Offset as follows:
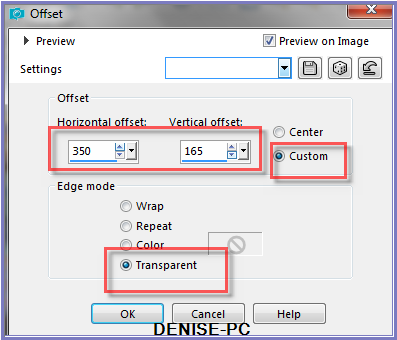
Effects/Plugins/Eye
Candy 3.0/Drop Shadow
OR
Effects/Plugins/Eye Candy 4000/Shadowlab
Layers/Merge/Merge
All Flatten
Edit/Copy
Step Twelve:
Image/Add Borders/10 pixels/White
Magic Wand with the following settings:

Select Border with Magic Wand
Flood Fill with Foreground Gradient
Effects/Plugins/Texture/Texturizer/Canvas
Effects/Plugins/Eye
Candy 3.0/Drop Shadow
OR
Effects/Plugins/Eye Candy 4000/Shadowlab
Repeat Drop Shadow/Shadowlab/Direction 135
Selections/Select
None
Image/Add Borders/50 pixels/White
Select with Magic Wand
Edit/Paste into Selection
Effects/Plugins/Filters Unlimited 2.0/Toadies/What are
you?/Default Settings
Effects/Reflection Effects/Rotating Mirror as follows:
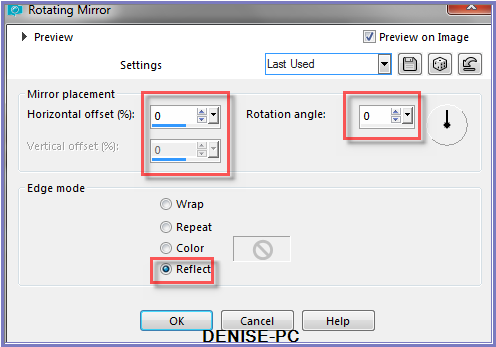
Effects/Edge Effects/Enhance
Selections/Select None
Step Thirteen:
Image/Add Borders/10 pixels/White
Select with Magic Wand
Flood fill with Foreground Gradient
Effects/Plugins/Texture/Texturizer/Canvas
Effects/Plugins/Eye
Candy 3.0/Drop Shadow
OR
Effects/Plugins/Eye Candy 4000/Shadowlab
Repeat Drop Shadow/Shadowlab/Direction 315
Selections/Select None
Maximise
rw-BeeHive-8-05-07.pspimage
Edit/Copy Edit/Paste as New Layer
Image/Resize/50%
Adjust/Sharpness/Sharpen
Image/Free Rotate/3 degrees/Right
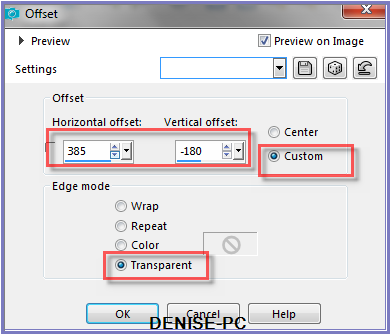
Effects/Image Effects/Offset as follows:
Effects/Plugins/Eye
Candy 3.0/Drop Shadow
OR
Effects/Plugins/Eye Candy 4000/Shadowlab
Step
Fourteen:
Maximise LGiles_WordArtSetNo1_9Bees.png
Edit/Copy Edit/Paste as New Layer
Image/Resize/50%
Adjust/Sharpness/Sharpen
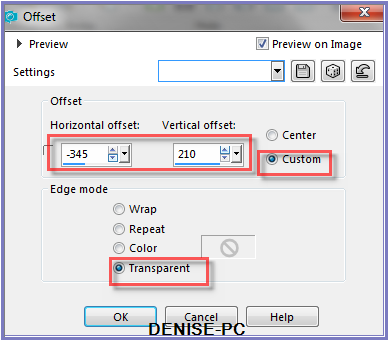
Effects/Image Effects/Offset as follows:
Effects/Plugins/Eye
Candy 3.0/Drop Shadow
OR
Effects/Plugins/Eye Candy 4000/Shadowlab
Maximise Signature.png
Edit/Copy Edit/Paste as New Layer
Placxe at bottom of Layer
Layers/New Raster Layer
Add
your Watermark
Layers/Merge
All Flatten
Image/Resize/900
pixels wide - height will adjust itself
File/Export/JPEG
Optimiser/Compression Value 20
I hope you have enjoyed
this tutorial
A
big thank you to the ladies who test my Tutorials
TESTERS'
RESULTS
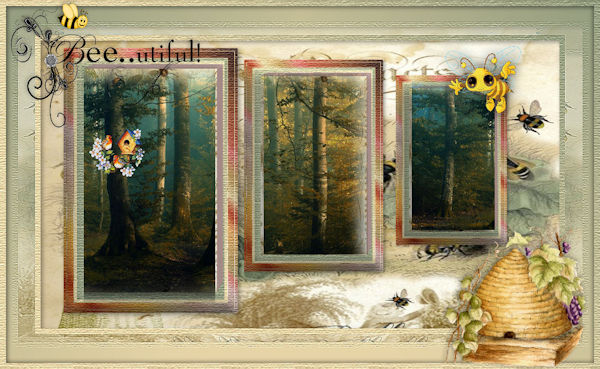
ELIZABETH
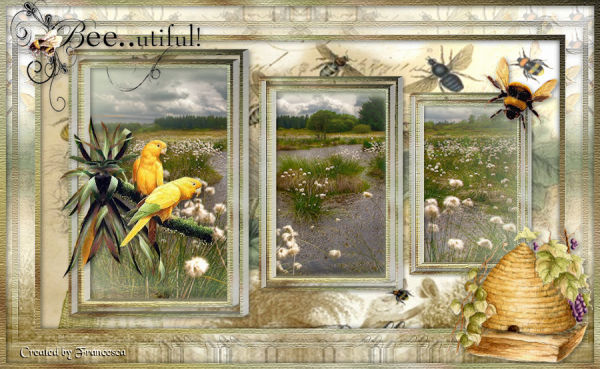
FRAN
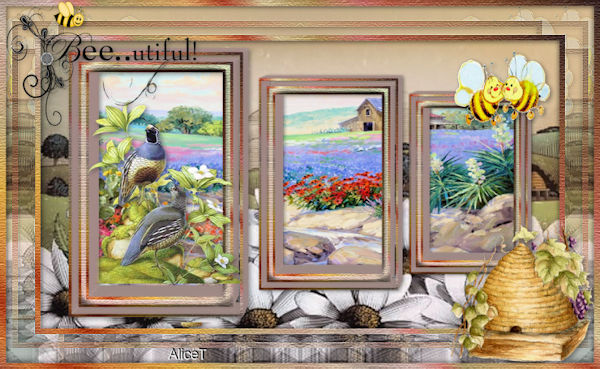
ALICE T.
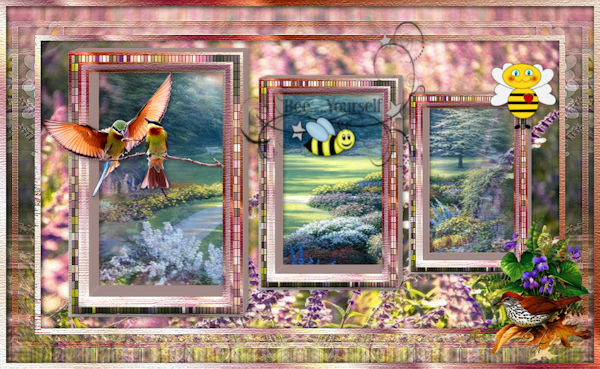
JOYCE
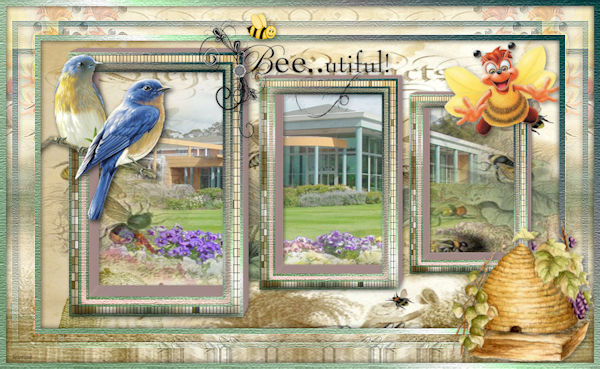
SHIRLEY NZ
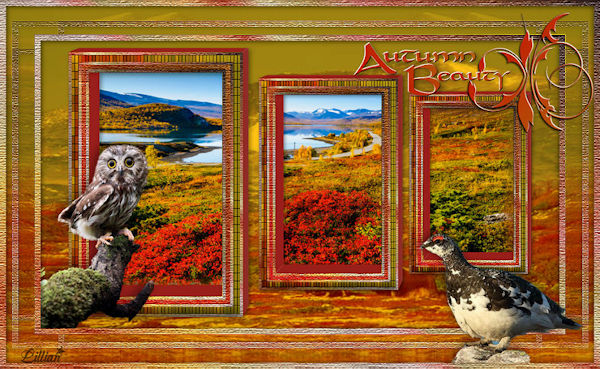 ' '
LILLIAN
BETTY
FOR
OTHER VERSIONS OF THE TUTORIAL
PLEASE
GO TO:
escapingtopsp2.altervista.org/BirdsAndBeesVersions/BirdsAndBeesVersions.html
| | | |